Make it Yours: How to Setup and Adjust a Motorcycle to Suit You

The second greatest joy to owning a motorcycle besides riding it is customizing it. Whether it's for style, performance, comfort, or all of the above, there are a myriad ways to customize a motorcycle. However, no matter if it's a brand new bike or a Craigslist special, the first and most important thing you should do is make sure the motorcycle is setup to fit you and your preferences, motorcycle ergo is key.
What does this mean?: Basically you should carefully address four key areas on the motorcycle: suspension, handlebars, hand/foot controls, and seating positioning/seat height.
Why should you do this?: Making sure you are happy with these components and that they are tailored just for you will make riding the motorcycle safer, more comfortable, and enable you to get the utmost joy out of the bike with every mile that clicks away on the odometer.
For cost purposes and ease of manufacturing and assembly, manufacturers design and build their motorcycles to fit what they consider to be the "average rider". This fictional rider may vary from company to company but essentially they all have a window based on the size and weight of what their idea of an average rider would be for each model. Beyond height and weight, they take into consideration other body measurements such as the arms, legs/inseam, and torso as well.
Unfortunately, not all of us fall into these average measurements. Heck, even two riders of the same height and weight can have completely different inseams which could mean the difference between not being able to hold the same motorcycle up at a stop flat footed or feeling too cramped in the leg area on long rides.
Things can be really off target when purchasing a used bike that's been setup to fit the previous owner. That's why it's extremely important to spend some time sitting on the bike and taking mental notes of where and how everything is positioned, and then figuring out what you like or don't like about the various components mentioned above. Fortunately, most motorcycle parts like the handlebars, suspension, and controls can be adjusted to suit your comfort and riding style. Or they can be replaced all together with aftermarket components.
So now let's take a look and these four areas and talk about what you should consider and what can be done.
Motorcycle Suspension Tuning
You'd be surprised how many people are riding around on motorcycles with the suspension set at the stock settings even though they might not meet the manufacturer's stock aka "average rider's" weight expectations. It's not just weight that is a sole concern when it comes to suspension adjustment however, you need to take into account your riding style, type of terrain you typically ride, and how you like your suspension to feel. Figuring out your suspension preferences is really a matter of experimenting and determining what is right for you.
Between sag, spring rates, valving, preload, compression, and rebound, motorcycle suspension can be a bit overwhelming if you're looking to get really technical. That's why there are shops and companies that focus solely on motorcycle suspension tuning. If you are not satisfied with the suspension on your new bike and don't want to spend the time testing different settings have an expert dial it in for you.
If you are purchasing a used bike you should inquire with the current owner what changes have been made to the suspension and if any components have ever been replaced or upgraded. If the bike has a lot of miles and the owner hasn't done much with the forks or rear shocks you may want to have a professional take a look. New or old, your best bet is to read the owner's manual for your motorcycle and figure out which part(s) of your suspension can be tuned, where the adjustment points are, and how the adjustments are made.
As stated at the beginning, riding is the best part about owning a motorcycle. Experimenting with different settings and paying attention to how each adjustment affects certain characteristics of how the motorcycle feels and handles in different situations will help you gain a greater appreciation for your bike.
Most modern sport bikes and dirt bikes come with adjustable front and rear suspension. The adjustments you'll typically find are for compression, rebound, and preload. Some bikes may offer all, while many cruisers, entry-level, and budget oriented motorcycles may only offer preload on the rear shock. Older bikes will be all manual adjustments with basic hand tools, while many newer, more performance oriented motorcycles may offer different settings that can be changed with the push of a button.
We aren't going to delve deep into settings and tuning, but we will say that the first thing that you or whoever is working on your bike should do is to make sure the rider sag/loaded sag (the preload adjustment) is set according to your weight. With the sag set accordingly, it will help any compression or rebound adjustments jive correctly. Take a look at your owner's manual and you should find the standard (or baseline) settings and then begin to adjust accordingly based on your weight and/or preferences. The manual may also offer suspension settings recommendations for different riding conditions, as seen with the Honda CRF 450X manual above.
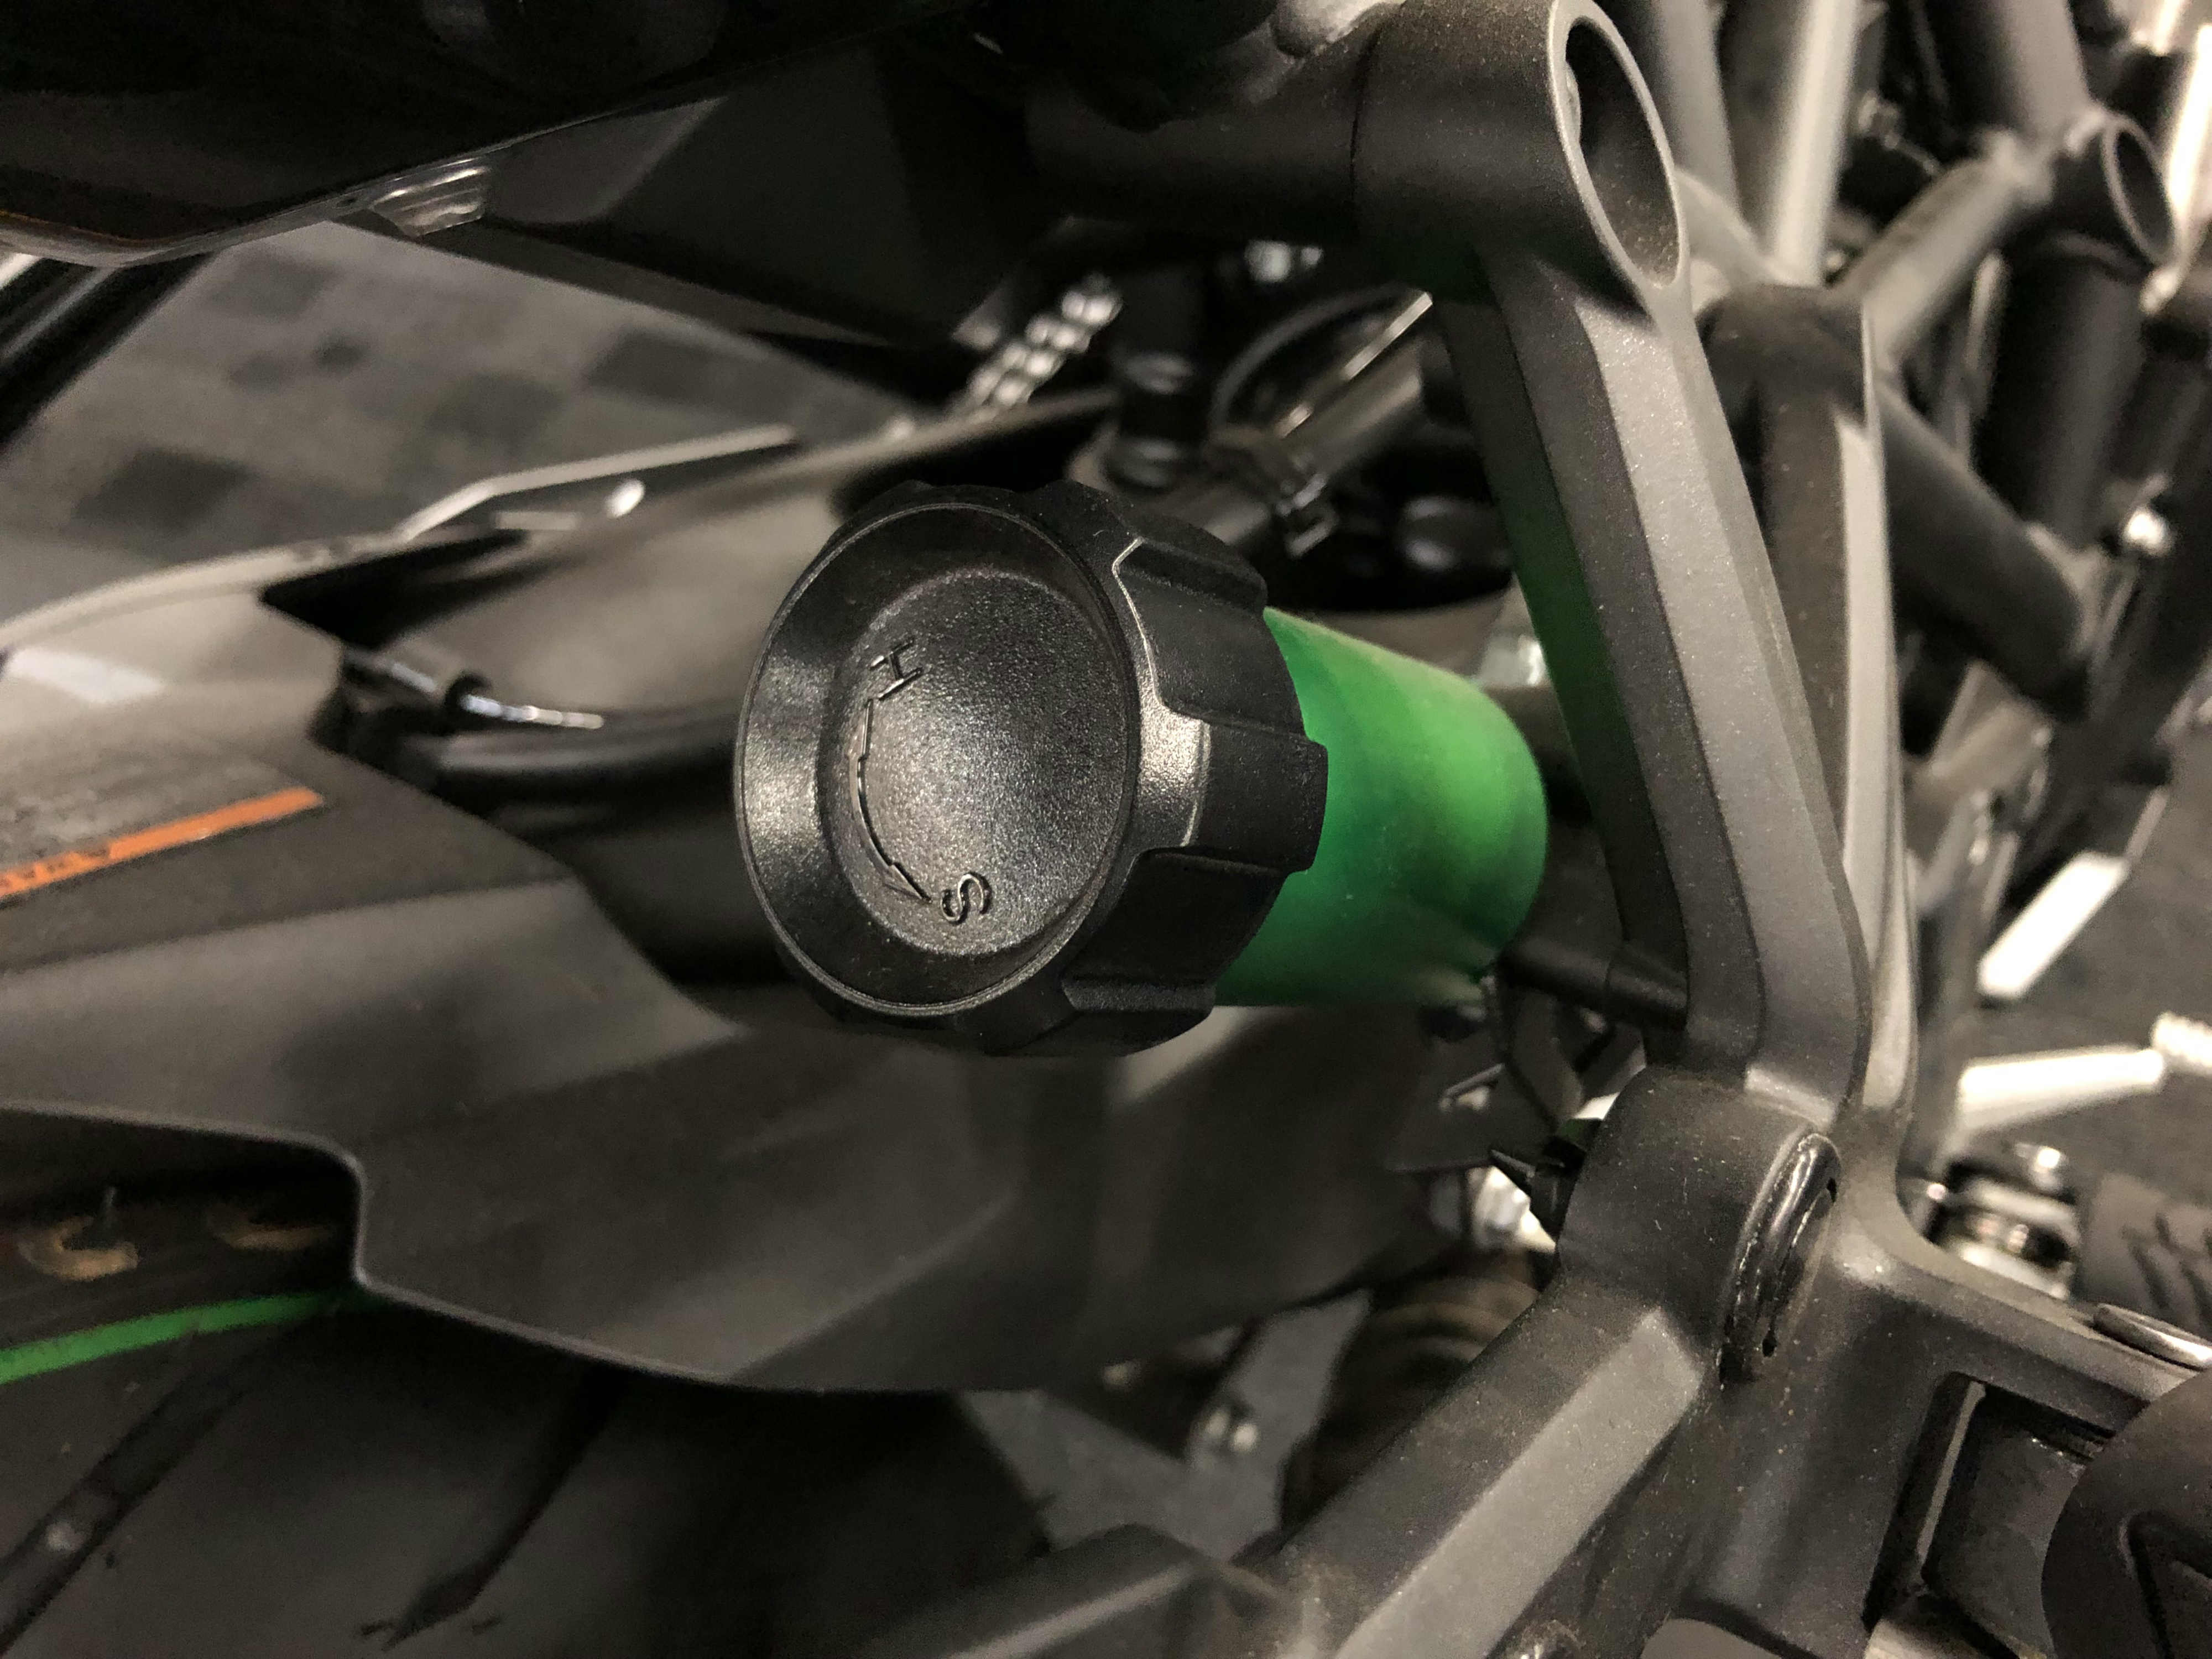
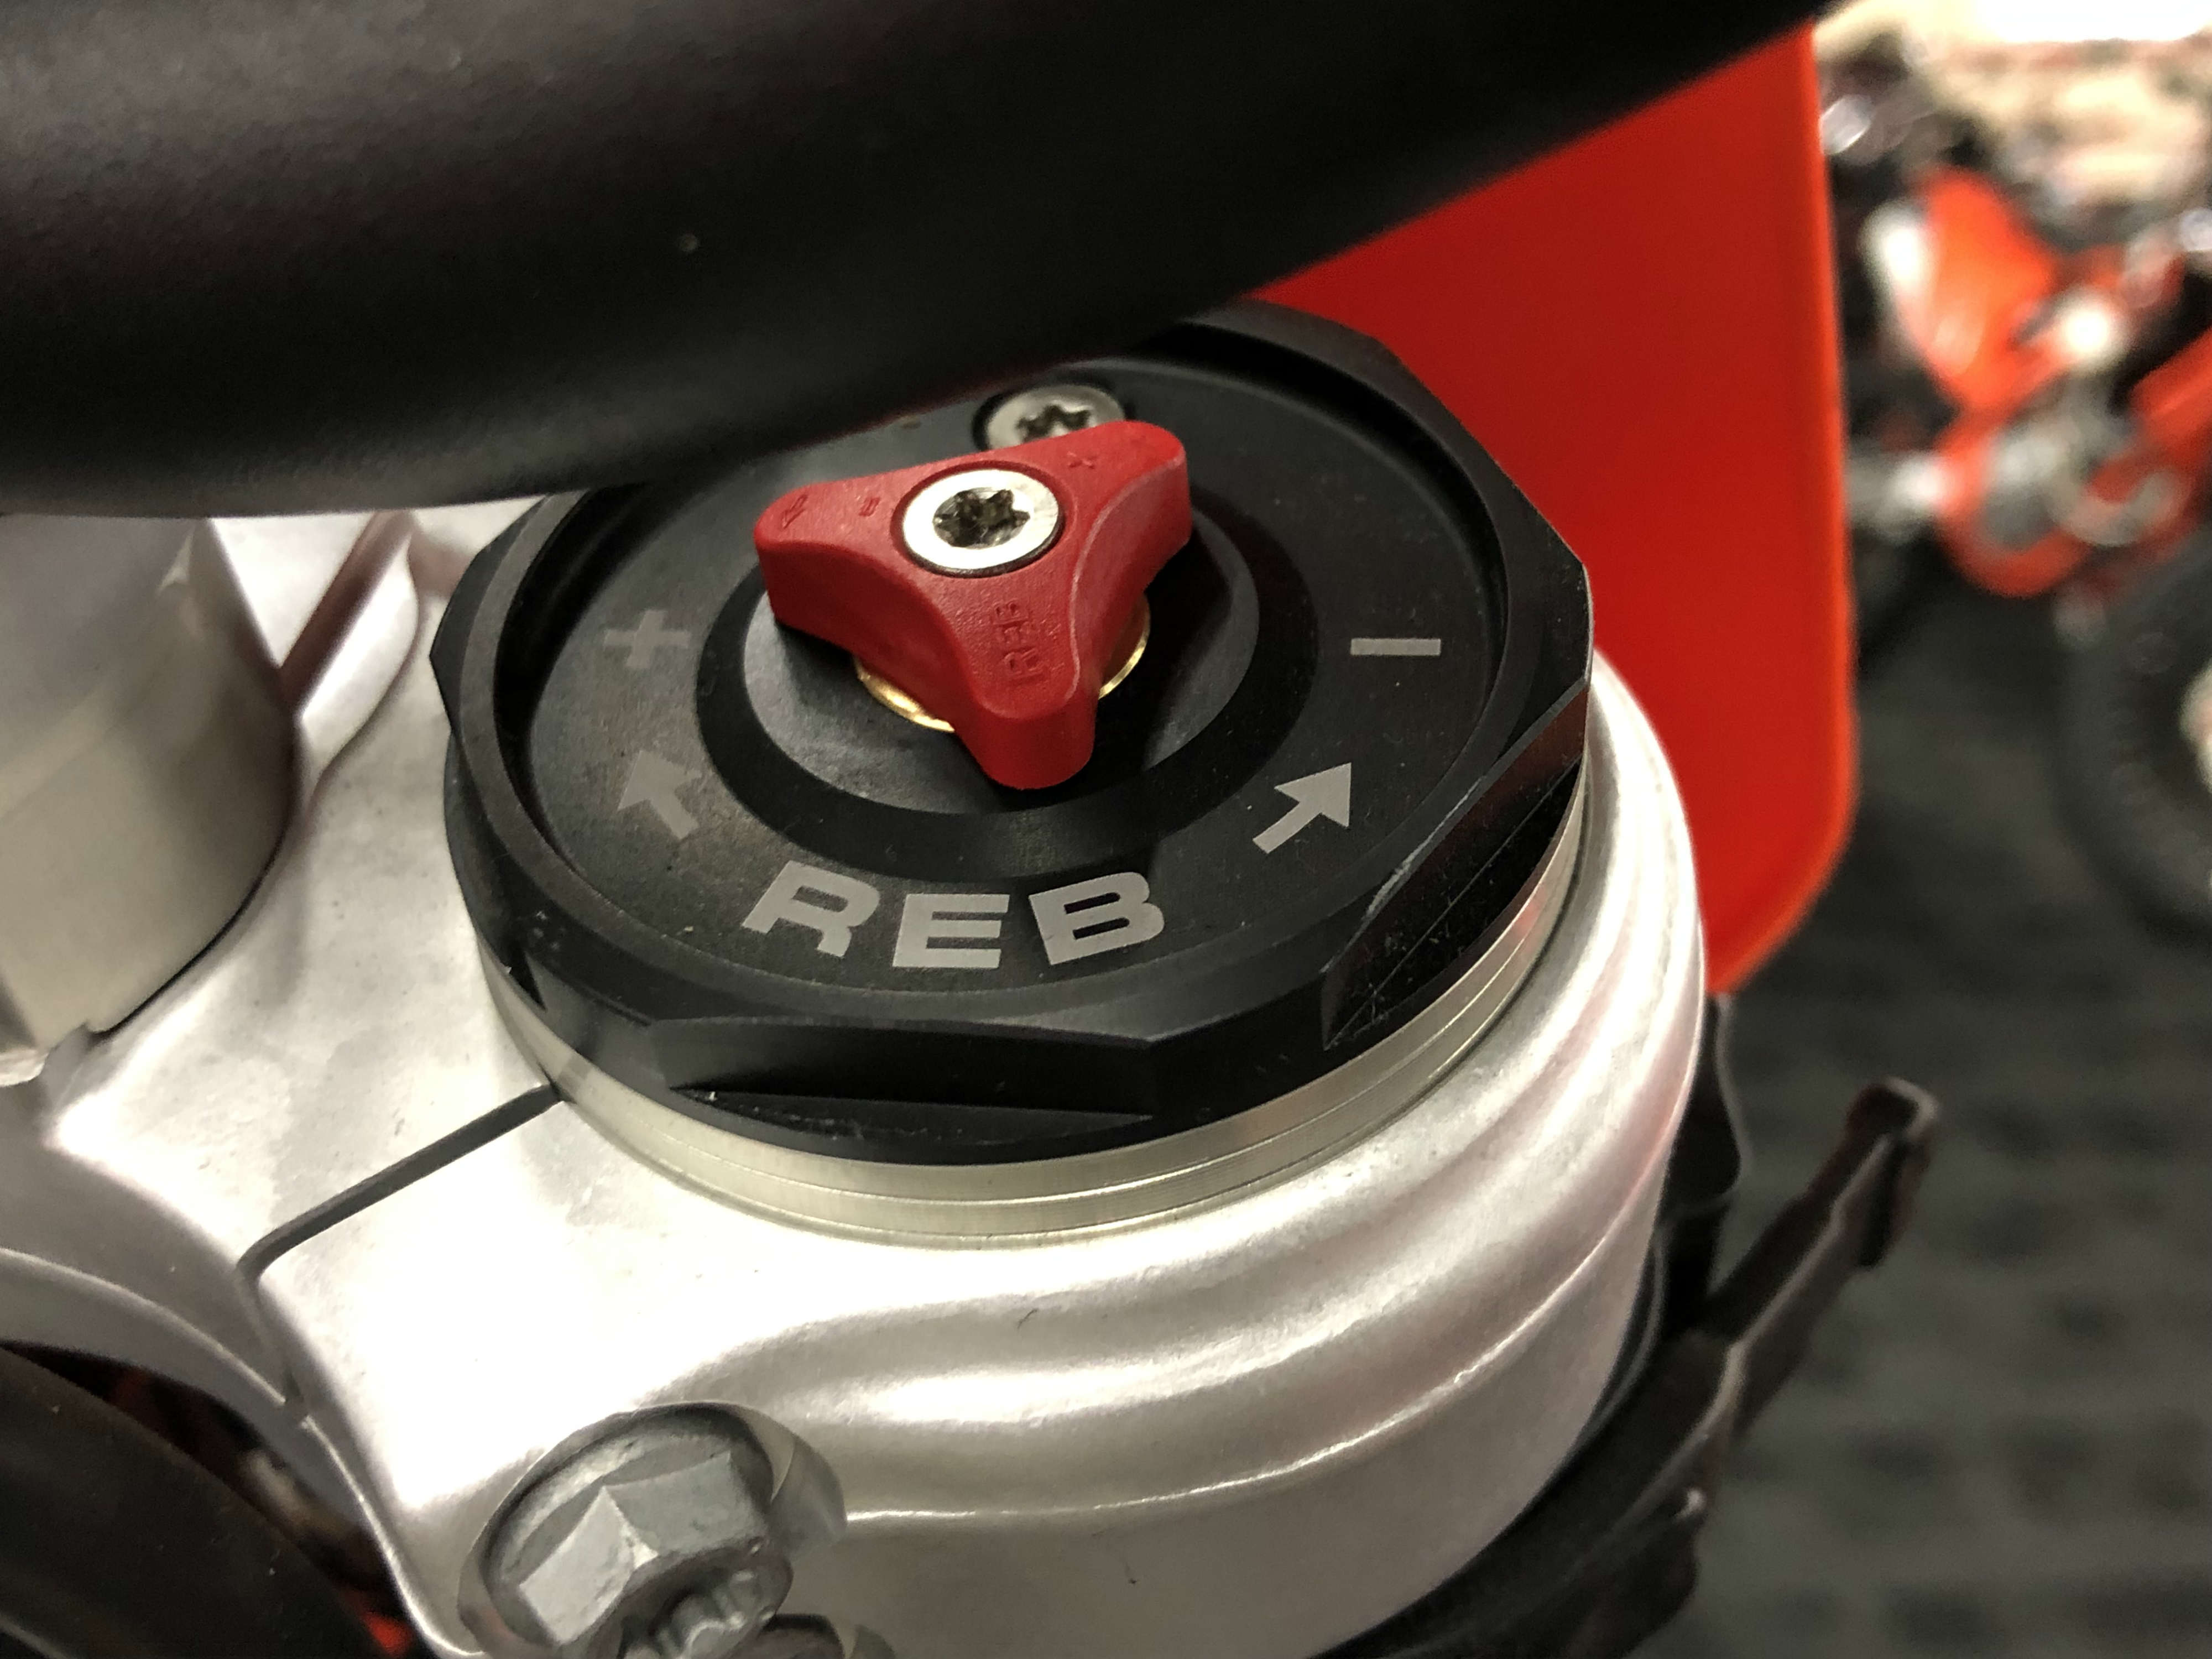
On most motorcycles the rear preload is adjusted via a collar found either at the top or bottom of the spring. Tighten the spring collar for more preload or loosen the collar to reduce preload. Some bikes may have compression or rebound damping adjustment located either off to the side or at the top or bottom of the rear shock. On some bikes it will be marked with TEN for tension, as well as with arrows with H and S to indicate which way to turn for harder (more damping) or softer (less damping).
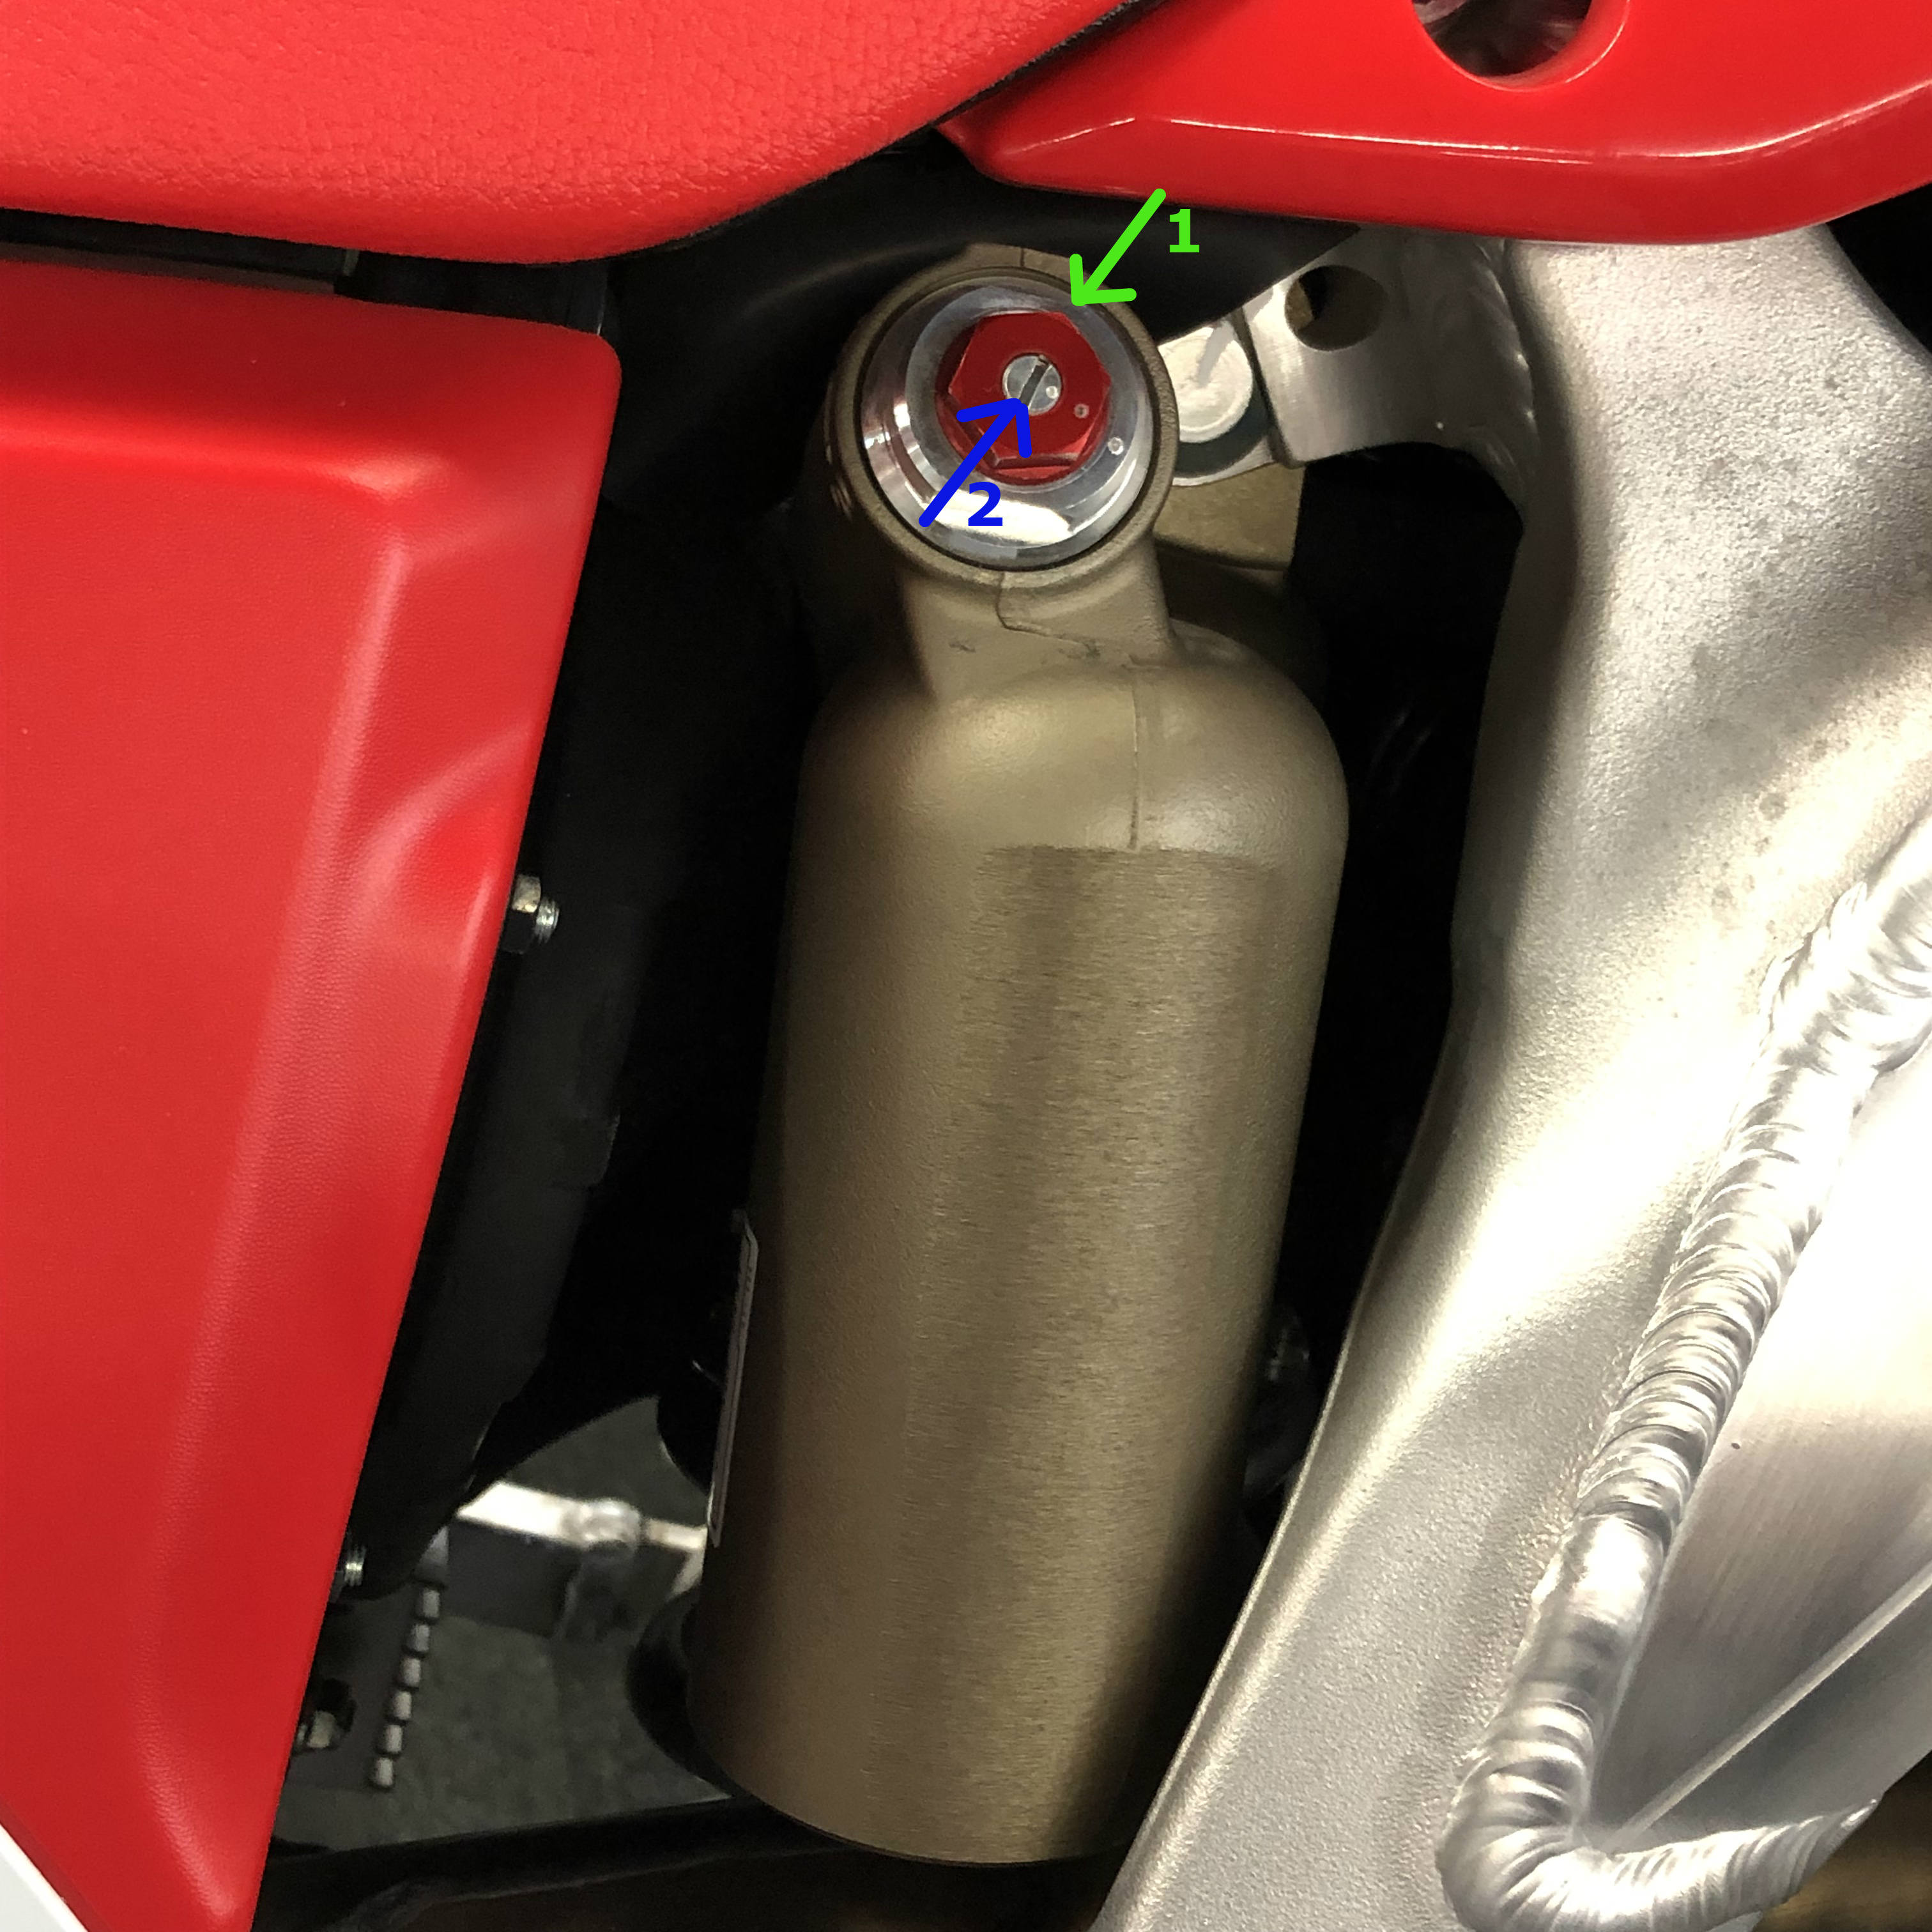

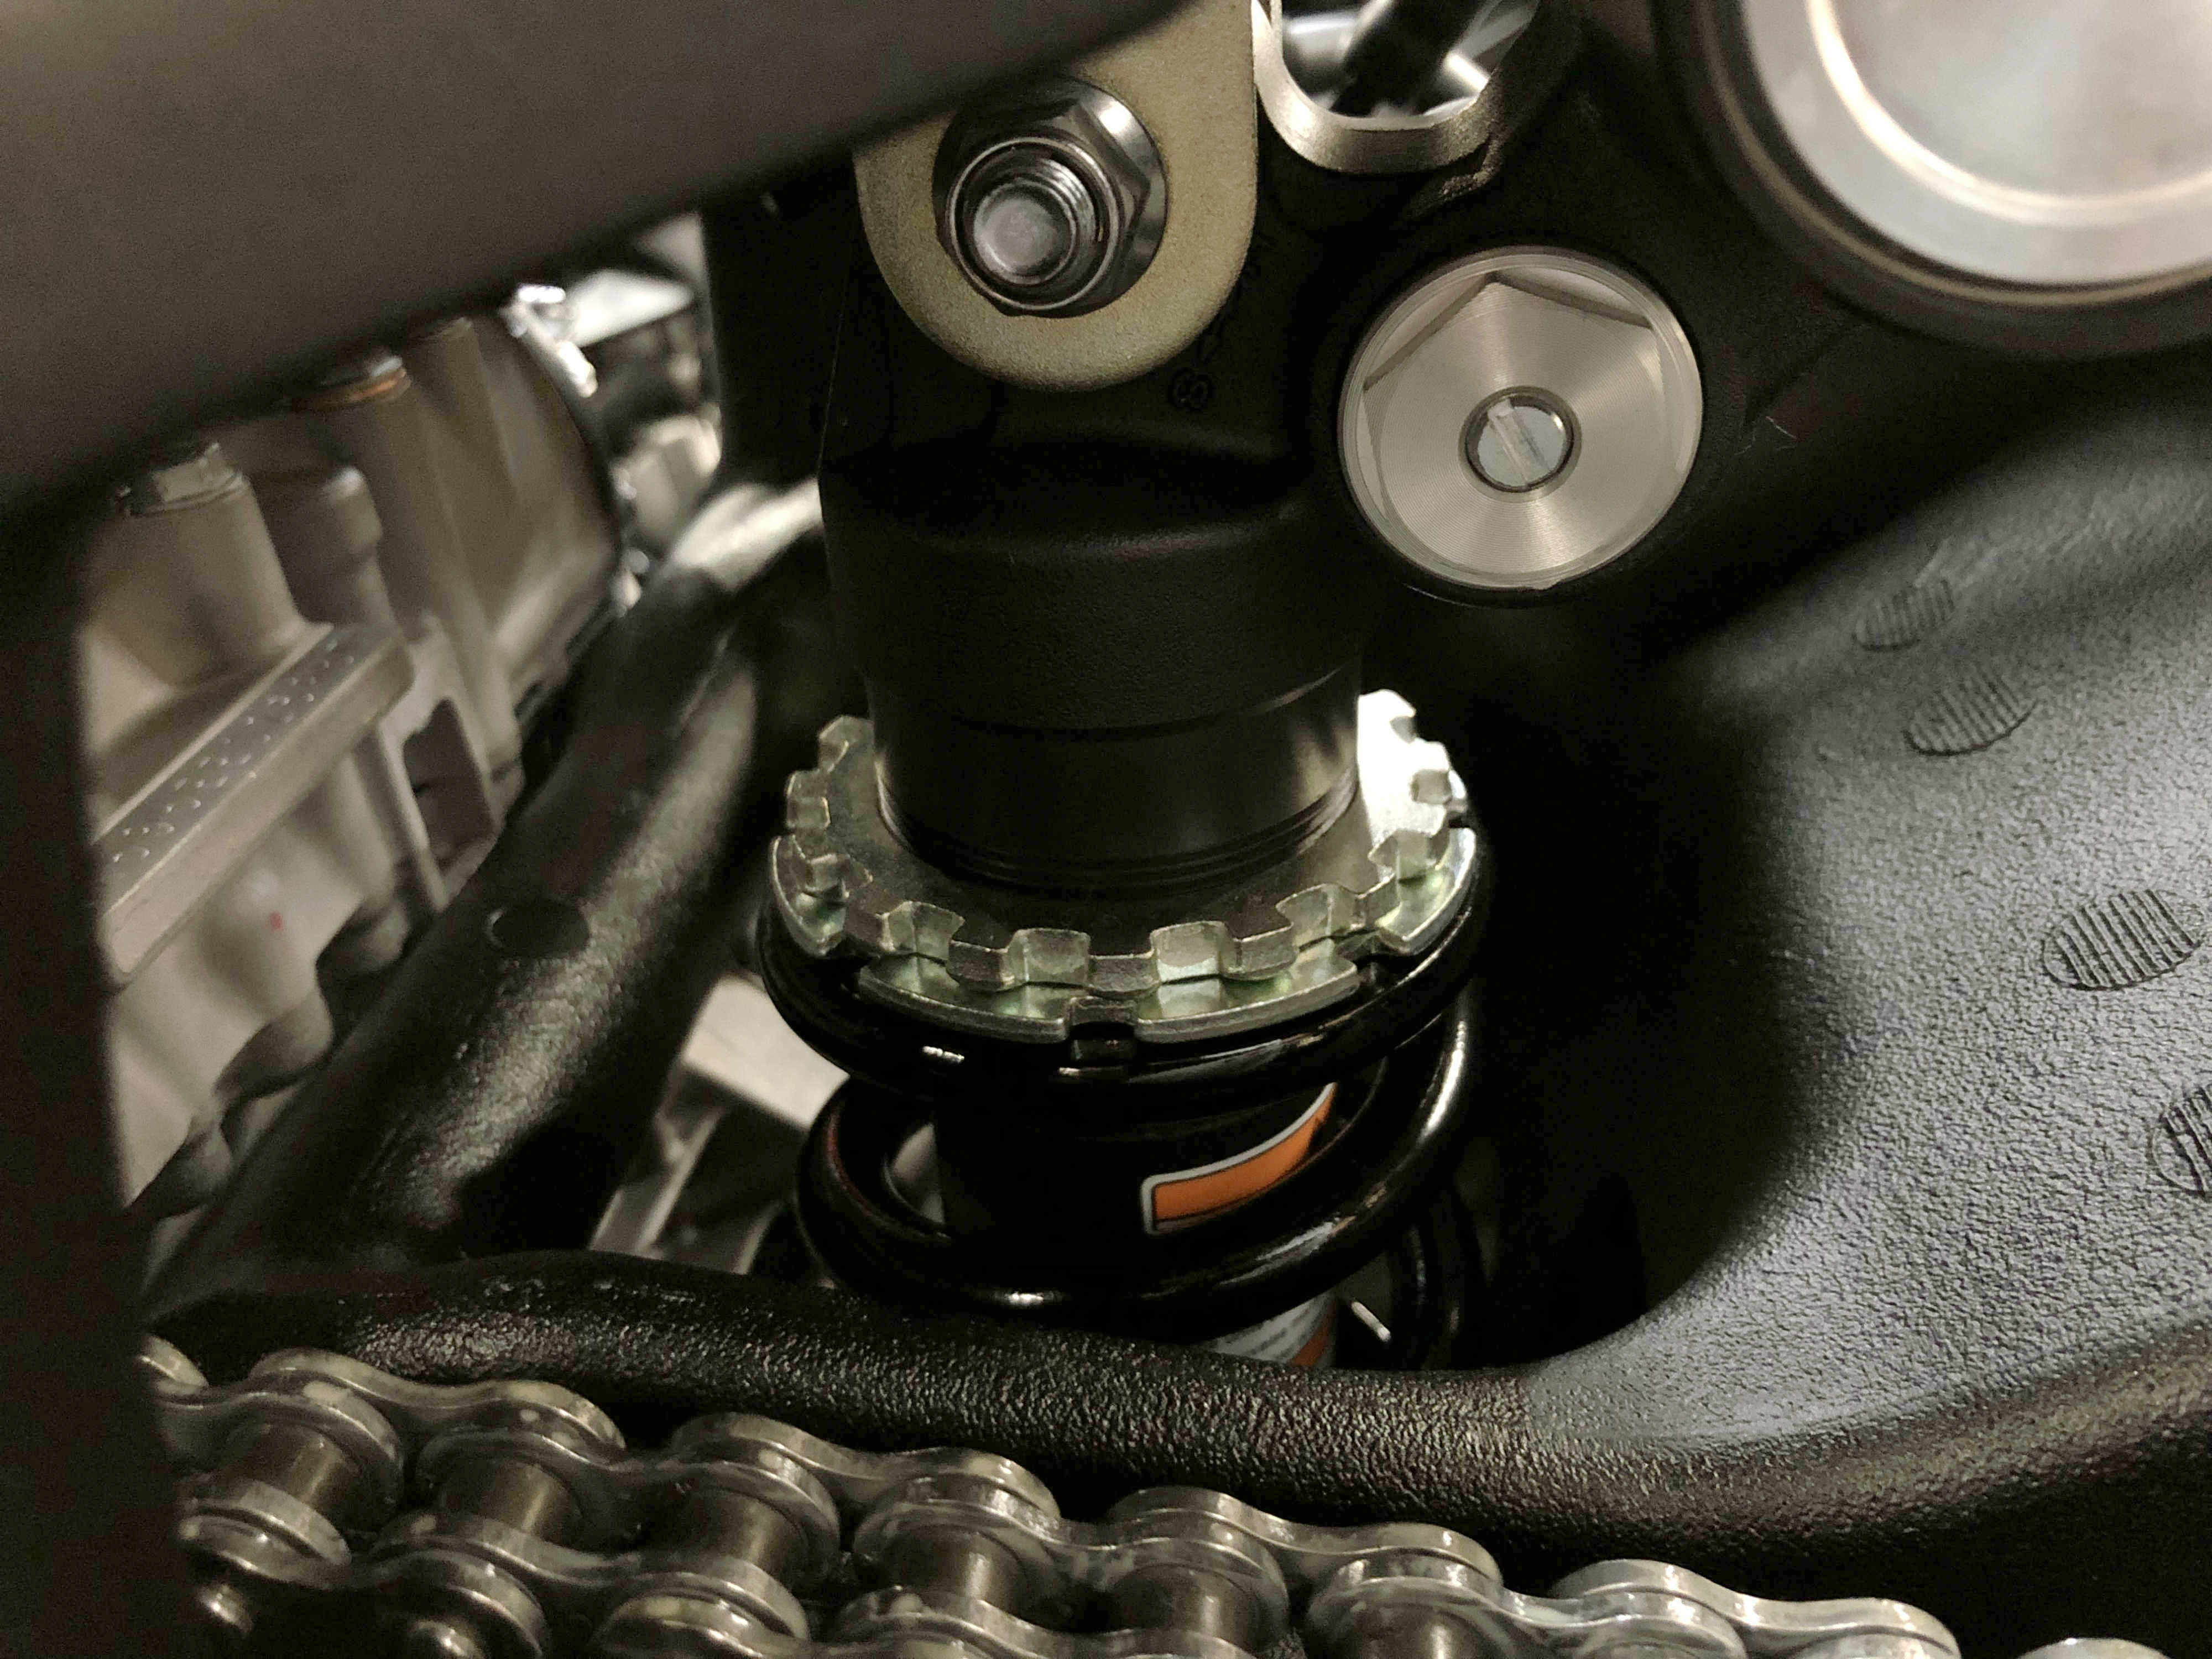
The Honda CRF450X offers the ability to tune the rear suspension for high speed and low speed compression damping as well as rebound damping. The high speed damping is adjusted via the red hex nut while the low speed is adjusted via the valve found in the center of the hex nut. The rebound damping adjuster is located at the bottom of the shock.
Some bikes might have a large knob that sticks out the side of the bike that you can adjust by hand, like the one found in the Kawasaki H2 below.
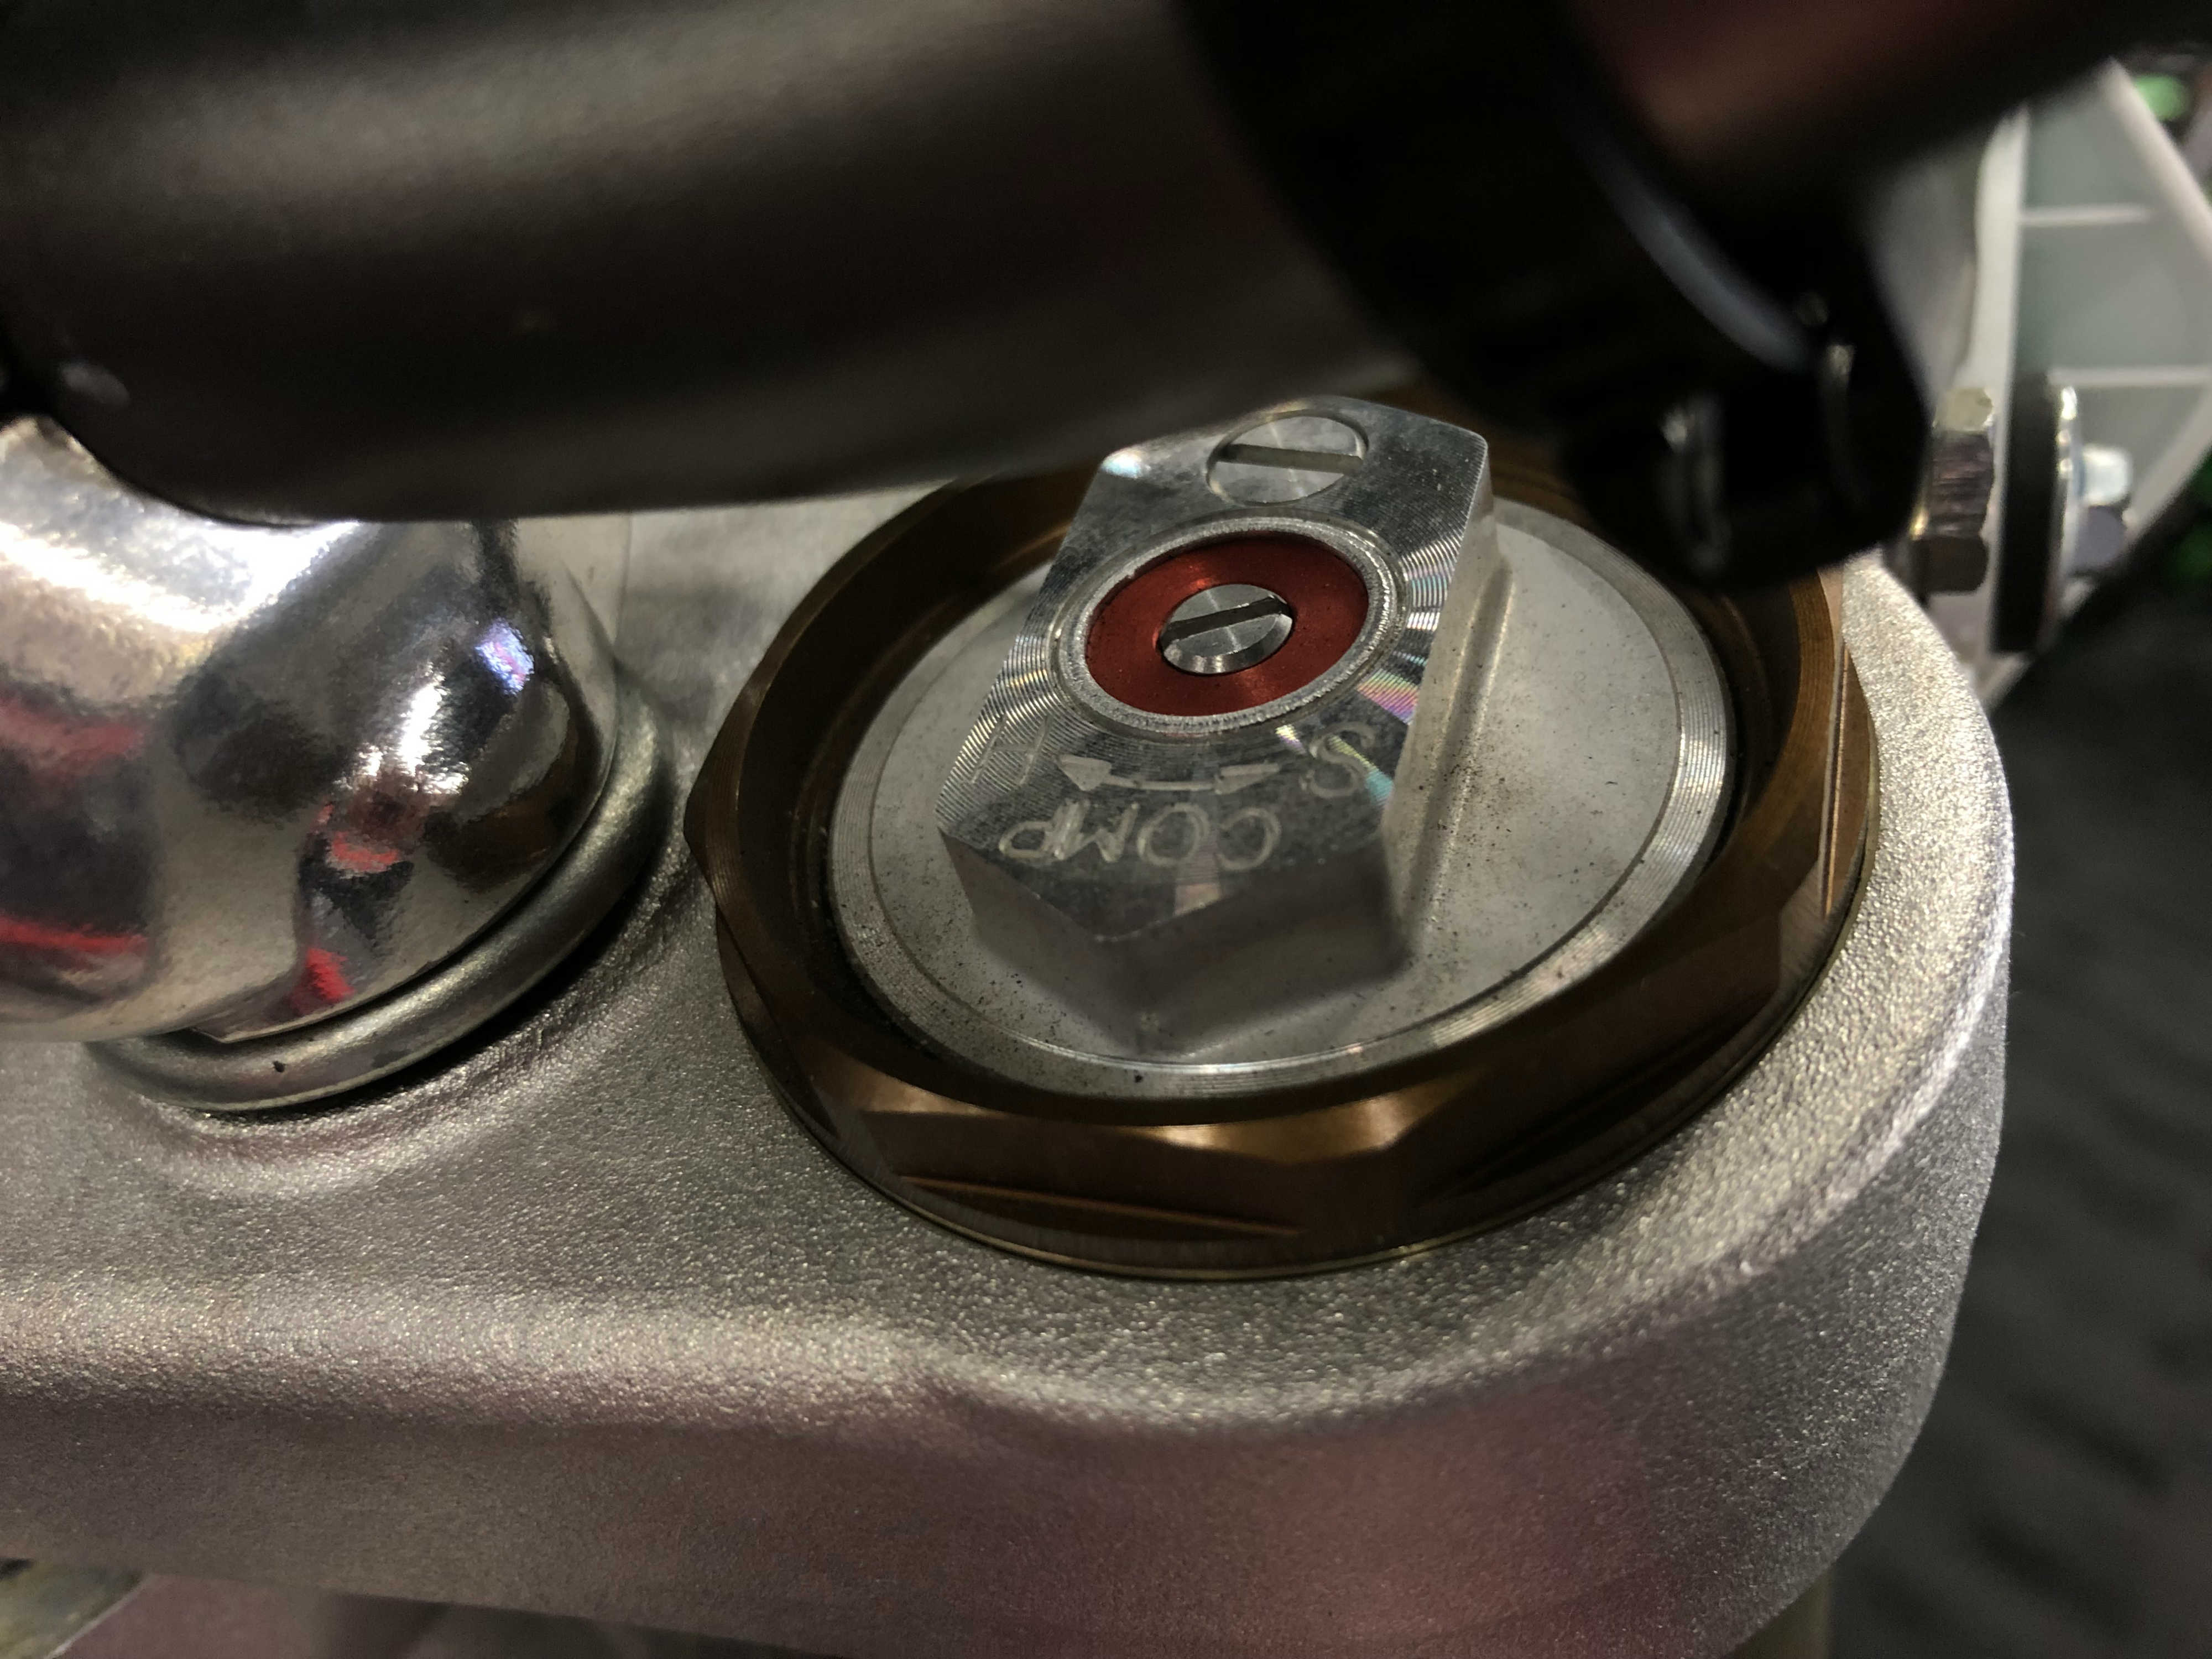
At the front of the bike you may find the preload adjustment on top of the fork cap. The rebound or compression adjuster may be located on the fork caps as well. Take for example the KTM 250 XC-W above which has the rebound damping adjuster on the right side fork cap and compression damping on the left. Again there will probably be arrows indicating H and S or as seen on these adjsuters +/-.
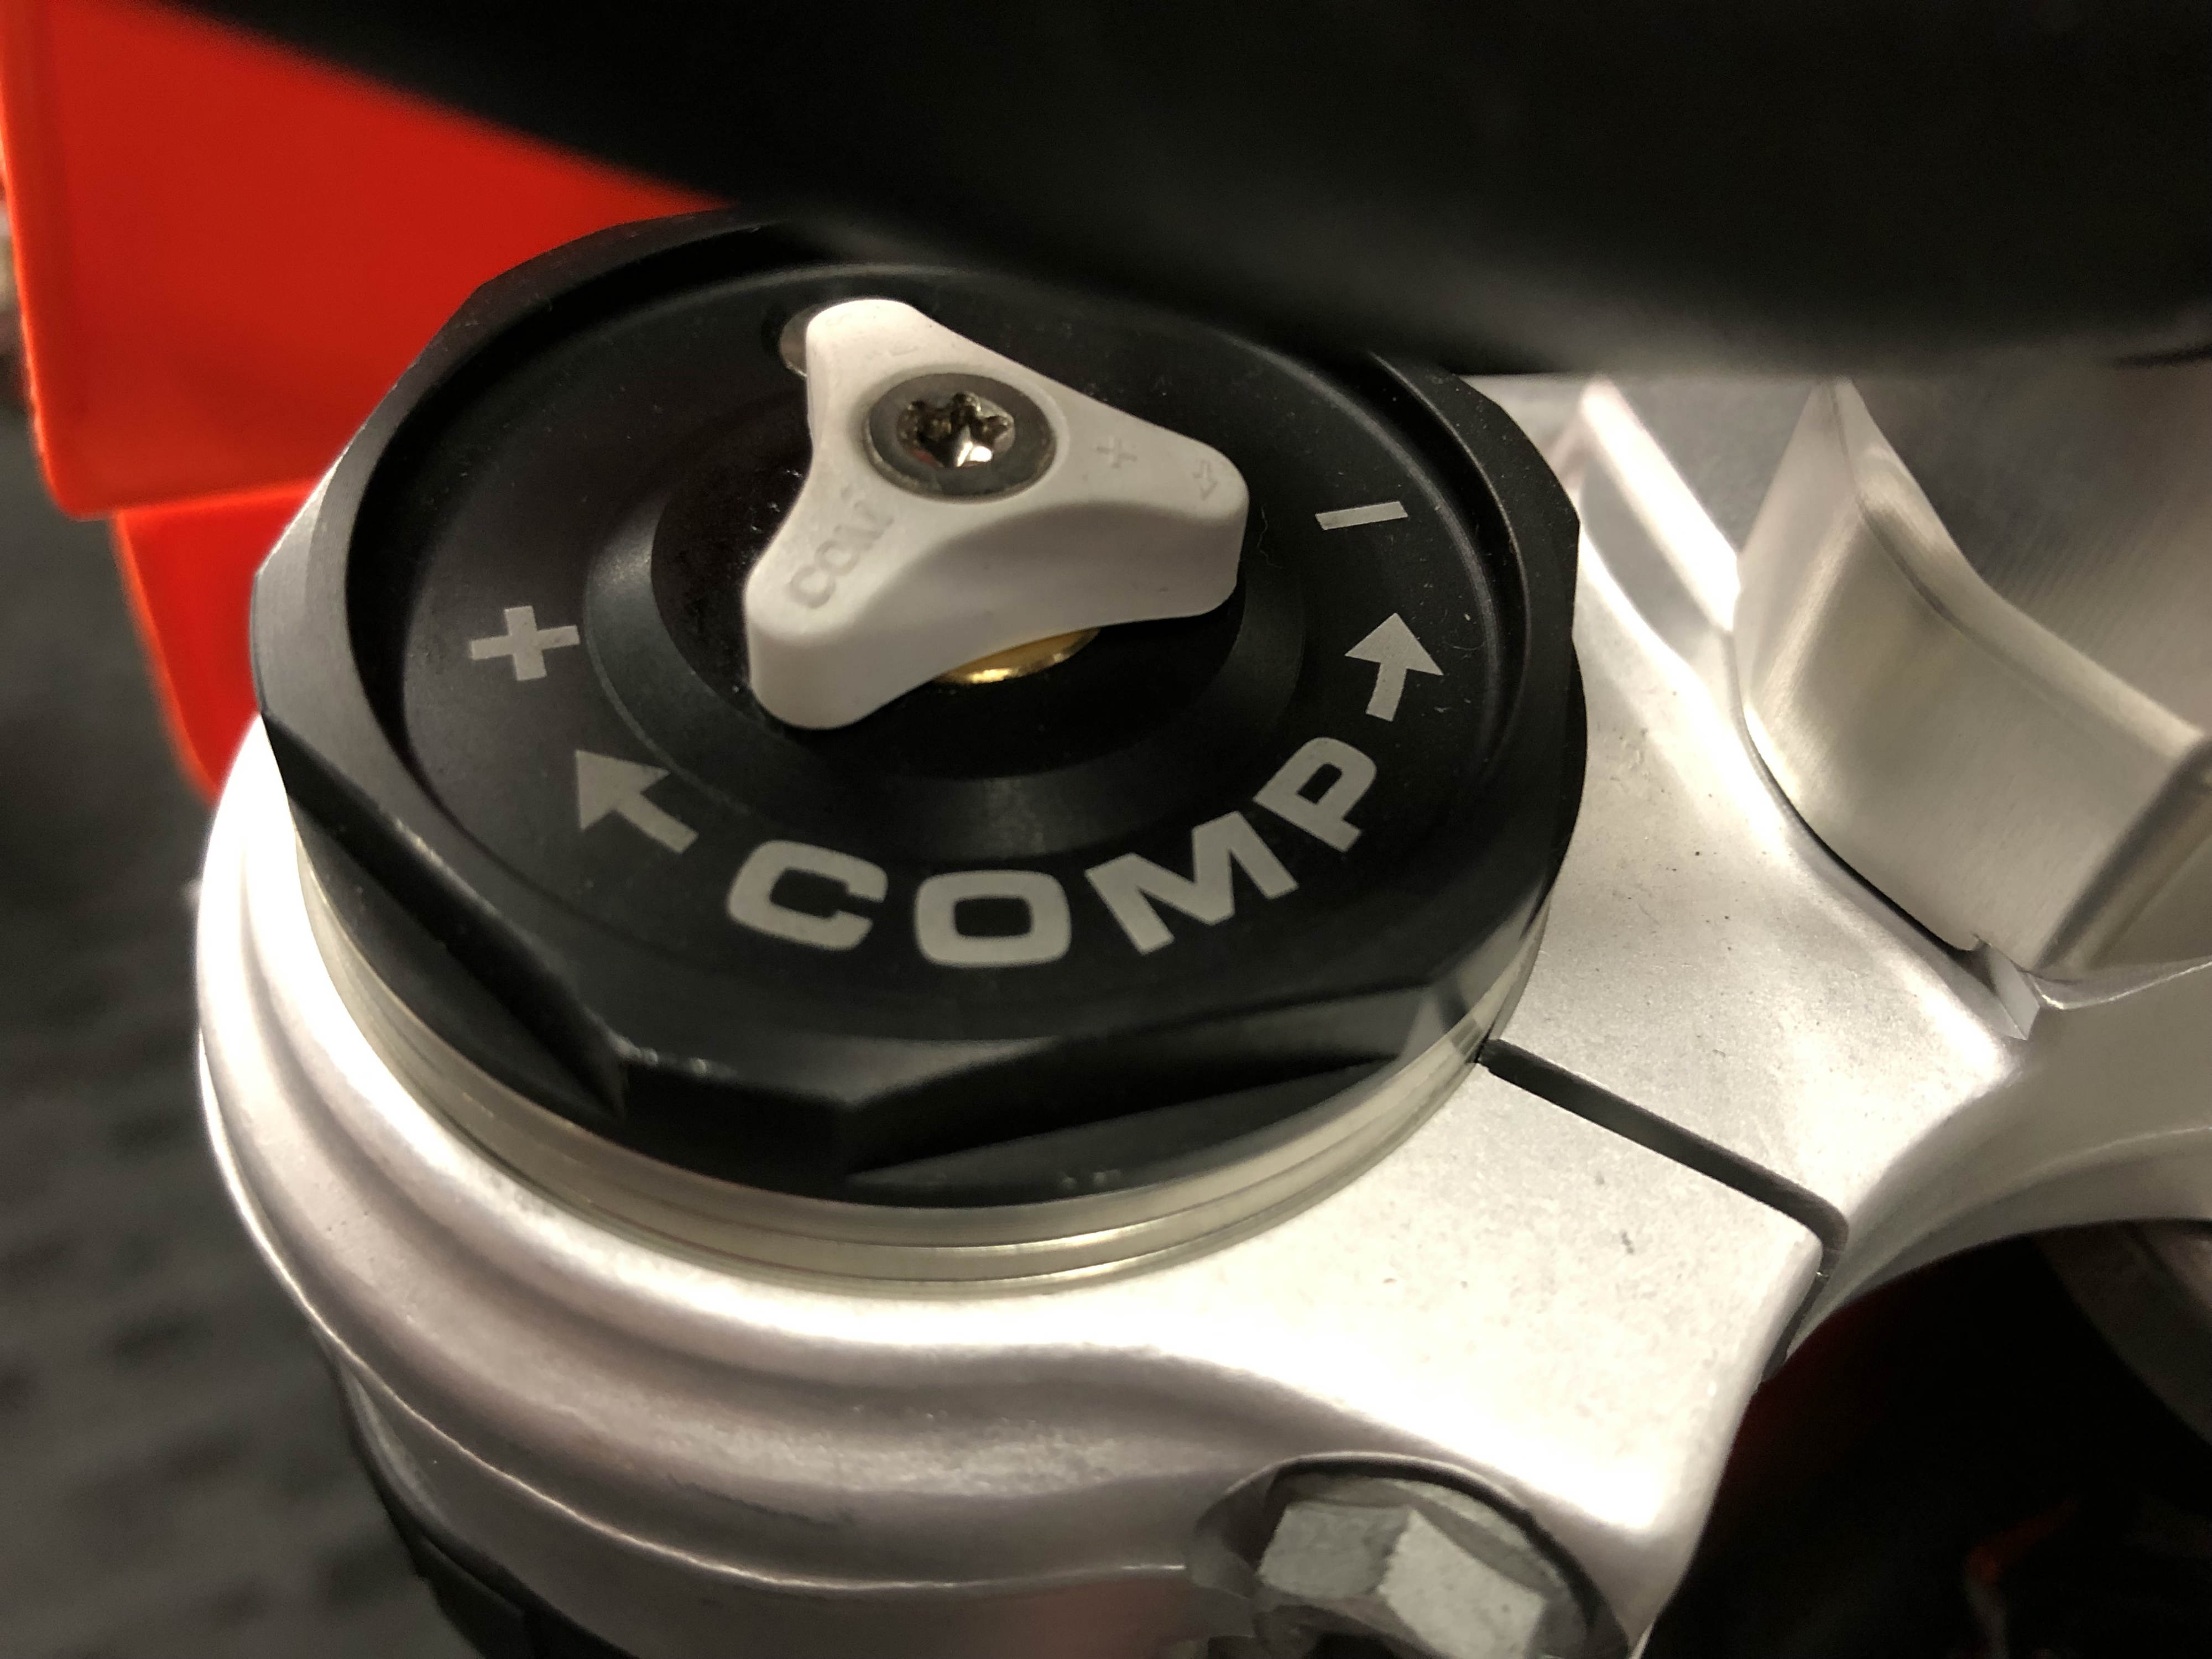
The Showa fork legs on the Honda CRF450X has compression damping adjusters in the fork cap and rebound adjuster in at the bottom of the fork leg.
Familiarize yourself with where all the adjustment points are. Keep a note pad handy so that you can write down where all the settings were before you started tuning. You'll also need to know if you're your adjusters are measured in turns or clicks.
Before you start tuning, turn each adjuster all the way to either the left or right and mark down the number of clicks or revolutions until it stops. Then turn the adjuster all the way in the opposite direction and mark that number down. The first number will give you the reference point of where you started and the second number will tell you how much total adjustment there is.
Unless you're a really experienced rider, you may not notice small, one step adjustments. So start by making more sizeable adjustments and then increase or decrease as needed with smaller and smaller adjustments until you're happy. Also, except for the preload, don't adjust both the front and rear suspension at the same time (unless a professional is doing the tuning). It's much easier to dial them in independent of each other; otherwise you'll spend a lot of time chasing your tail between the front and rear.
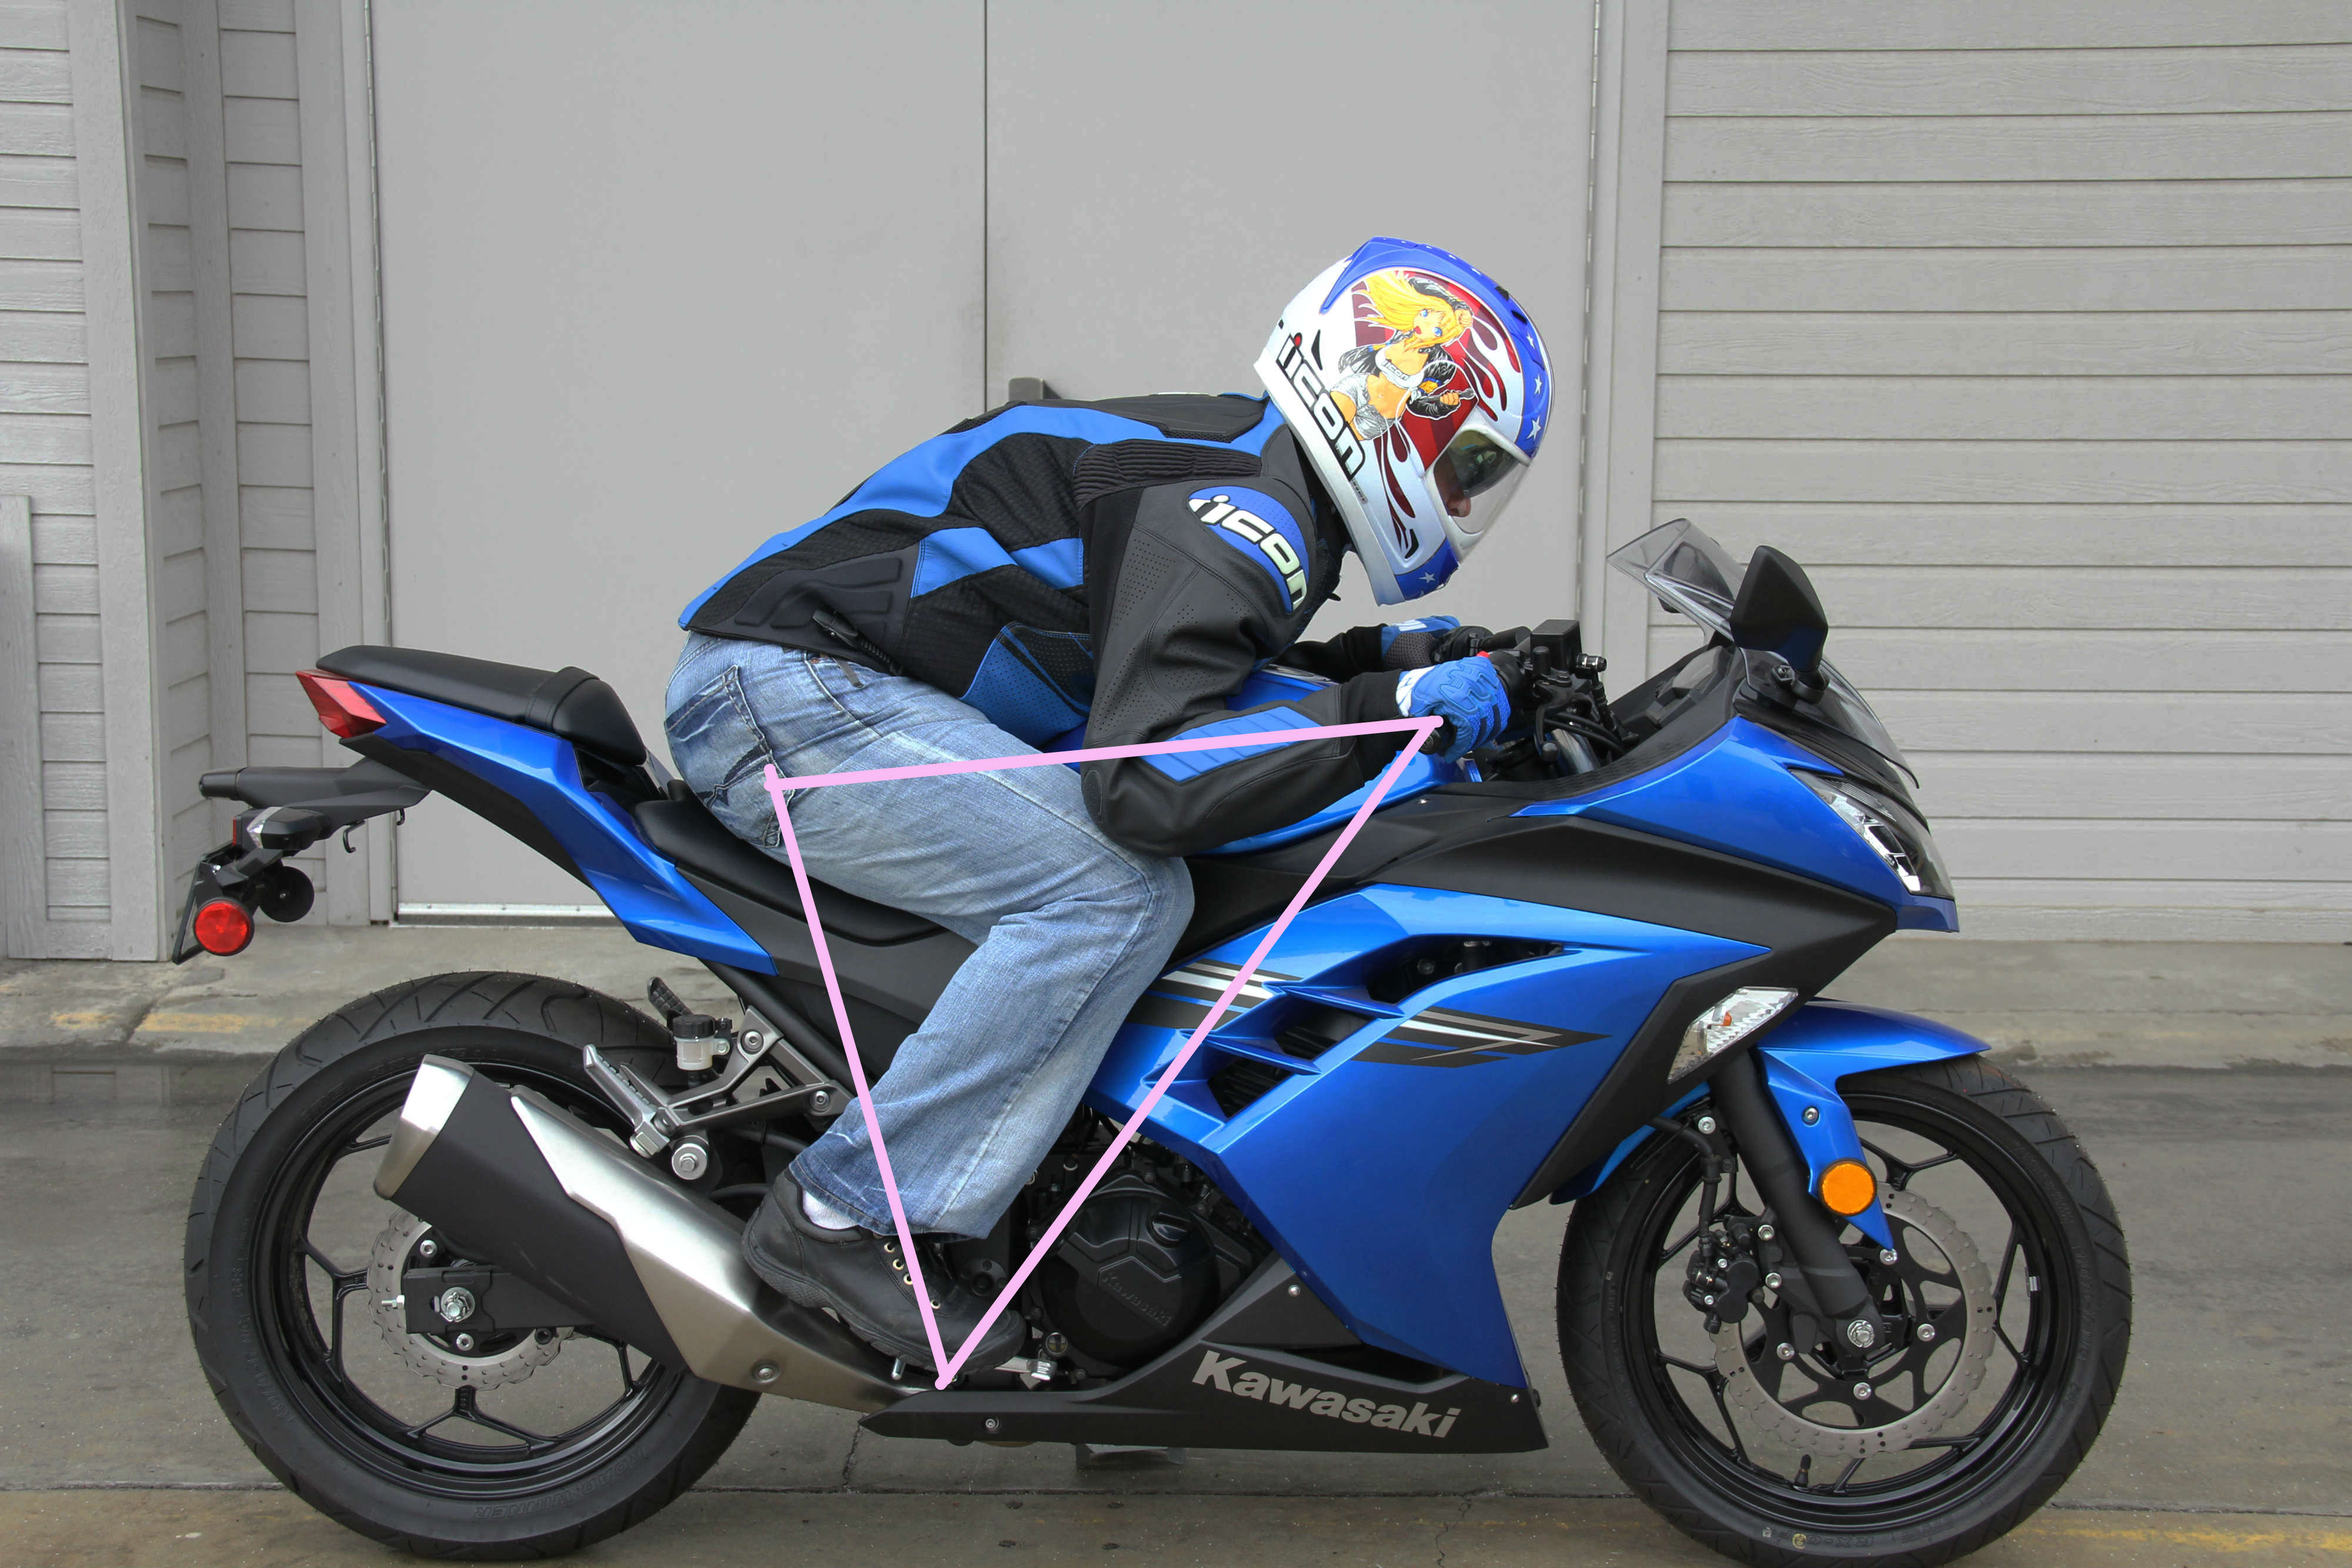

The handlebars, foot controls, and seating area make up the ergonomics of a motorcycle. They also create what's known as the rider's triangle or the riding position. The rider's triangle is a series of imaginary lines that correlate to where your hands, butt, and feet rest on the motorcycle and would create a triangle if all were connected. The riding position varies from motorcycle to motorcycle. Sport bikes have an attack position with the rider leaning forward onto the bike, arms tucked in close to the body and top of the gas tank, and the feet slightly back or directly under the butt. The cruiser position is much more relaxed. The torso is upright, arms are out wider or stretched further, and the feet are placed several inches in front of the butt. Thankfully the ergonomics on pretty much every motorcycle can be changed or altered to better fit individual riders.
Handlebars
The type of motorcycle you own and the type of riding you do will play a big role in hand positioning. For example, the handlebars on a dirt bike will look much different than those on a sport bike. Cruiser riders can venture into the extreme when it comes to hand placement. Between wide sweeping beach bars to high flying ape hangers you'll encounter some handlebars that might look downright uncomfortable to you be but be completely fine for other riders.
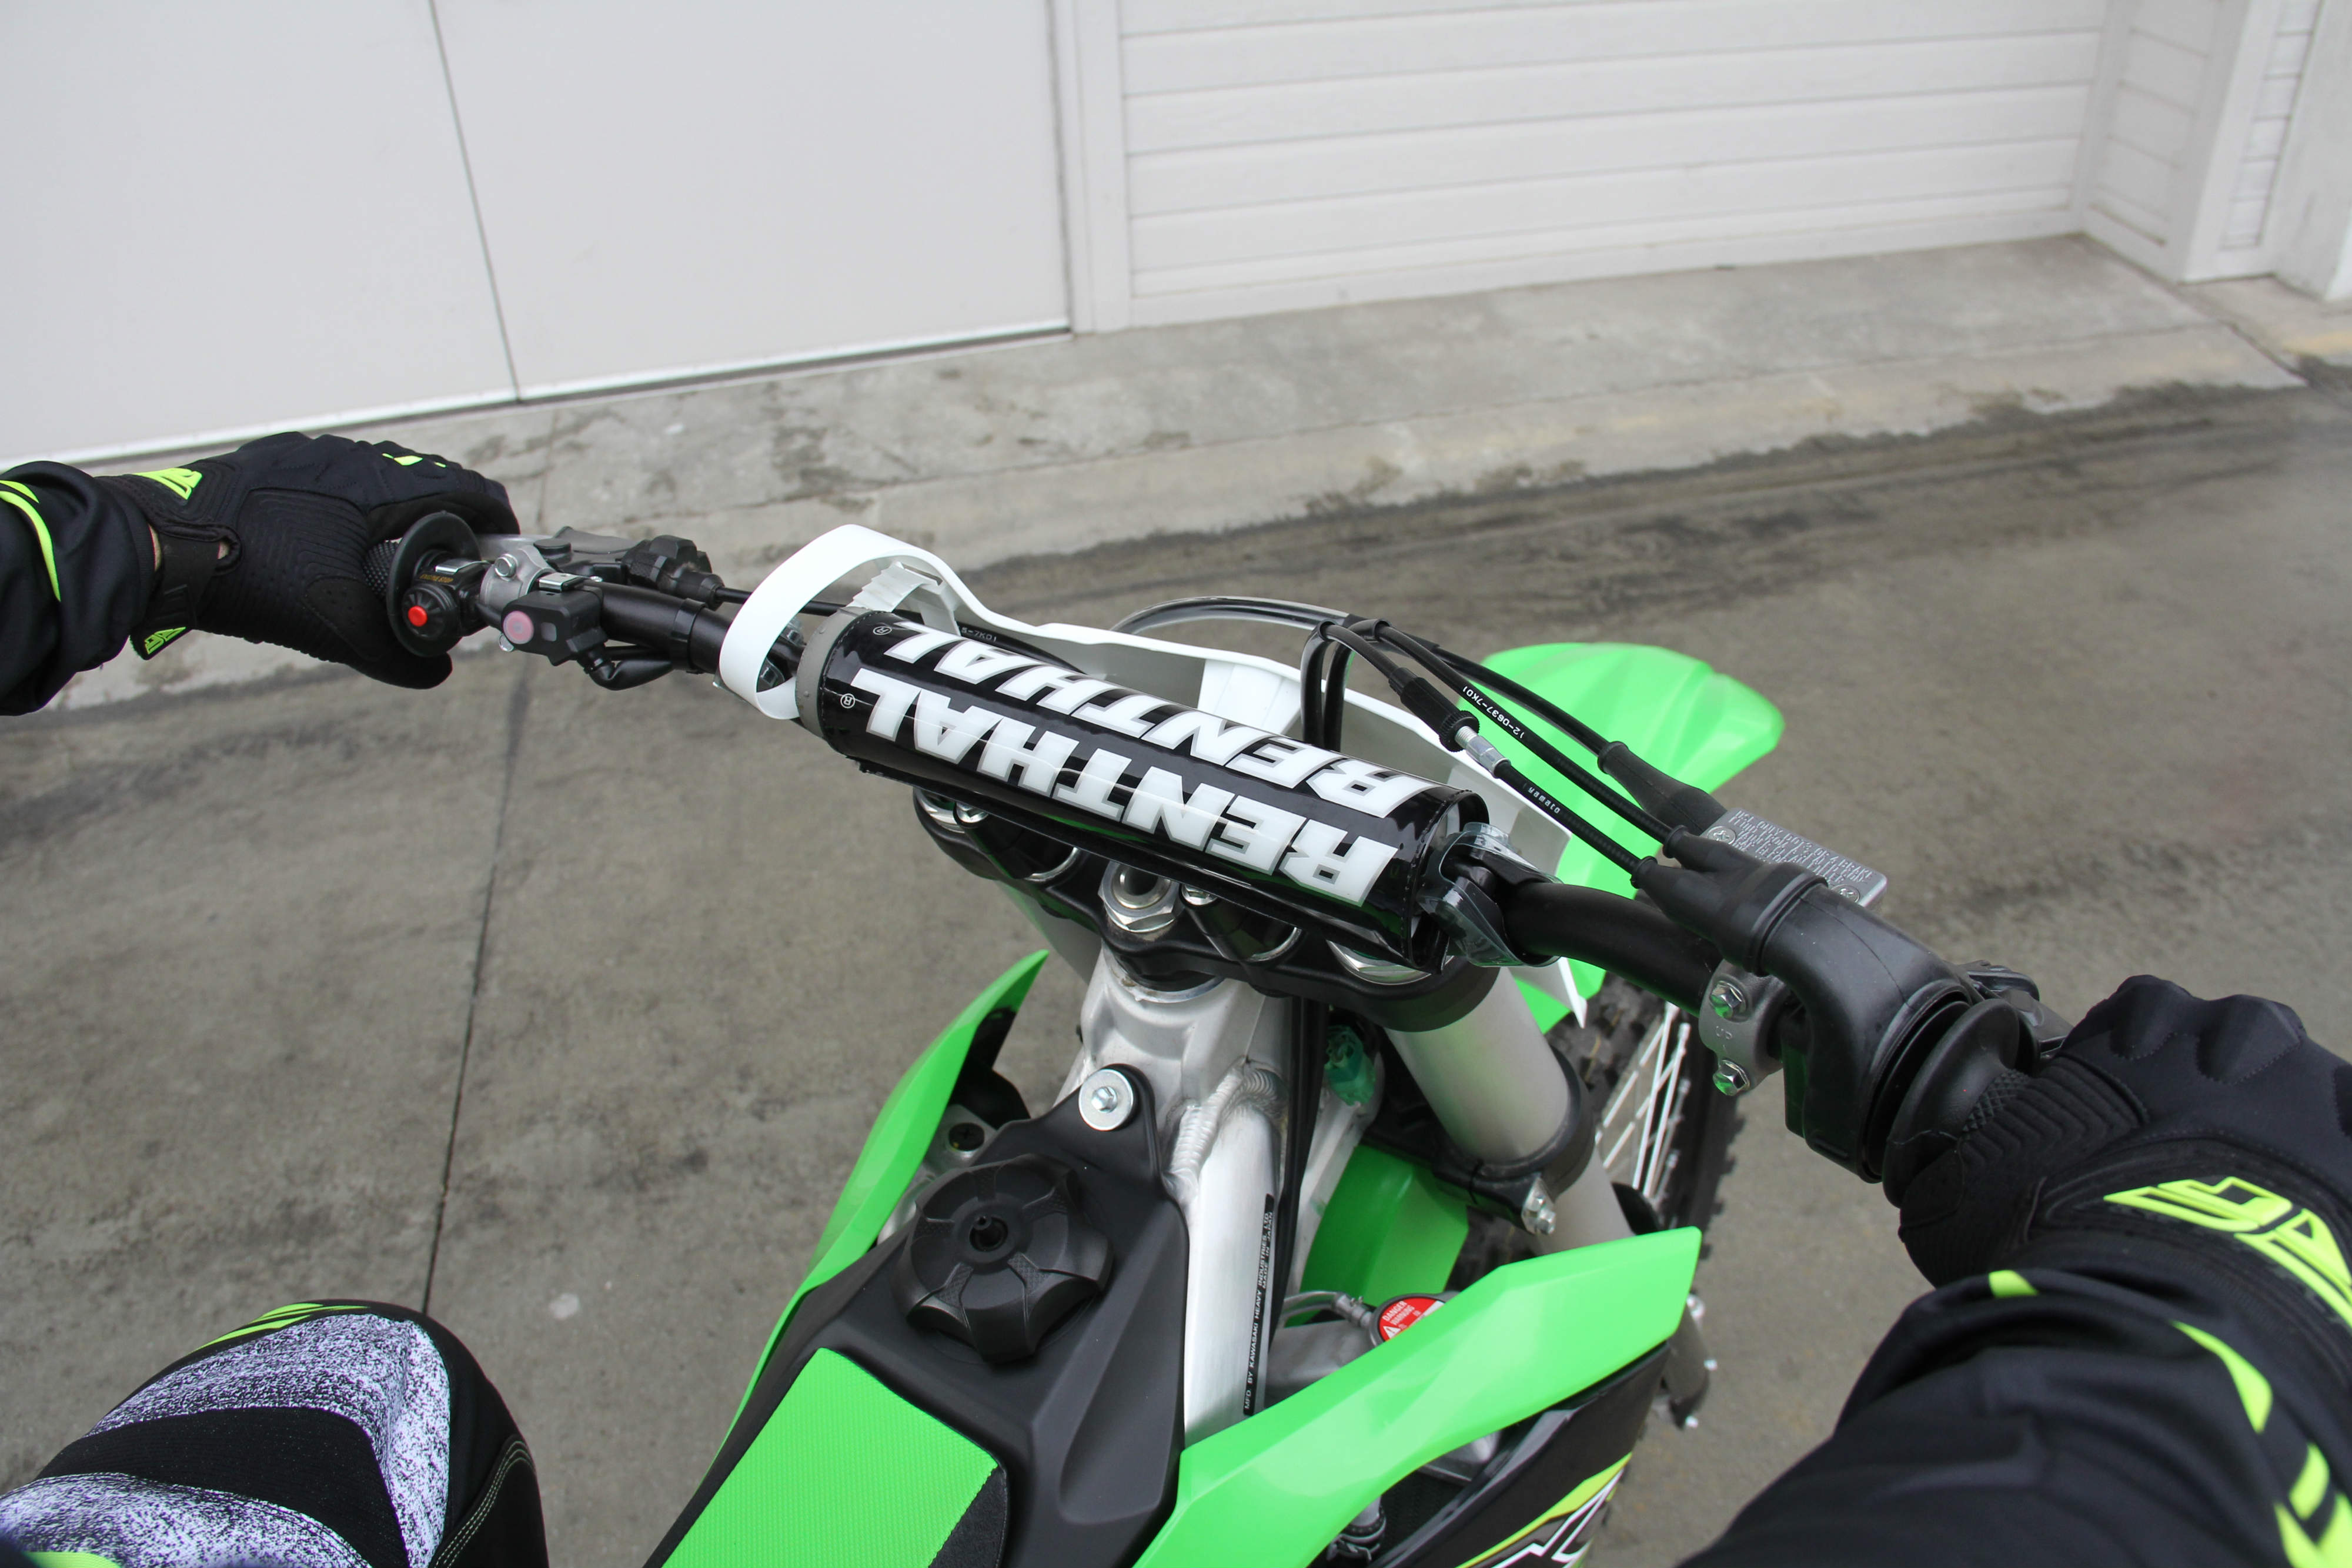
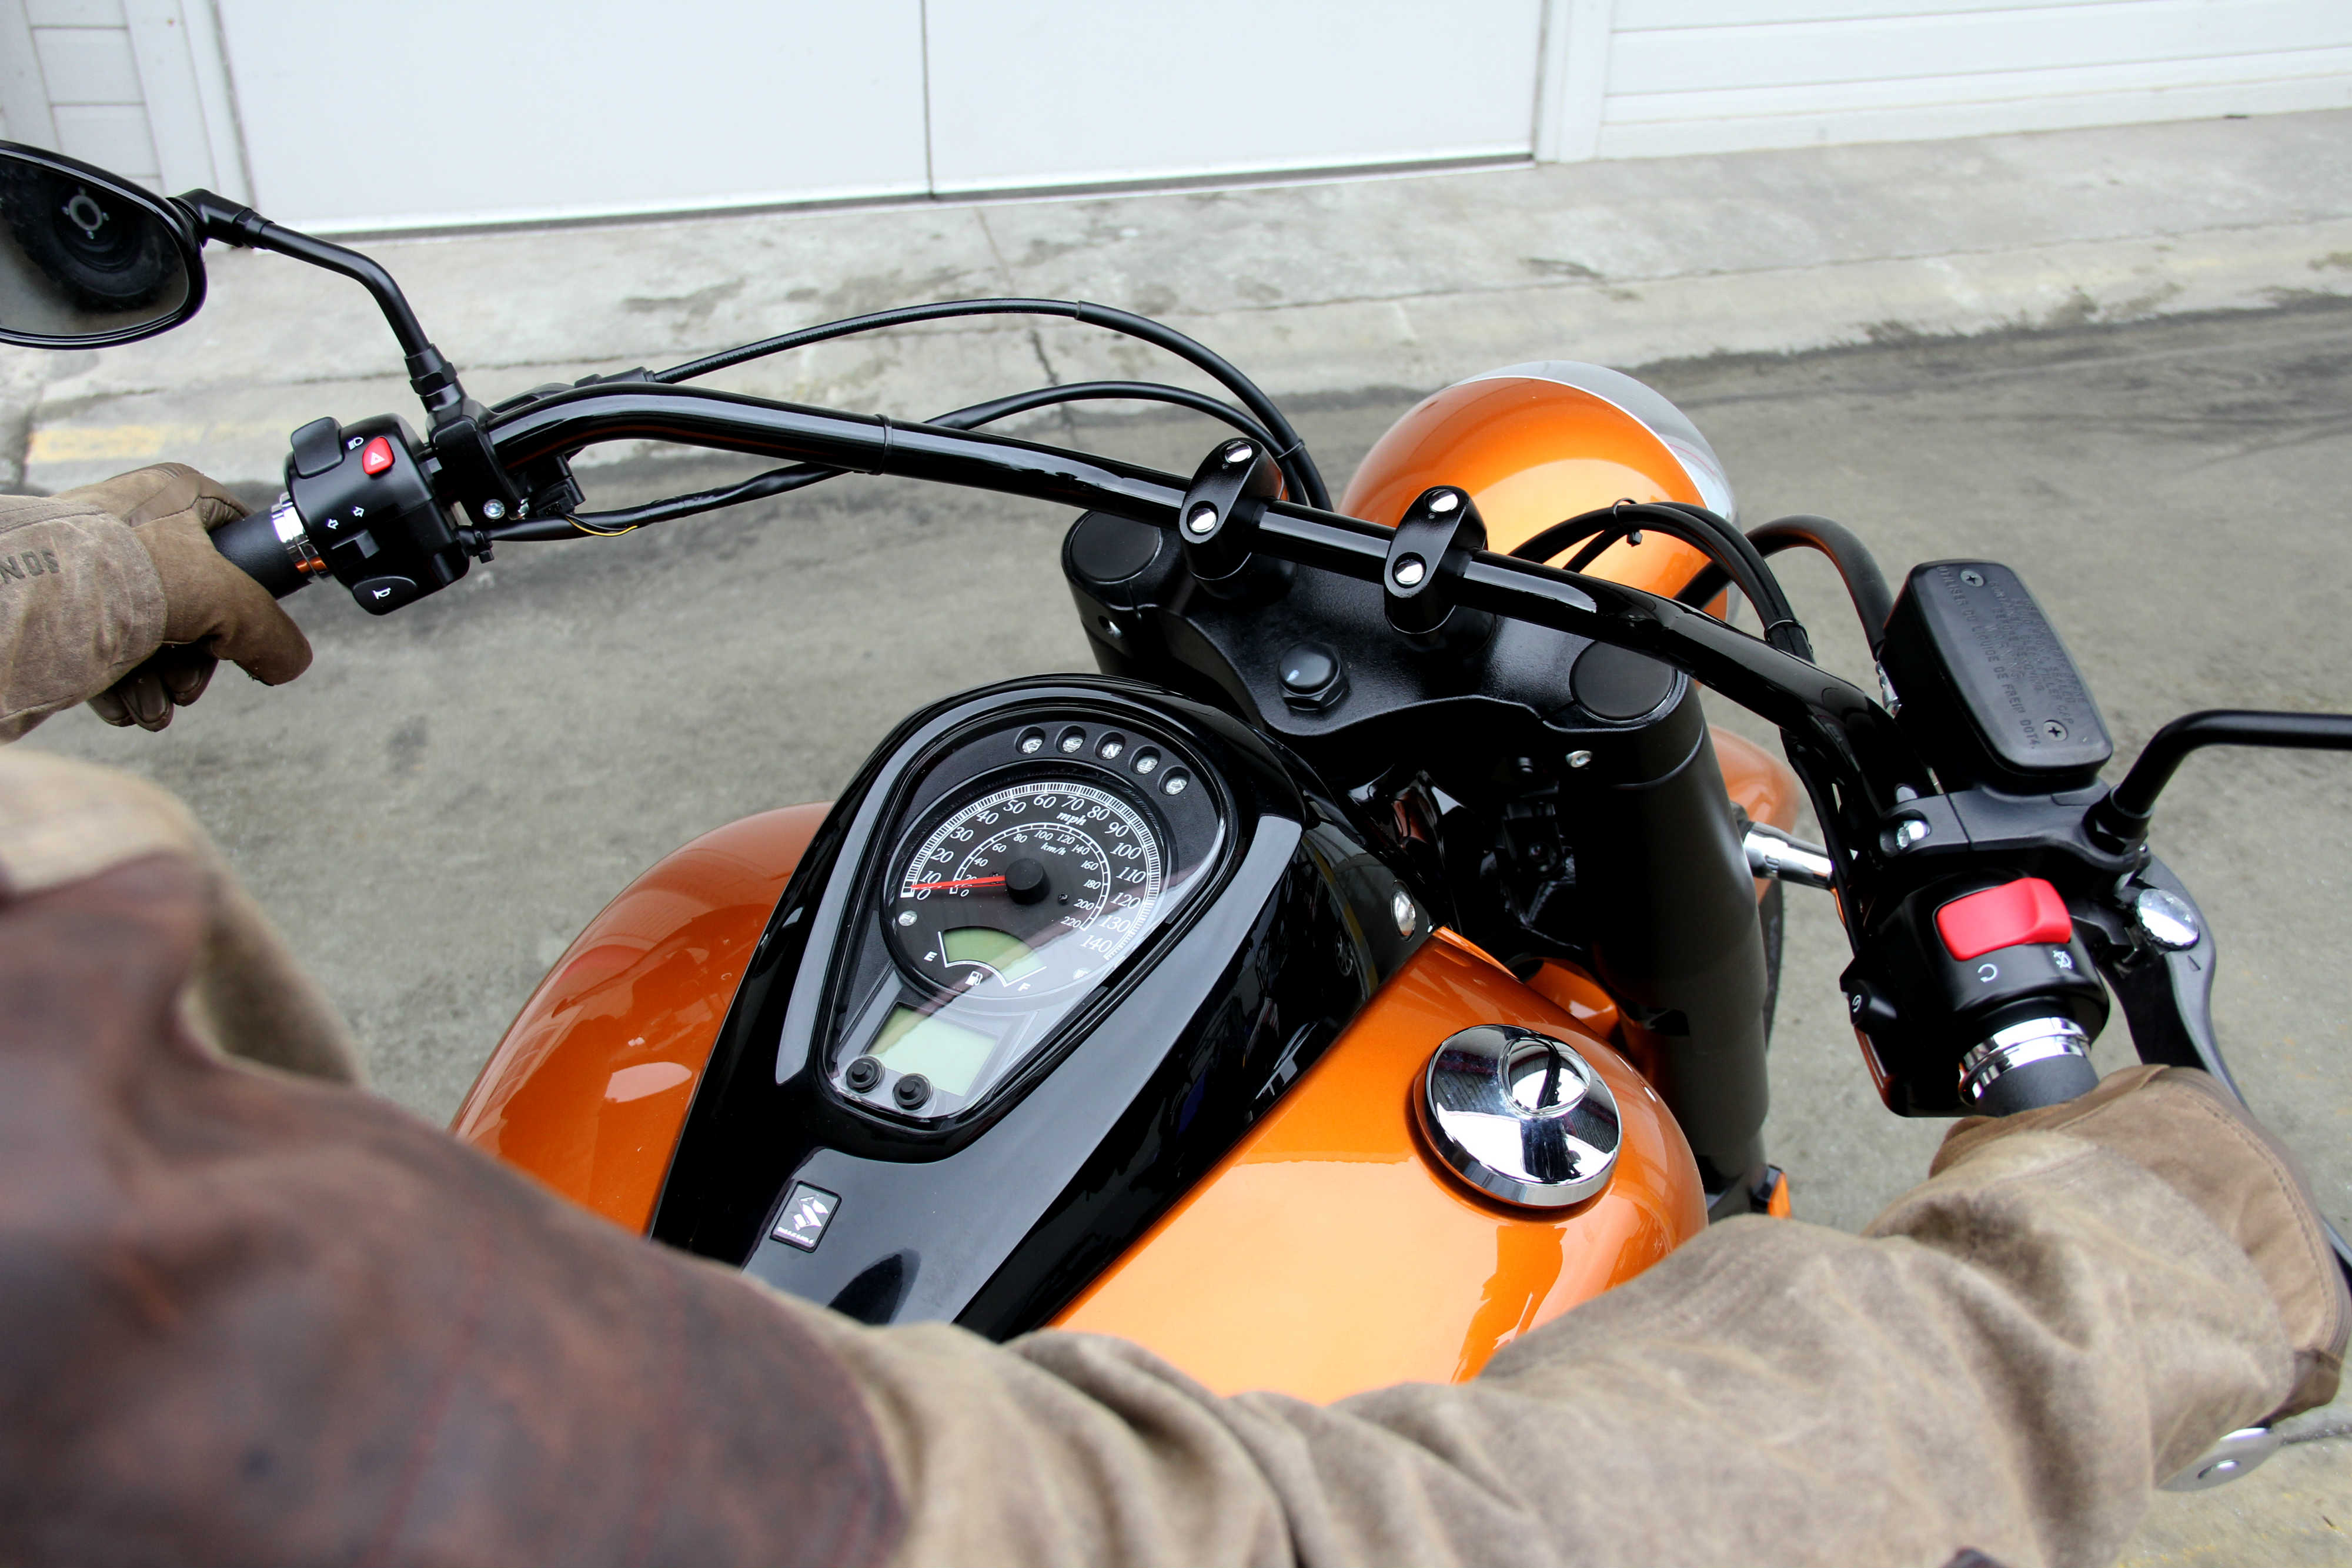

Whether it's stock or aftermarket handlebars you can often adjust the them by loosening the bars clamps/risers and rotating the handle bars forward (away from you) or back (closer to you). Rotating the bars back towards your body can help with providing better control of the bike if the stock position feels too far away. It can also make for a more comfortable ride and help take pressure off places like the shoulders or wrists.
The key thing to remember when adjusting your handlebars is once you have the desired position, make sure you turn the bars all the way to the stops on each side to ensure free and easy movement without the ends of the bars or hand controls hitting the gas tank or the cables getting hung up. Also be sure that the throttle has precise movement and snaps back to the closed position when you have the bars fully locked to the left or right.

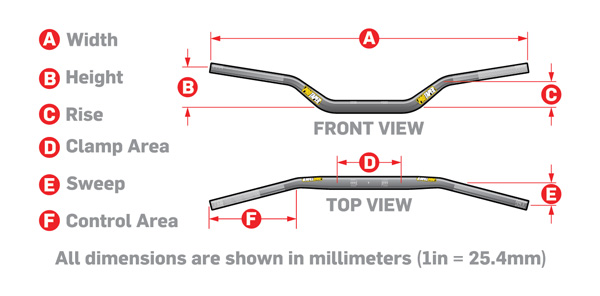
If after trying to adjust your handlebars you find that you still aren't happy you may need to swap out the handle bars for something else. However, before you do so you need to identify what the issue is so you know what to look for in a new set of bars. You should familiarize yourself with these terms: height, sweep, overall width, center width, and bar end rise.
The height is usually measured as the tallest portion of the handle bar. The sweep or wrist angle is the angle the bar ends sit at in relation to the bar center. The overall width is the length from bar end to bar end. Center width is the length of the center section before the bars bend, rise, or pullback-this is the portion where the bar clamps secure the bars to the bike. Bar end rise is how high the bars ends sit in relation to the center section. Pull back is how much the bars sit back from the center section. If you want to know how to measure for new handlebars check out the article we wrote about the topic several years ago. The article focuses on measuring handlebars for a Harley but the principles can be applied towards most motorcycles.
Controls
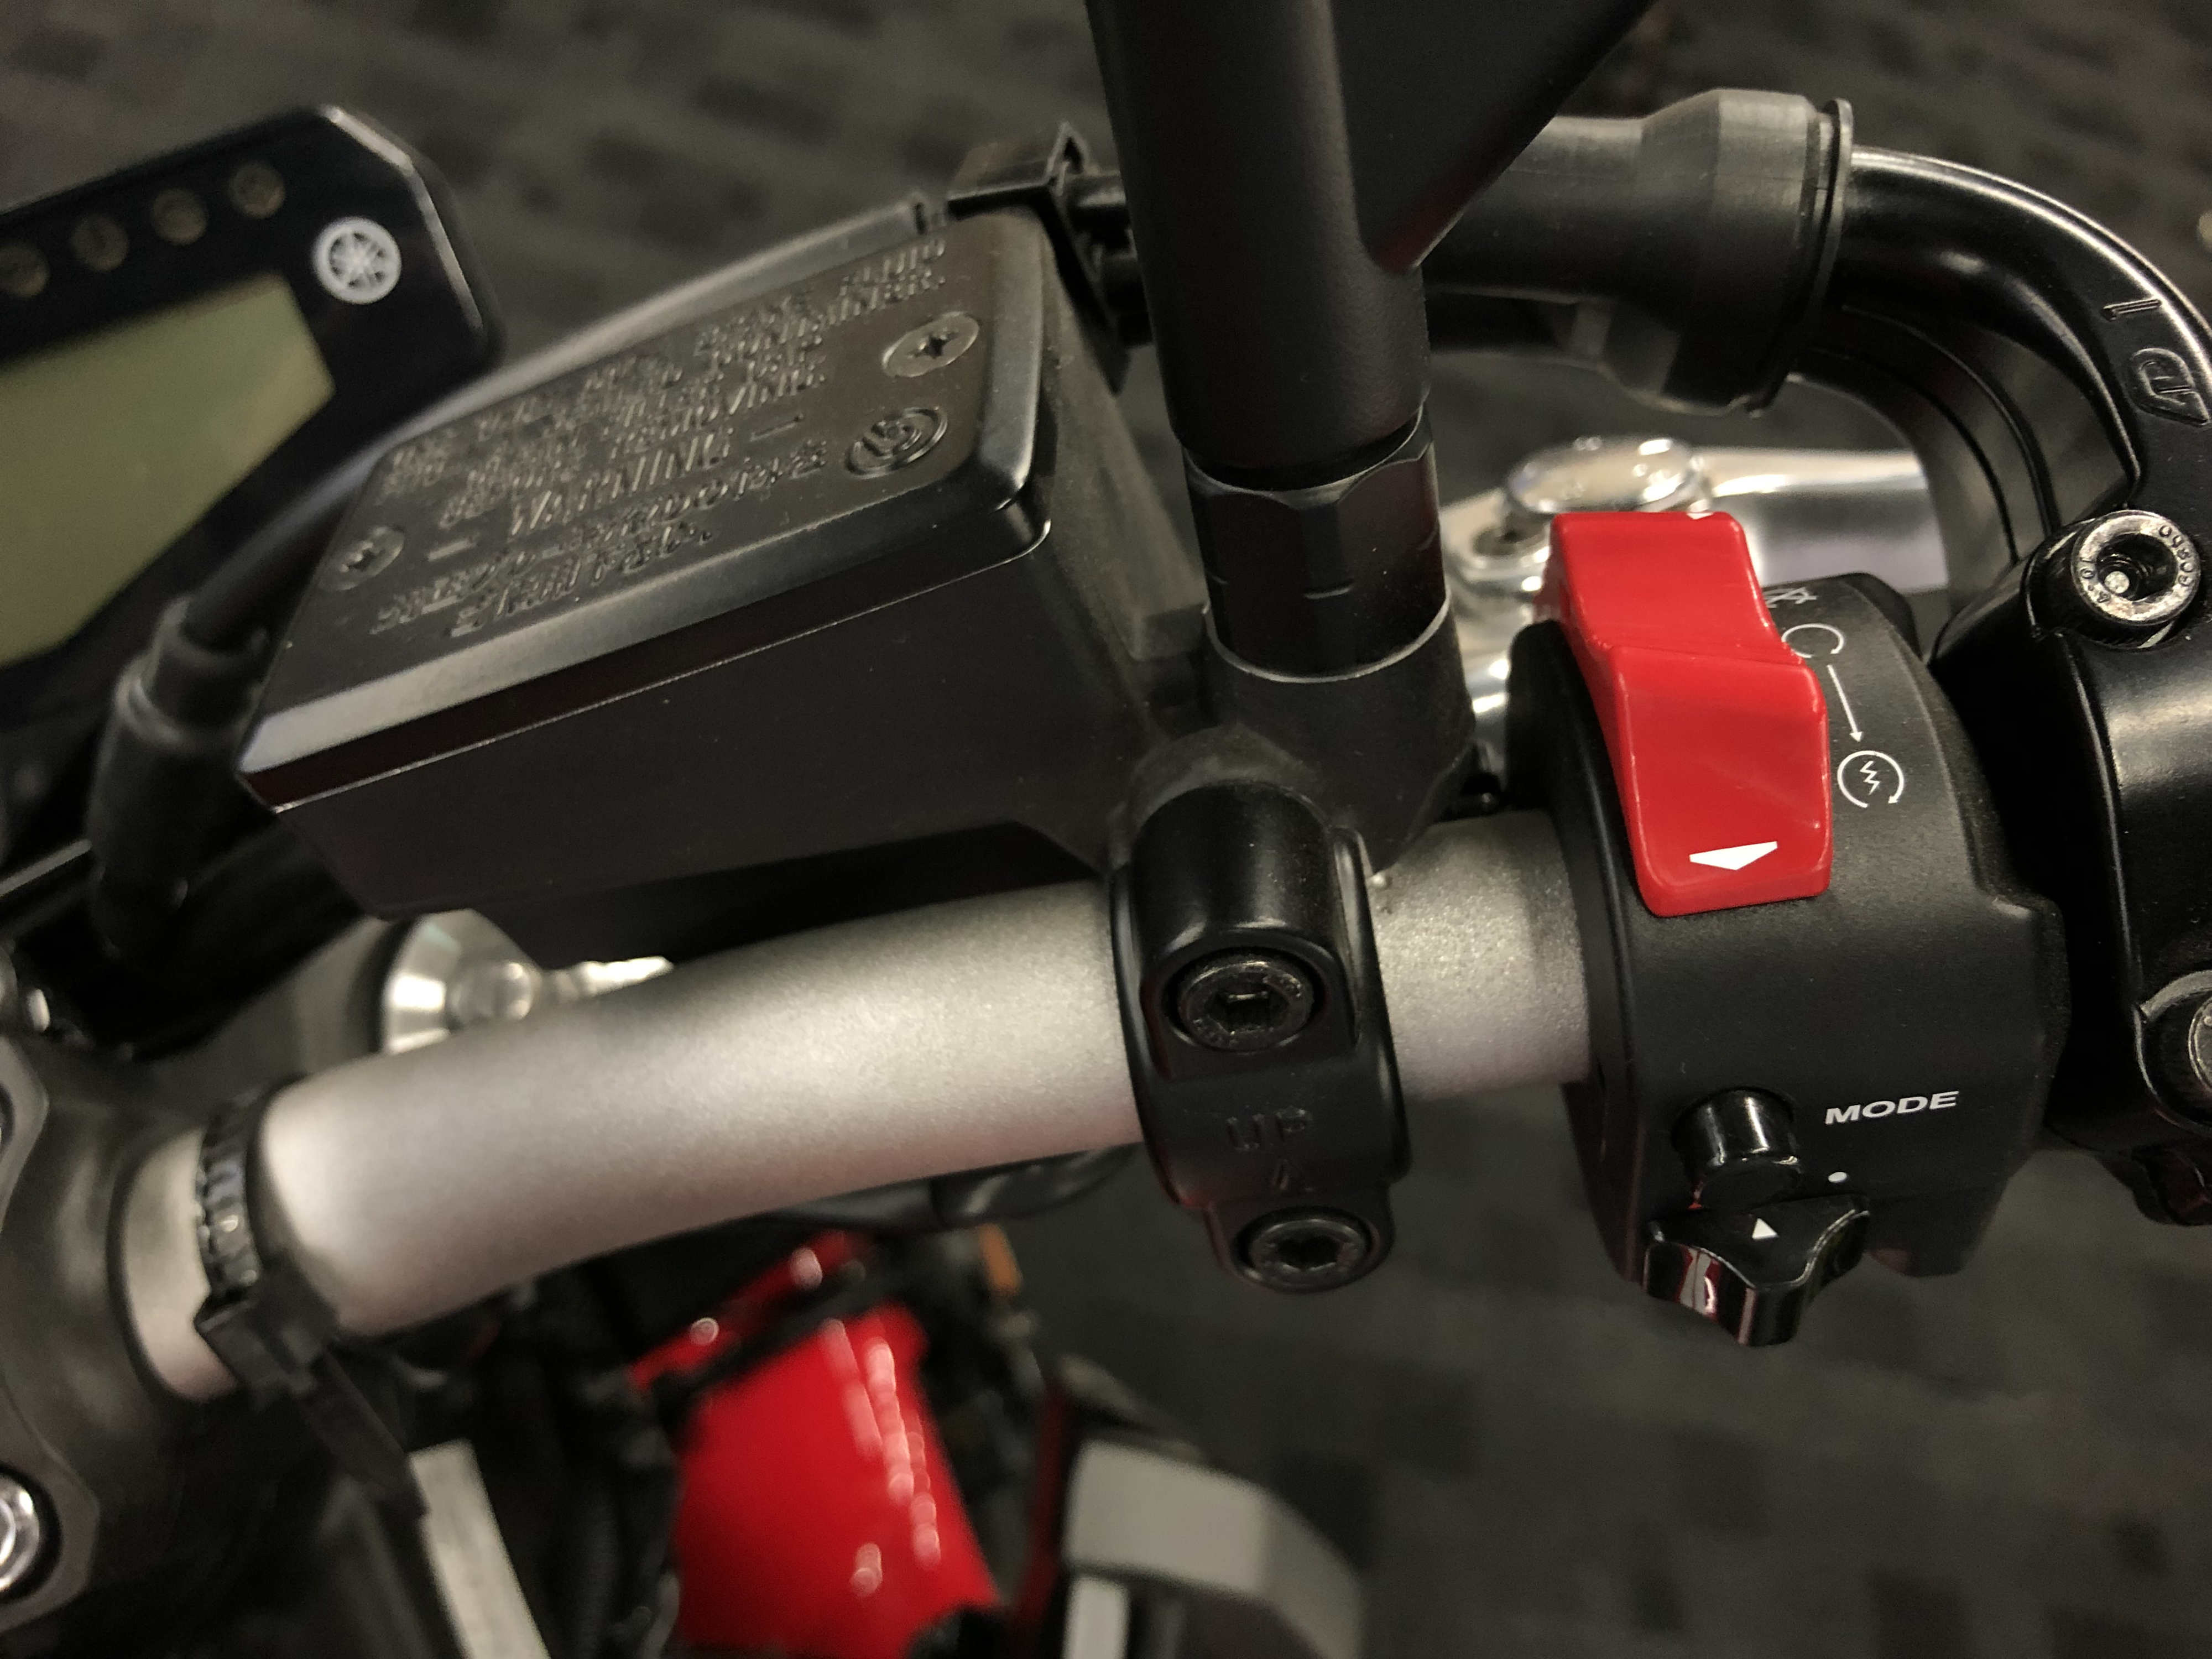
One of the things you may run into when adjusting your stock bars is that once you get them set into a new position the hand controls may feel differently. On most motorcycles you can adjust the hand controls by simply loosening their respective clamp bolts and rotating the brake and clutch levers into a more comfortable position. Aside from rotating the levers up or down you may be able to move the levers further in or out along the handlebar as well.
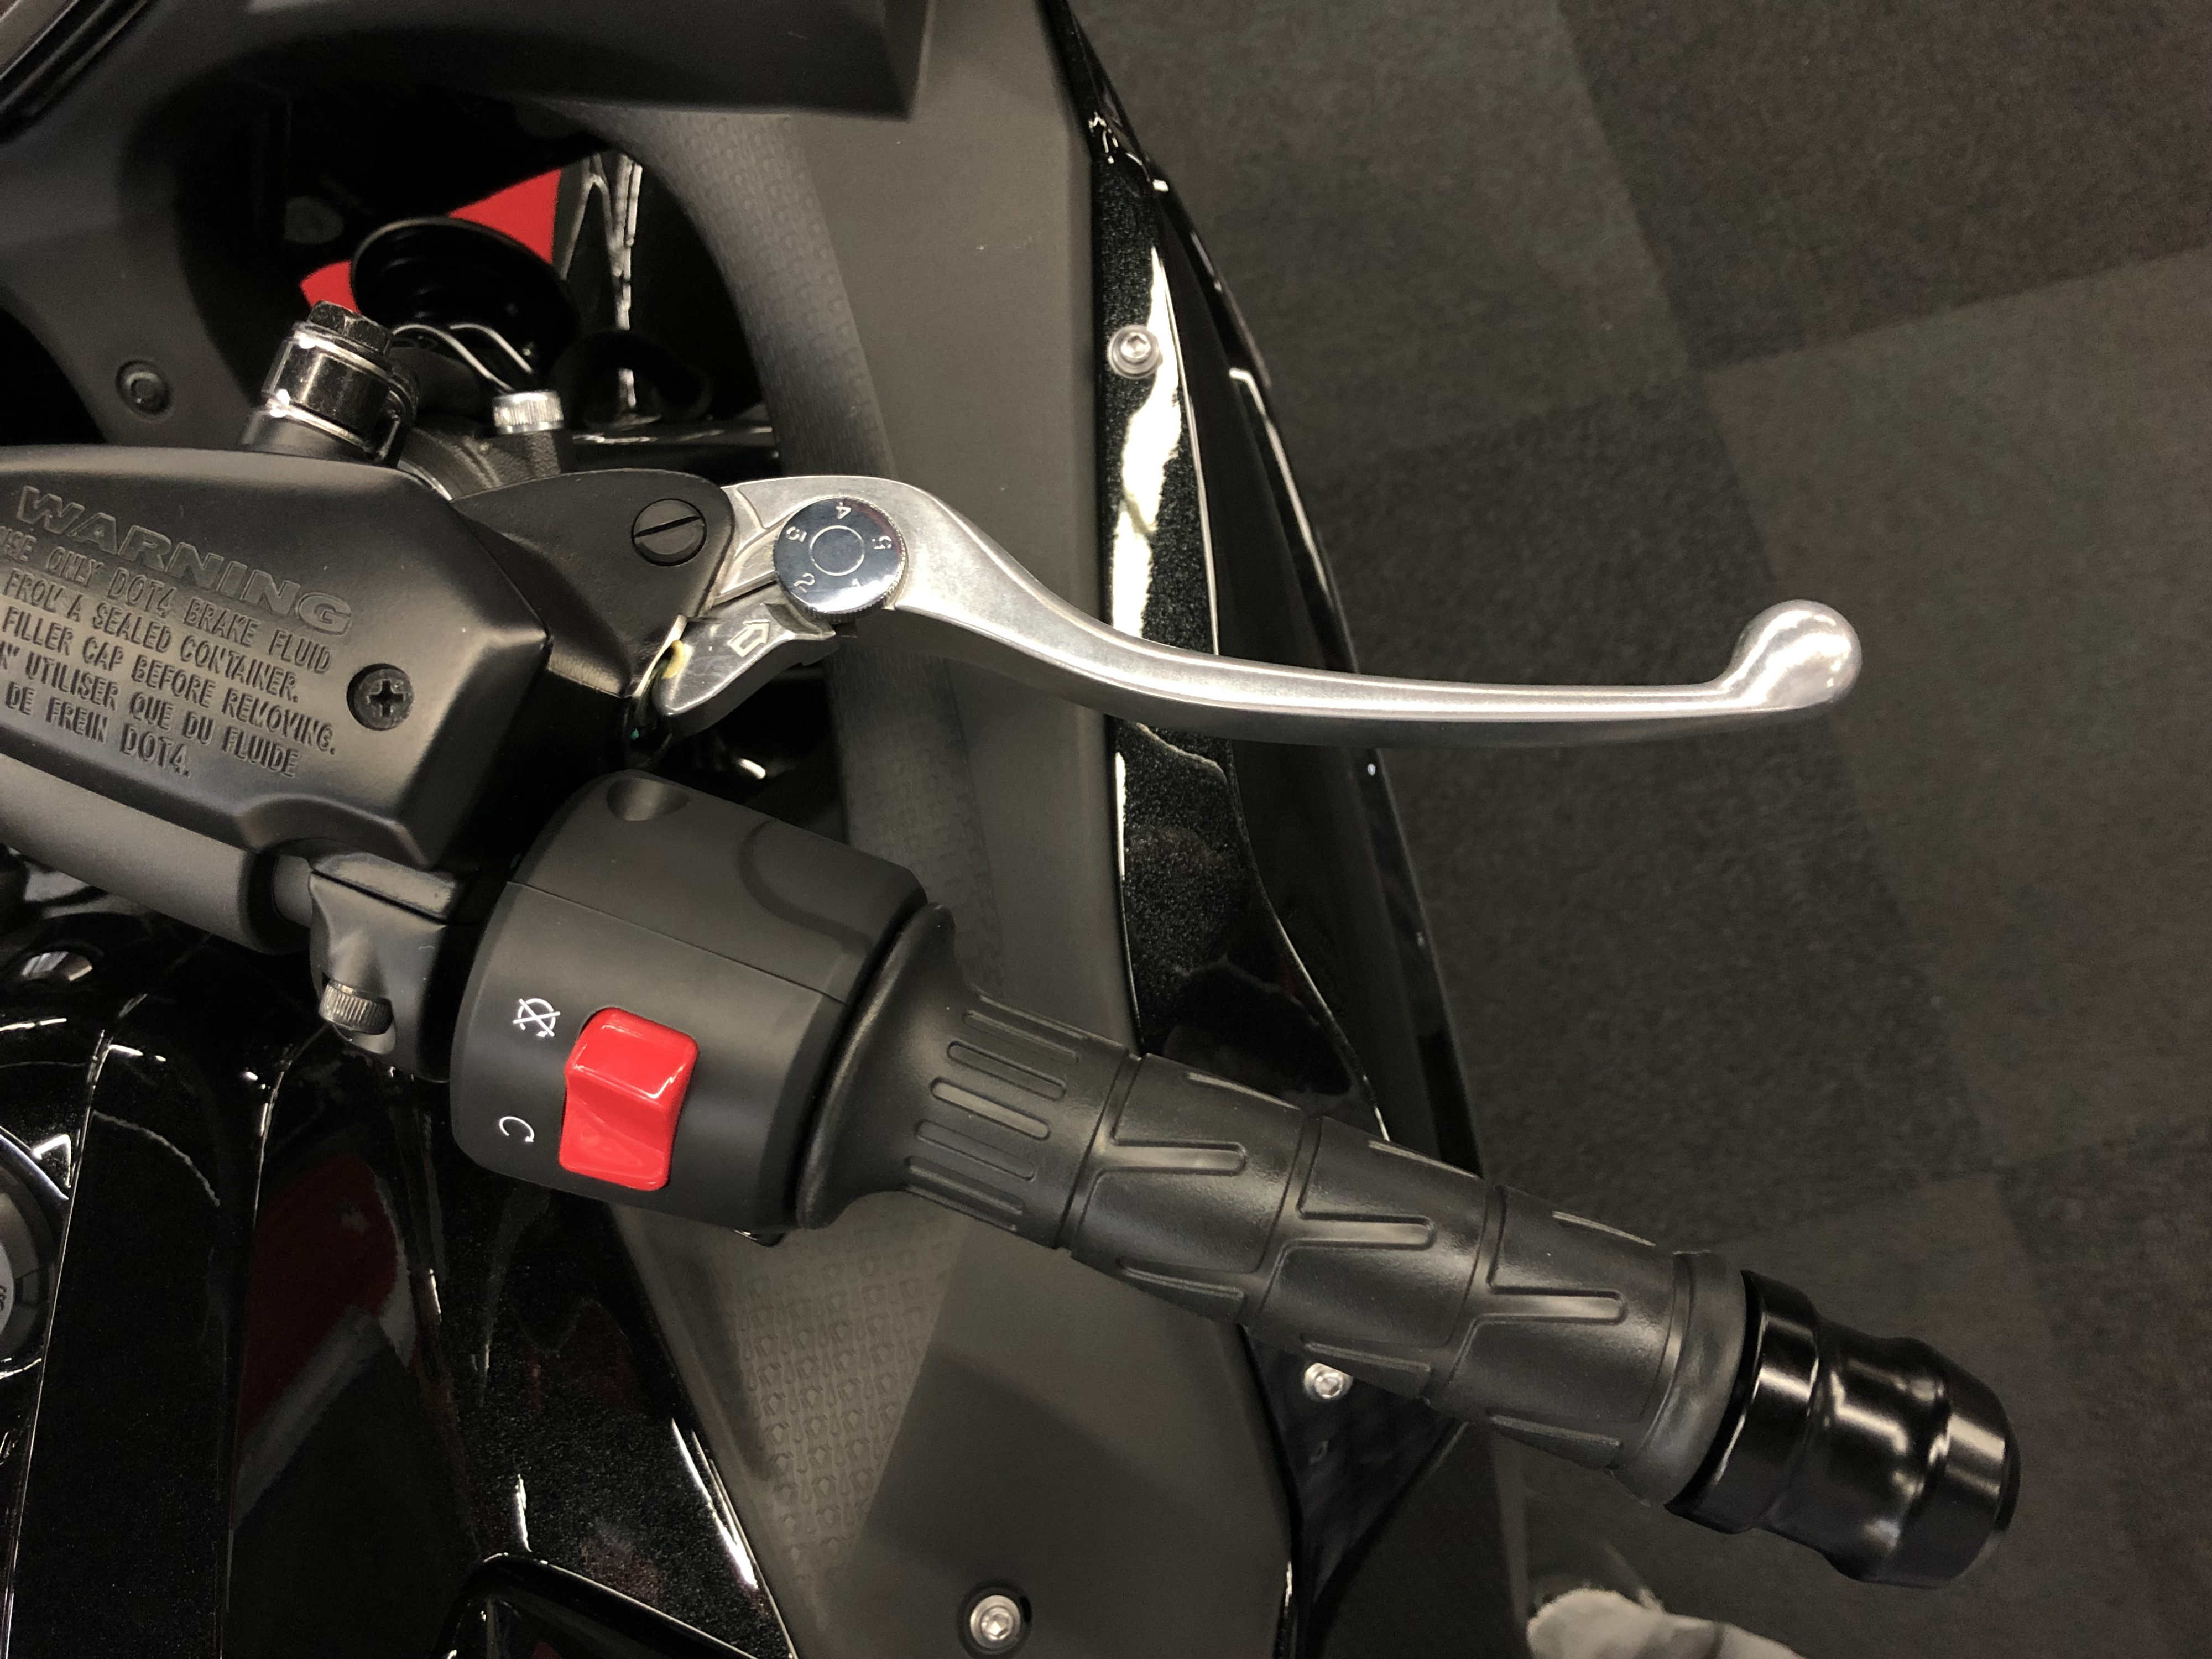
Some bikes even have lever reach adjusters which can move the lever closer to or further away from the bar. Adjusting lever reach is a good idea if you have smaller hands and have a hard time comfortably covering the levers. If your stock levers can't be adjusted you can always install a set of adjustable aftermarket levers.
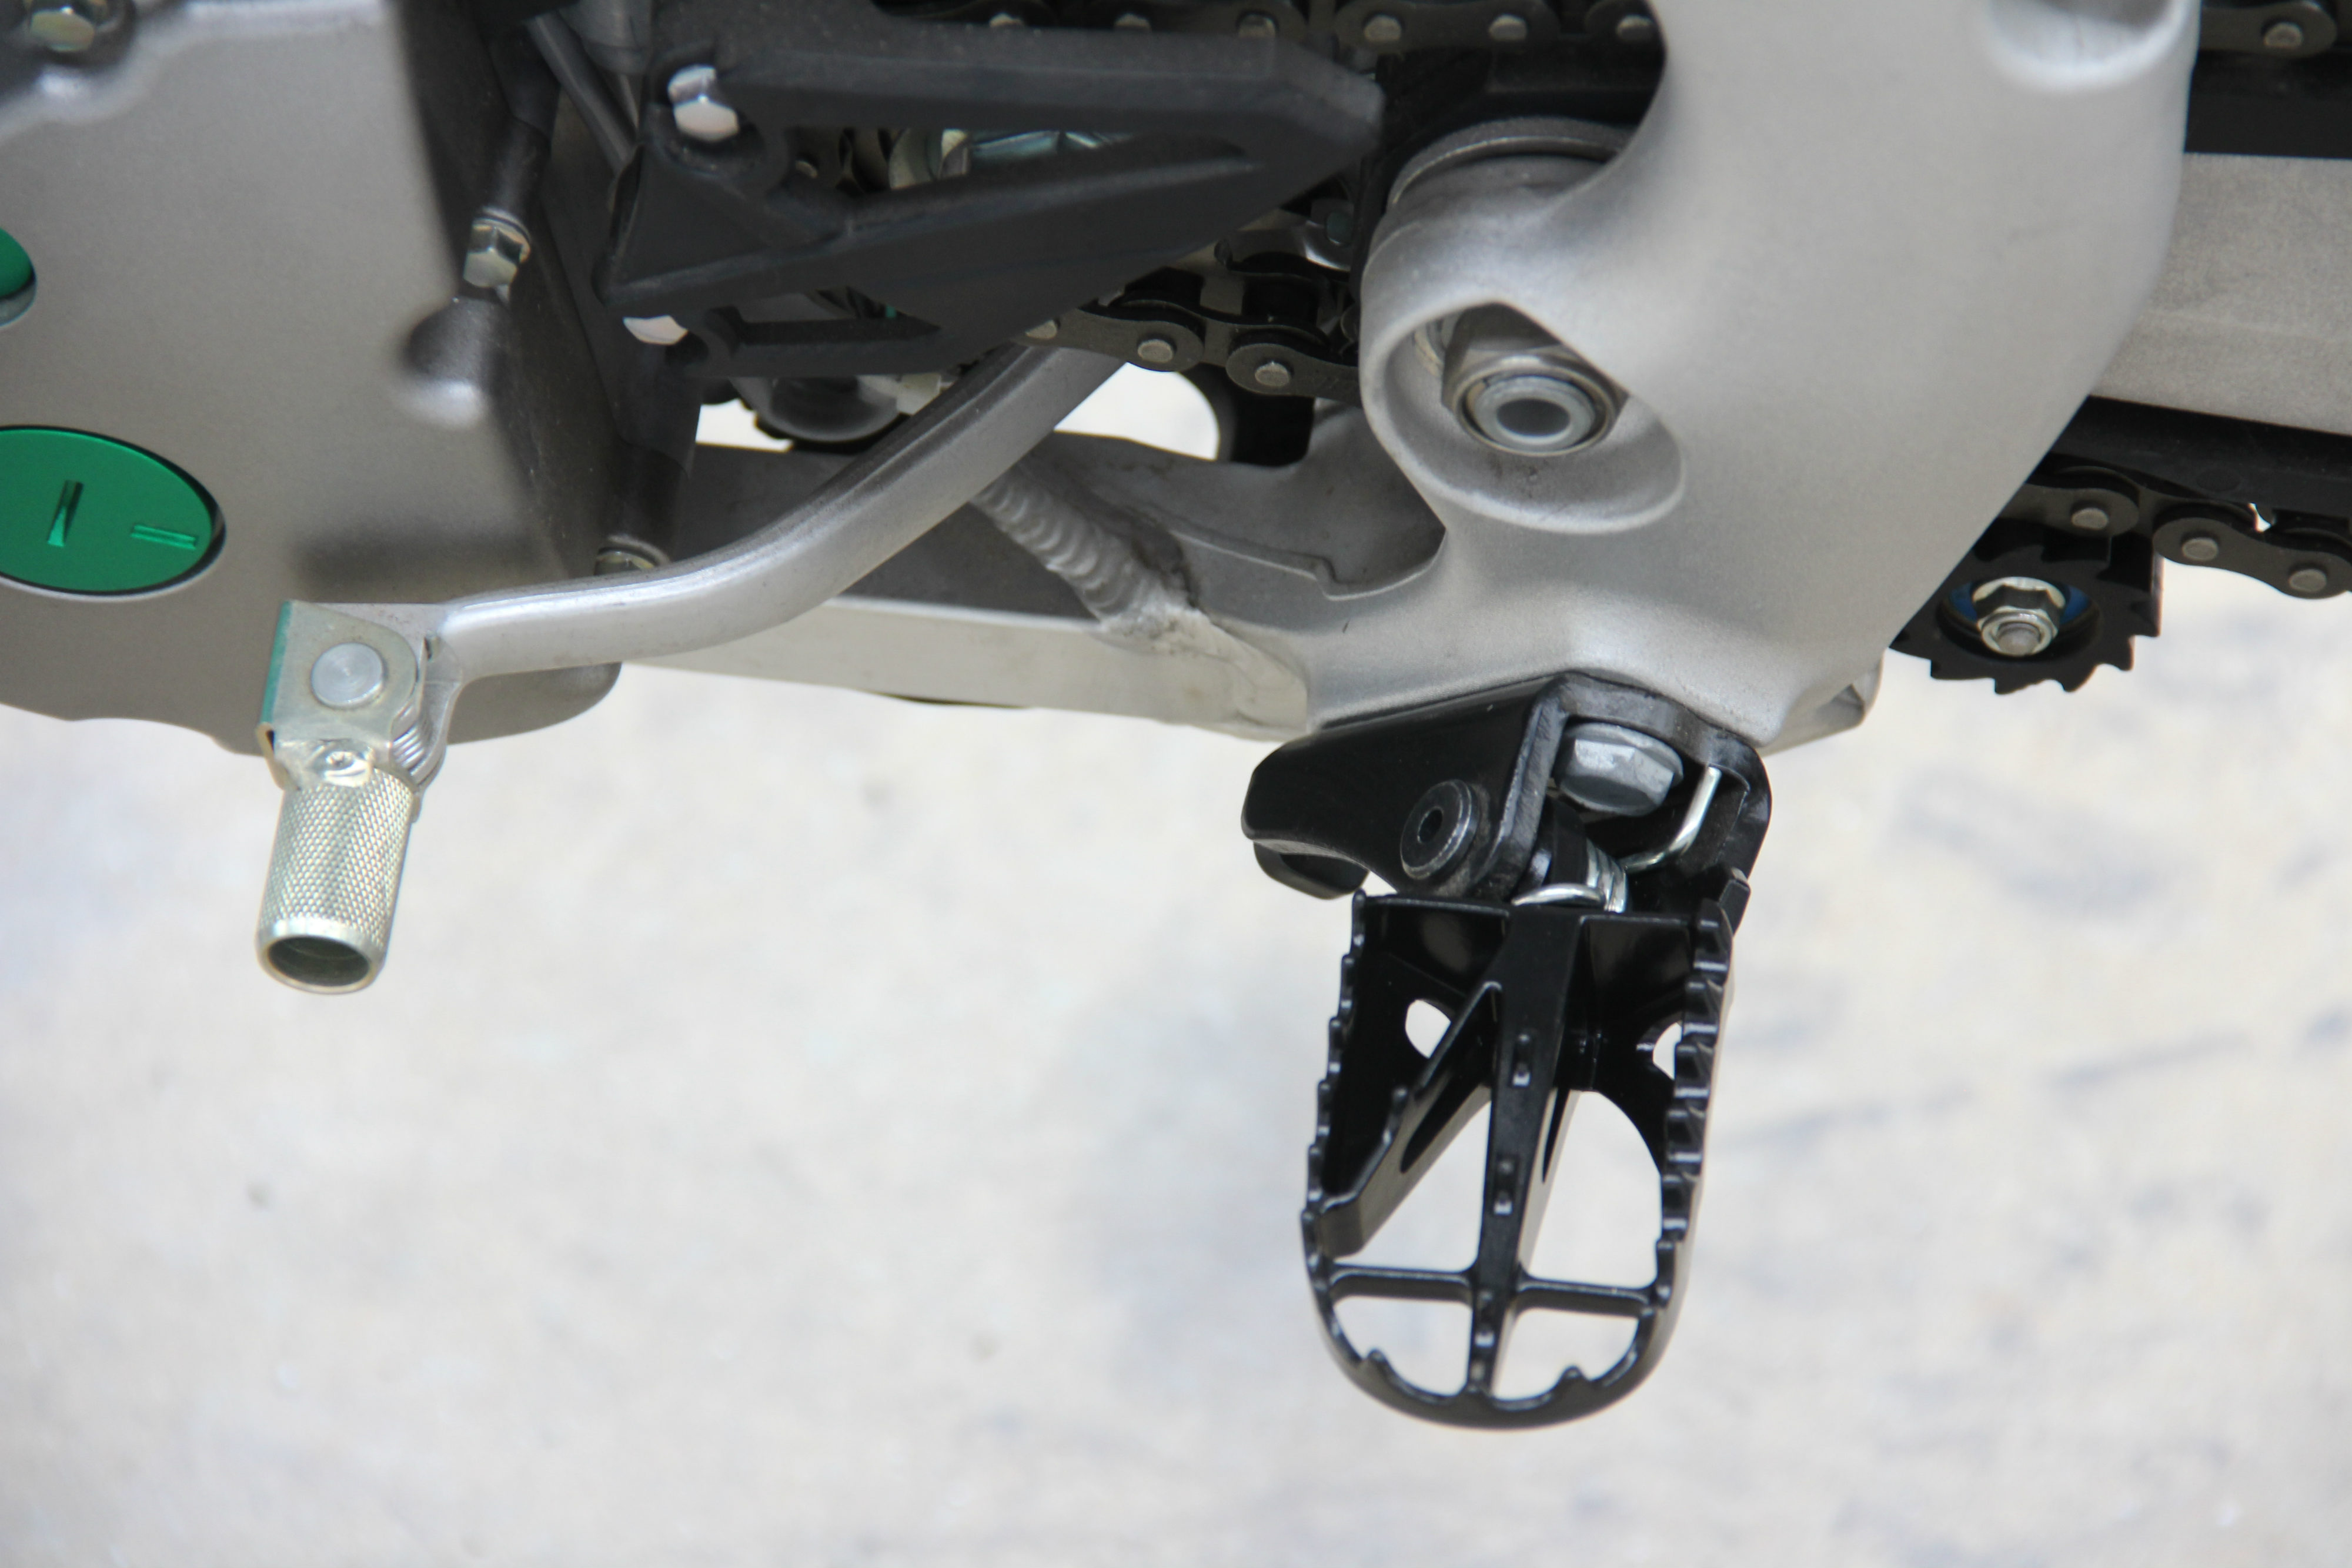
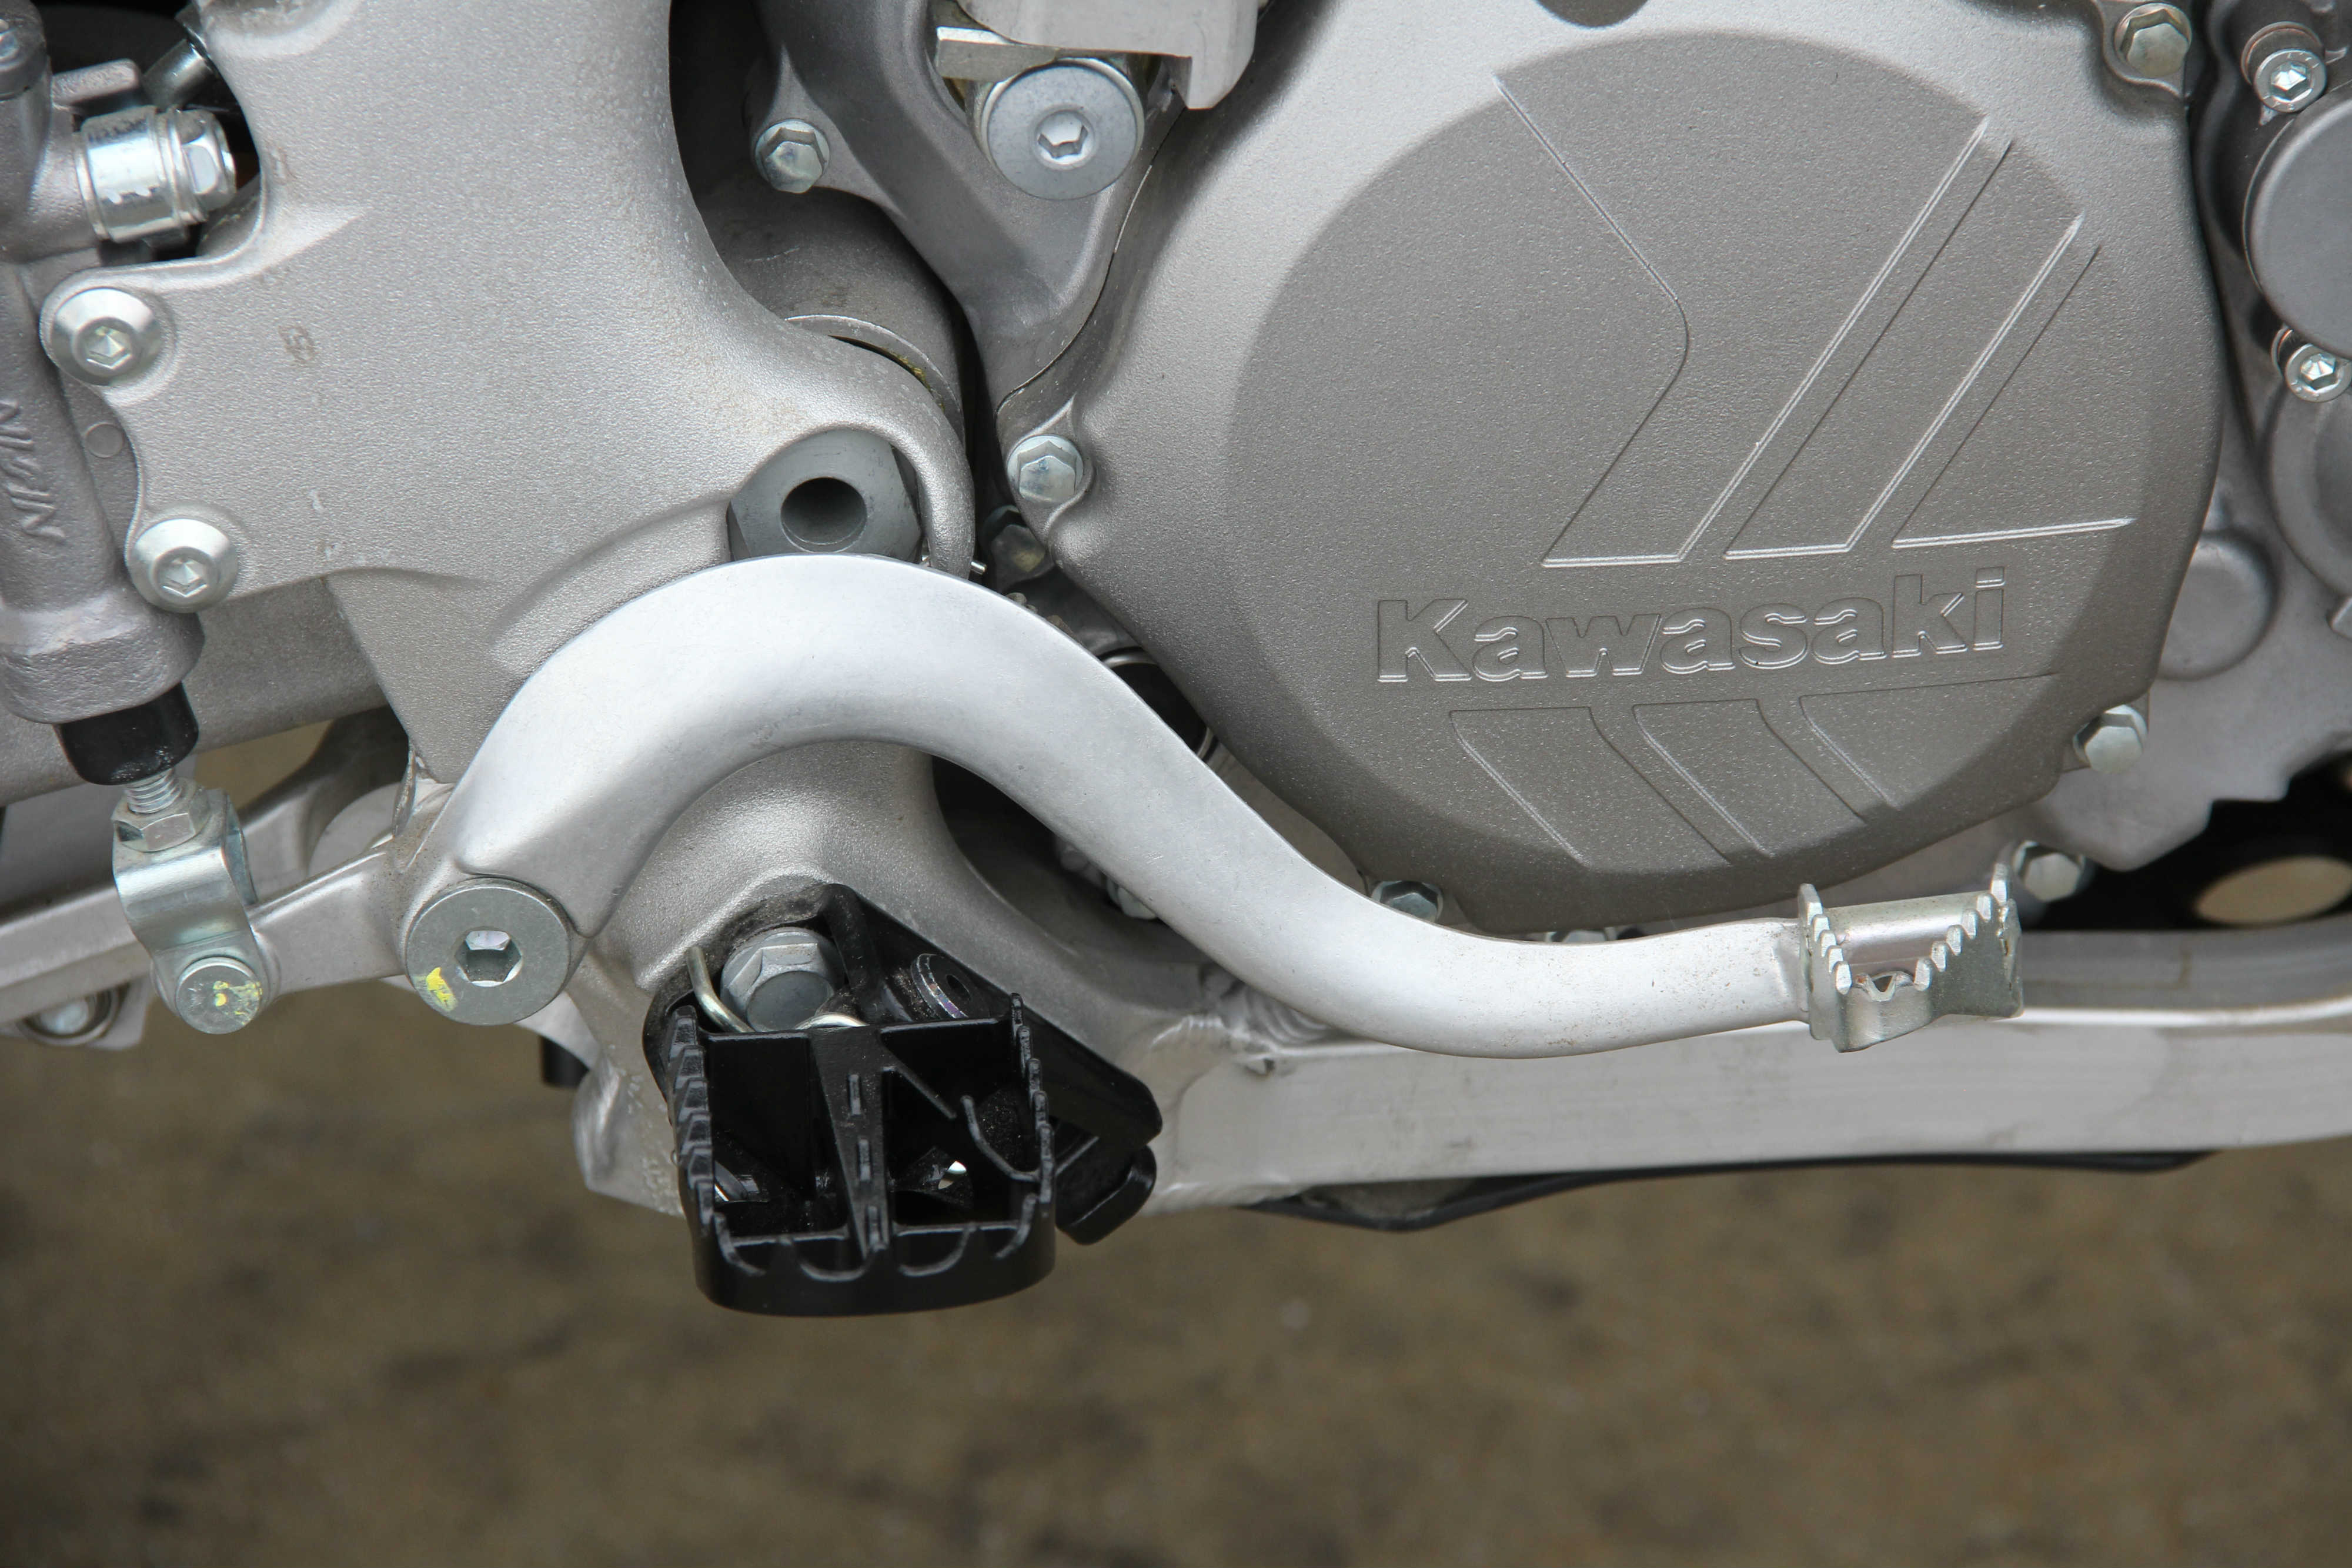
Motorcycle boots are an essential piece of safety equipment and everyone has a preference for their favorite riding boots. Some are extremely big and bulky, while others may be slimmer. Why does this matter? Because depending on your boots size you may notice that your shift and foot brake lever are difficult or awkward to manipulate. If your boots are really big and your shift lever is short you may have a tough time getting the toe into an easy position to upshift. On the other hand, if you have smaller feet and your foot brake pedal sticks way out you may have to move your foot more than you'd like to sufficiently reach the brake.


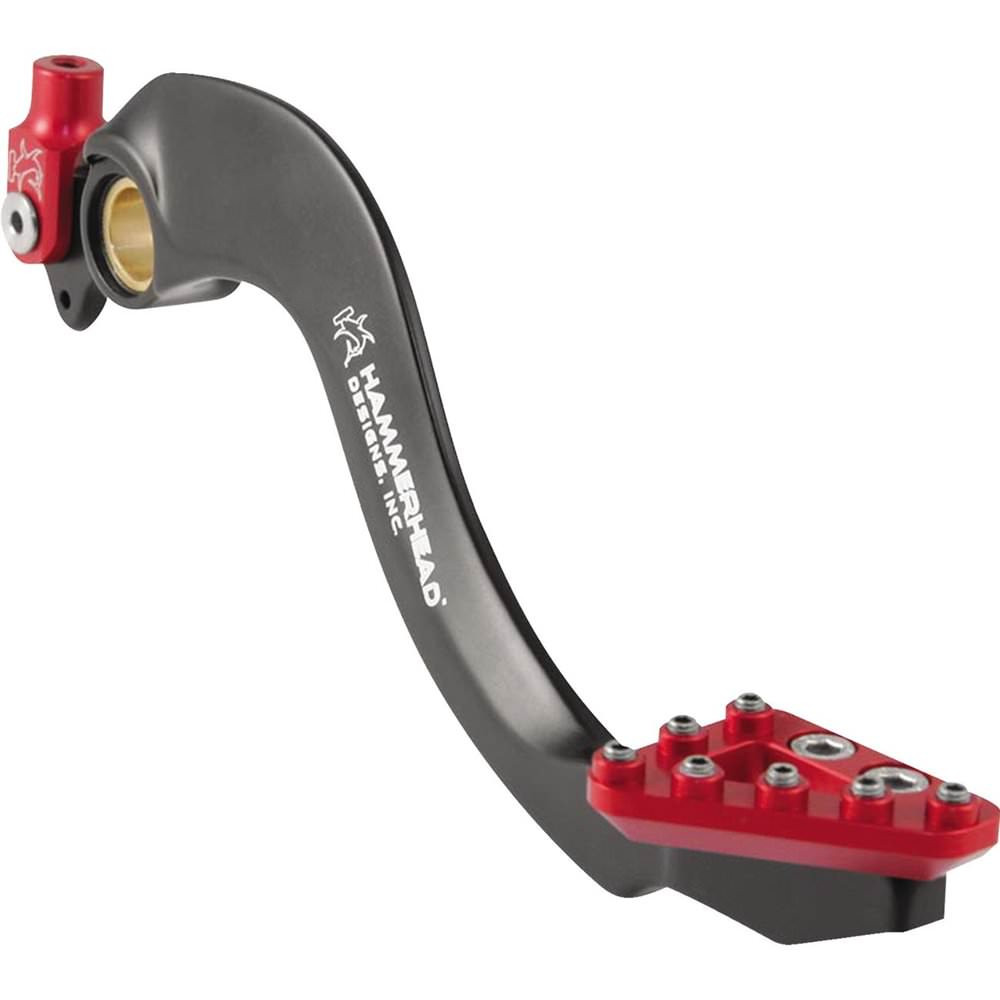
Depending on the motorcycle, you might be able to re-clock or reposition the angle of the shift lever in relation to the footpeg. For example on Harleys, the shift shaft and shift lever are splined so all you have to do is make a mark on the shaft and the lever then remove the lever from the shaft and re-clock the lever so that the shift peg is either sitting higher or lower according to what you want.
The brake lever is another issue. It's typically locked into one position. However, you can often find longer or shorter brake levers to accommodate your needs-same goes for the shift lever if re-clocking it doesn't work for you.
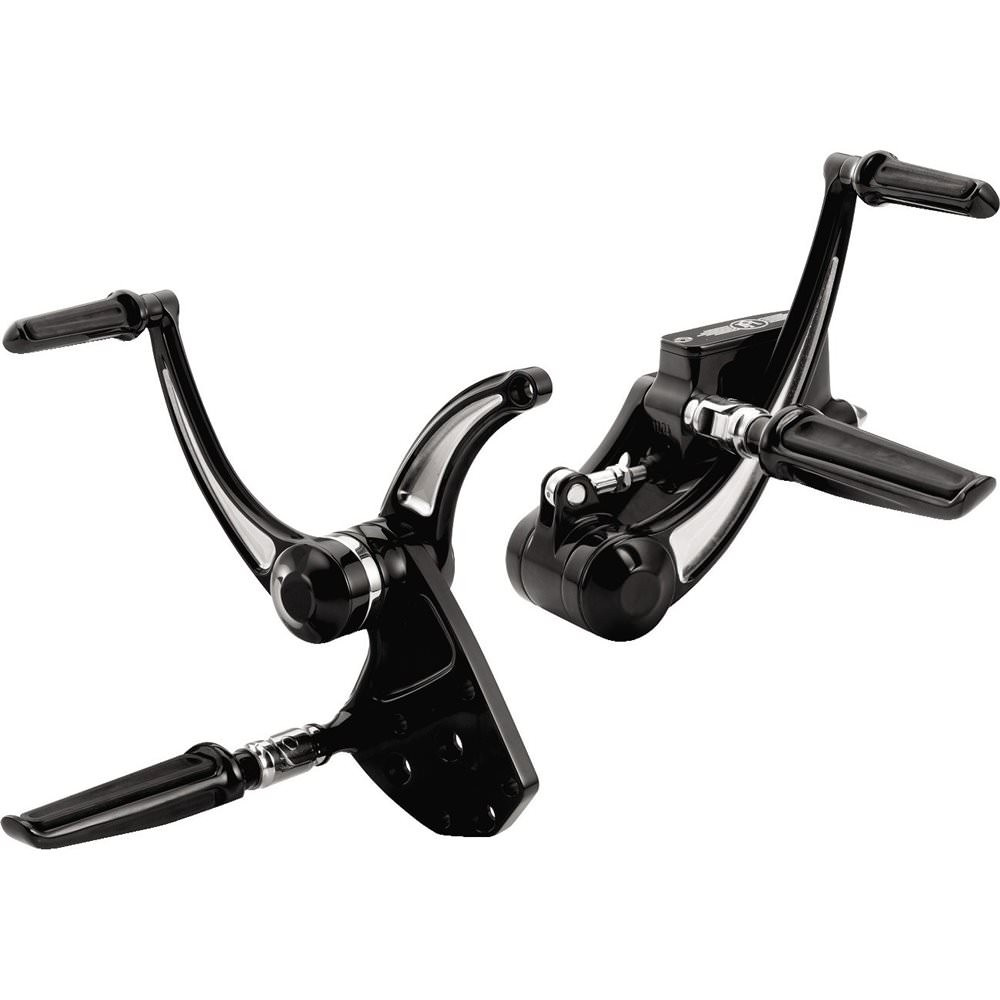
Forward controls are big in the cruiser world-especially Harleys. Ideal for riders with really long legs, there are plenty of companies that offer extended forward controls that will relocate the foot controls several inches ahead of their stock location to provide more room for the legs to stretch out.
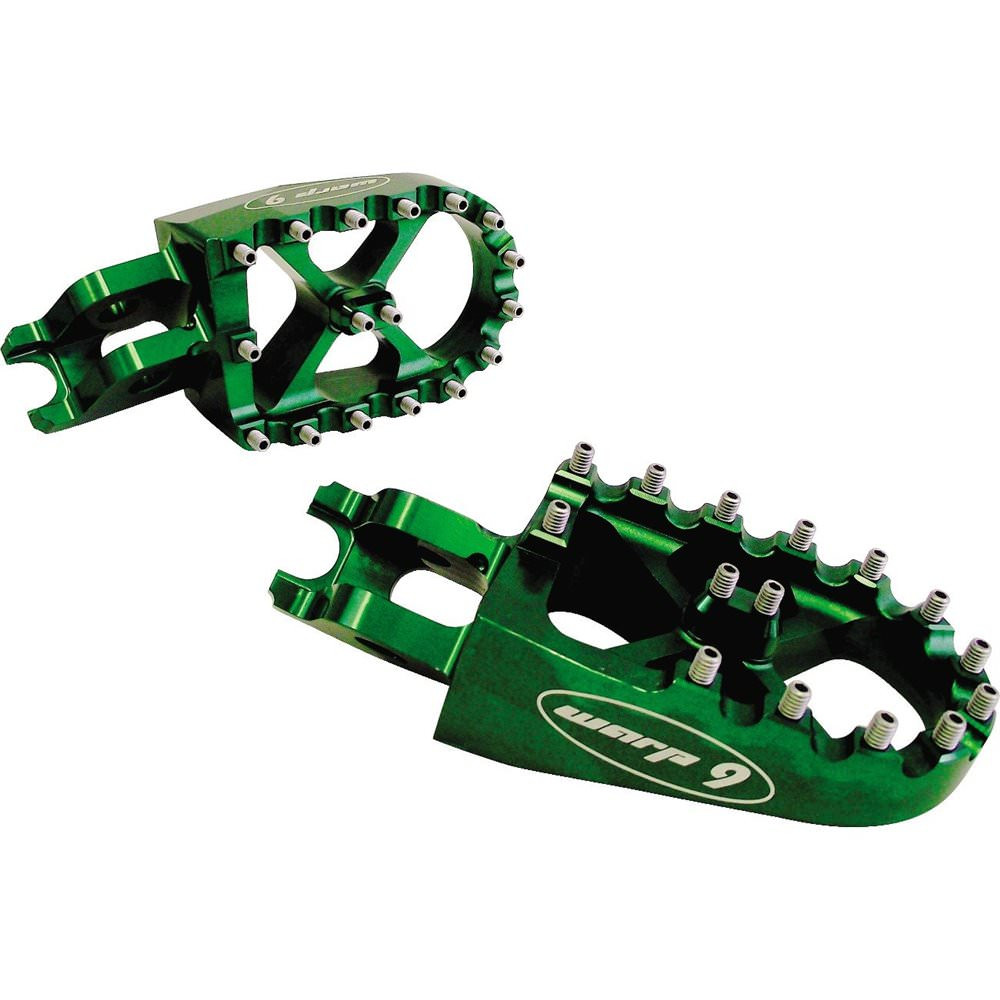
While most stock footpegs aren't adjustable you can find some replacement pegs that will allow you to adjust the height, pitch, or even raise the angle so that the pegs tilt up and inwards towards the bike. If you own a dirt bike you may want wider pegs like the Warp 9 Oversized Pegs to provide a more stable platform when standing. Cruiser riders may want to add highway pegs to really stretch out the legs on long journeys.
Seating Positioning/Seat Height
There's much more to your motorcycle seat than how comfortable it is. The seat is the center point of the ergonomics of your motorcycle. By addressing your seat you can turn a bike that feels too compact at the arms and legs into a much more enjoyable motorcycle. Just like most other components mentioned in this article, seats and more specifically the seating area will vary from motorcycle to motorcycle. For example, dirt bikes and dual sports will have long, flat seats so that rider can easily slide forward or backward to shift their weight when handling certain terrain or obstacles.
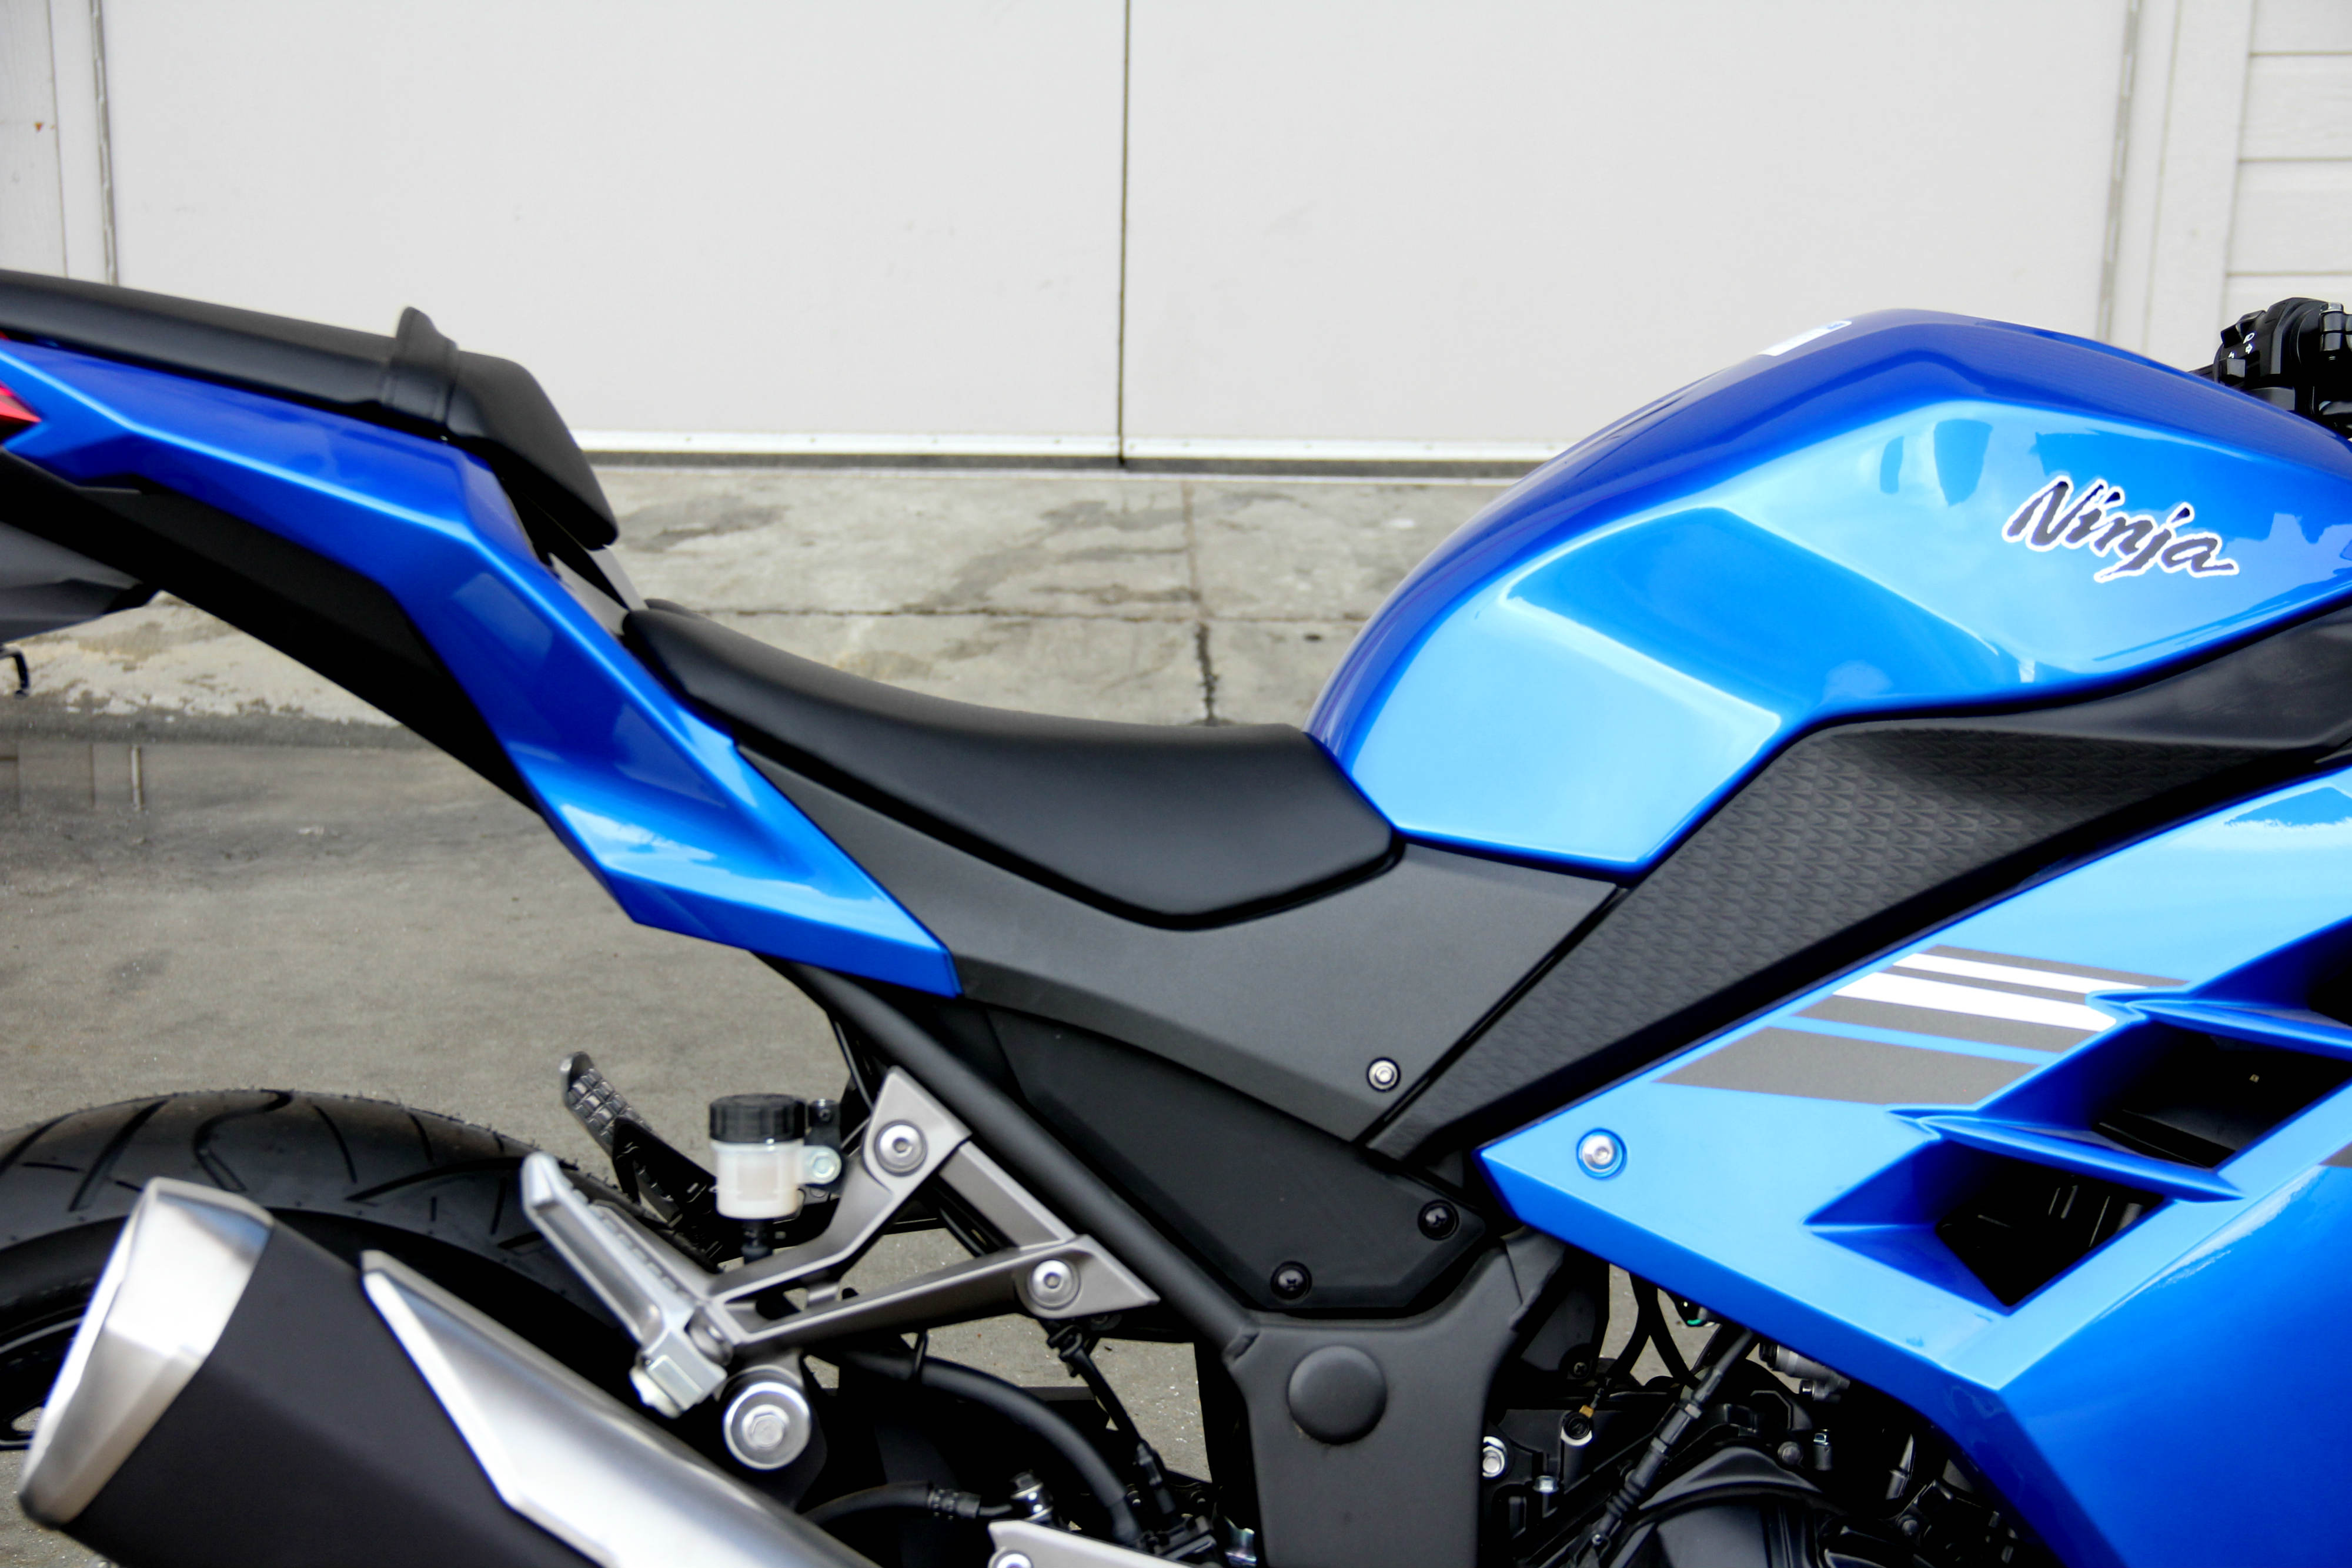
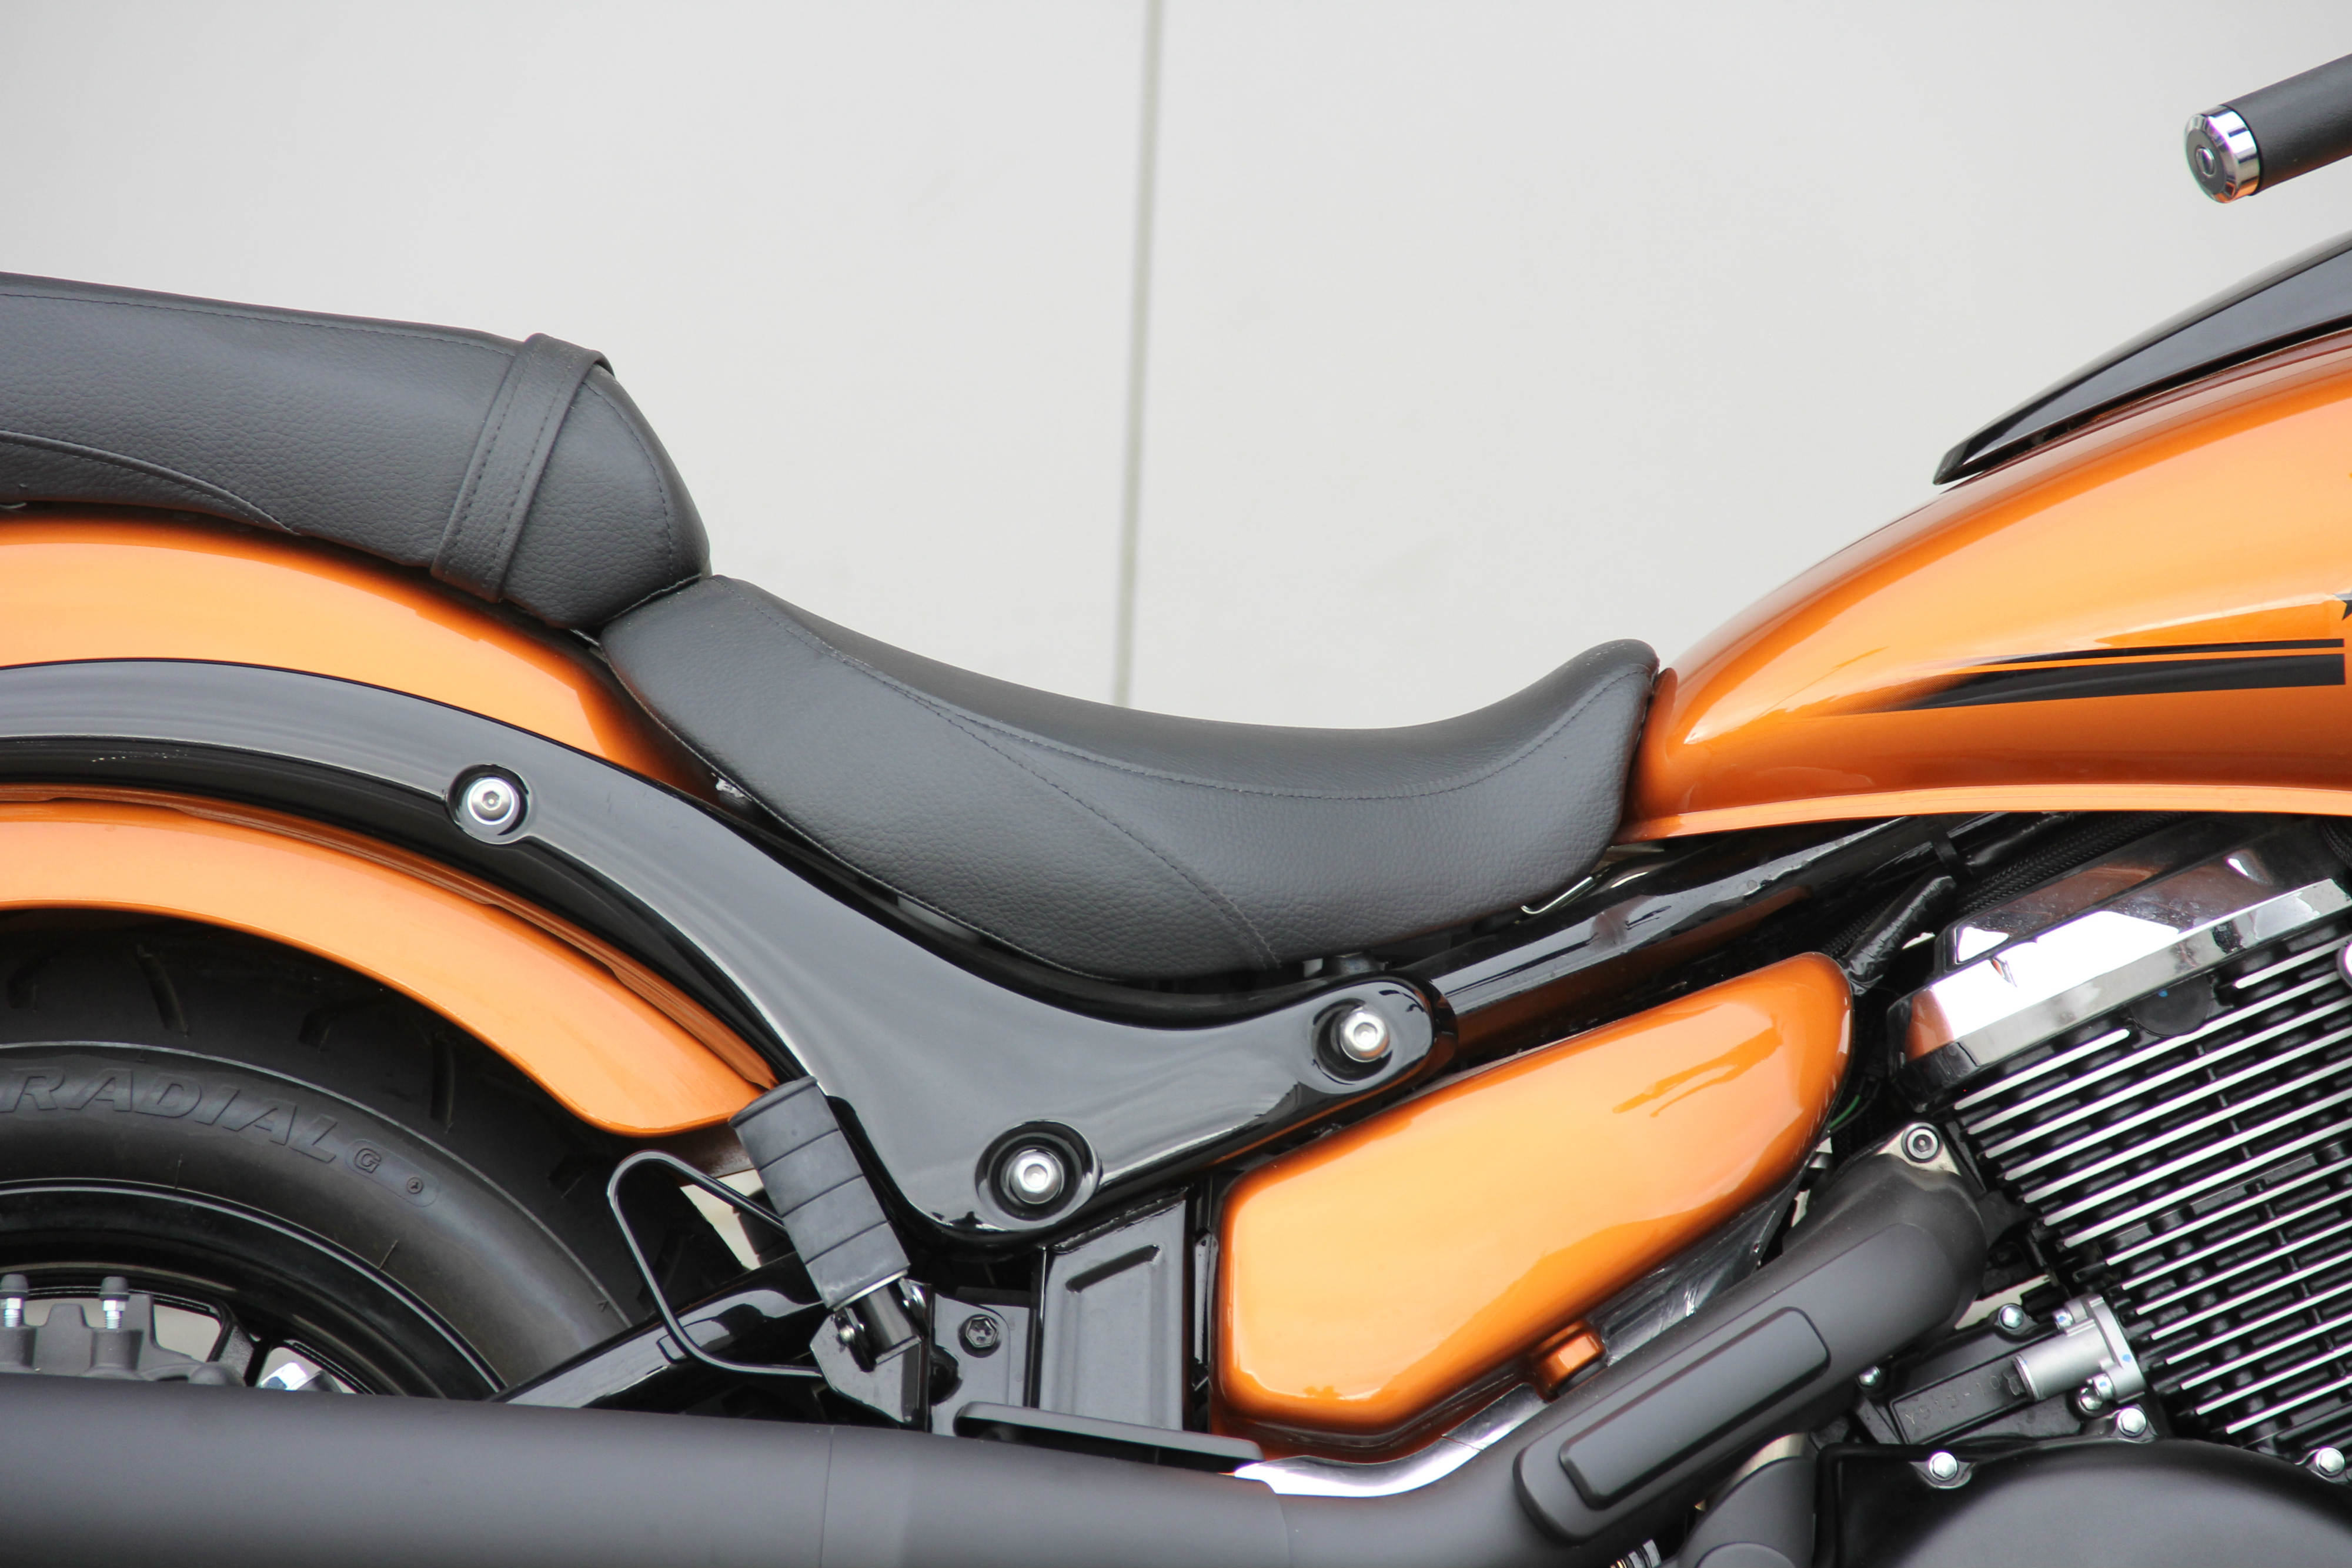
Sport bikes on the other hand will have a well-defined seat pocket that is highlighted by a compact seat nestled into the bottom to keep the rider's rear tucked into the bike under hard acceleration and aggressive canyon carving. ADV bikes have somewhat flat seats but will have a slight pocket for long highway comfort. Cruisers will have a seat pocket to provide back support for long distance travel and to give the rider that "in the bike feel"
So what can be done to your seat if you want to change up the ergonomics of your motorcycle? On some motorcycles the seat can be slightly adjusted higher/lower or forward/back. Otherwise you'll have to look into other options such as modifying your stock seat or searching the aftermarket.
If you're a DIYer and your seat is too tall or too short you may want to consider removing the cover and customizing the stock seat foam by either adding more foam or cutting foam out. For dirt bike riders companies like Factory Effex and Seat Concepts offer seat foam kits to replace your stock foam. The kits are available with taller, shorter, wider or narrower foam.
Sport bikes typically have much less foam in the seating area than a cruiser so your your ability to trim down the foam on a sport bike may be limited. An electric turkey carving knife is great for reshaping the stock seat foam. If the motorcycle is a little too tall and you can't stand flat footed at stops you can try narrowing the sides or taking a bit off the top of the seating area. Or you can get some spray adhesive and add foam to the stock foam to help raise your seat height a tad. You may need to trim the excess cover material when your cutaway foam or get new, larger, cover material when adding foam. Your local upholstery shop can help you with foam and cover material as well as handle any mods you don't want to try doing yourself.

Purchasing a new seat may be the best option. Some aftermarket cruisers seats can change up the ergonomics quite a bit, moving your seating position by as much as 3". Mustang Seats offers a huge assortment of options such as the Mustang LowDown Touring Vintage Seat with Driver Backrest which moves the rider 1-1/2" lower than the stock seat height.
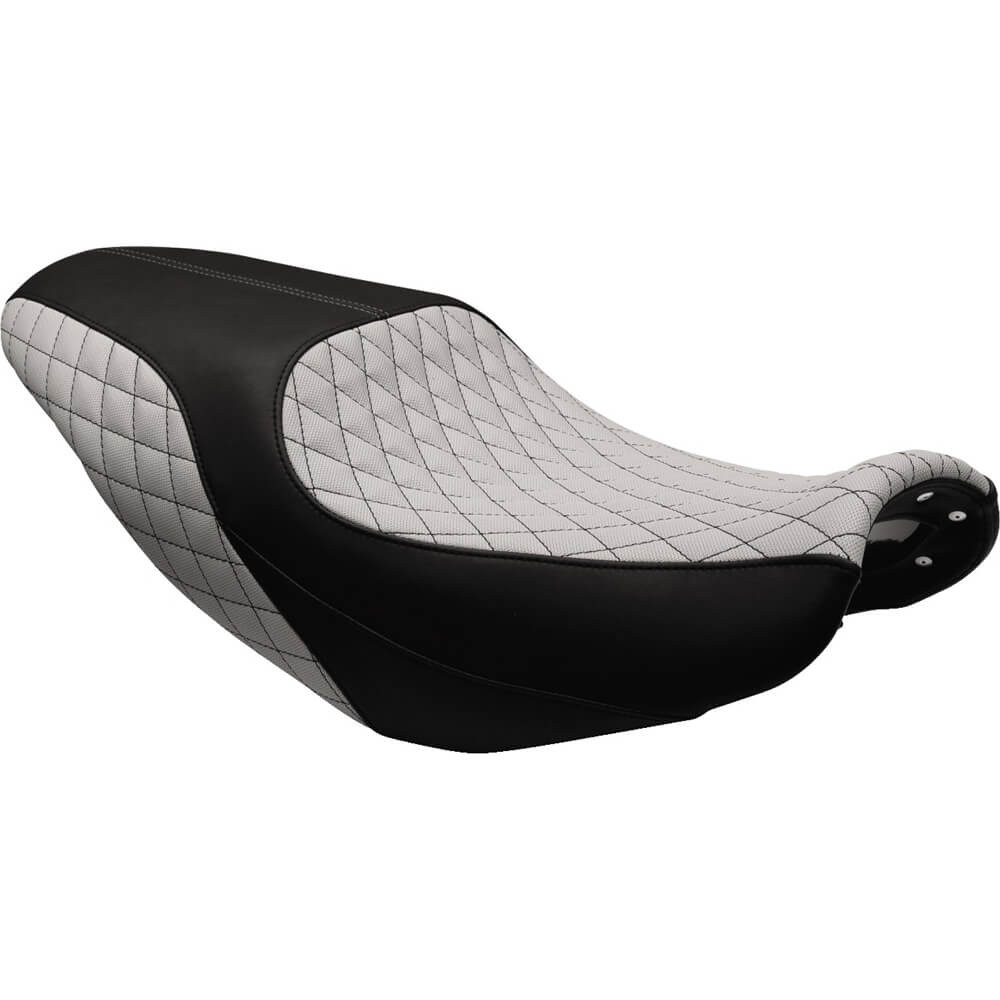
Installing an aftermarket seat will allow you to not only find a seat that suits your ergonomic needs but you can also get one with gel or memory foam to make your derriere happy on those long rides. In addition, with an aftermarket seat you can opt for custom coverings such as exotic leathers, colored stitching, or specific designs or patterns to really make your bike stand out.
Whatever you do to setup your motorcycle to make it yours, just know that there's no wrong way to go about it. It's your bike; as long as you are comfortable, safe, and happy with how it rides and looks, that's all that matters and will put a smile on your face for miles.