Beside your dirt bike suspension, there are other components on your motorcycle that are continually moving. The rear shock, swingarm, linkage, and bell crank are all connected and move together to allow the rear of your motorcycle to absorb all the bumps and jumps. In order for the linkage and bell crank to work smoothly and correctly you need to take some time to inspect, clean, and keep their bearings properly lubricated.
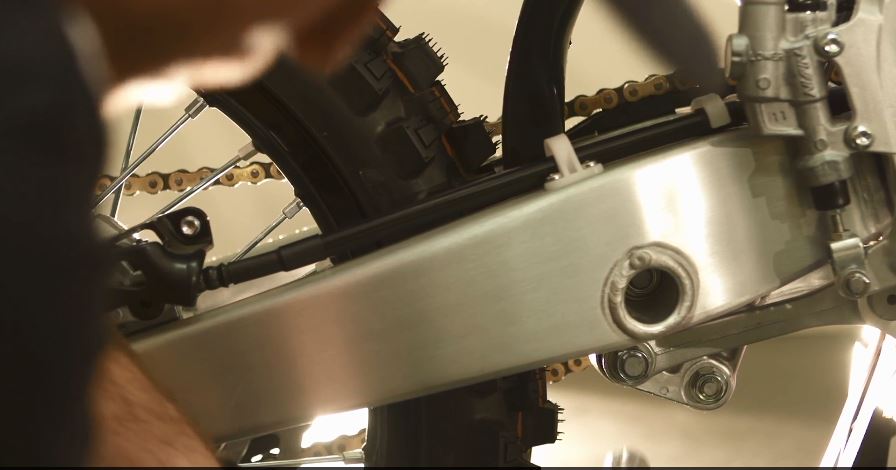
Removing and re-installing your dirt bike linkage and bell crank is a pretty simple job that can be done in your garage and only requires some basic hand tools. As long as the parts aren't damaged and the bearings are in good working order the only special things you will need is some grease and a torque wrench.
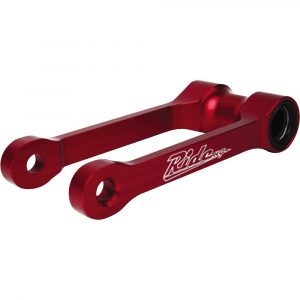
If you do dig into the project and notice that your bearing are shot or something else is amiss with your stock parts you can always replace them. All Balls Racing offers a Bearing and Seal Linkage Kit that comes with new bearings, shafts and seals. If you're not totally happy with the hook up and handling of the rear of your motorcycle, instead of re-installing the stock linkage you could opt for Ride Engineering's Rear Suspension Performance Lowering Link. This dirt bike lowering link will drop your rear end from 8- to 10mm and will help keep the rear tire planted in breaking bumps.
Our friends at Vital MX stopped by the store to shoot a set-by-step video showing you how to service the linkage and bell crank. The bike used in the video below is a Yamaha YZ125 but the process is pretty similar for most other dirt bikes.