When it comes to making performance improvements to their motorcycles, most owners will often focus on the engine or swapping drivetrain components like the sprockets. The majority of people want things like faster top speed, improved hole shot performance, or more horsepower/torque. These types of changes are good and definitely make for a more fun motorcycle to own and ride. However, there is one area many riders overlook when it comes to getting the most out of their ride, their motorcycle brakes.
Improving your braking components can be relatively easy with things like a simple pad swap or rotor upgrade, and is definitely an area that shouldn't be overlooked. Galfer has established itself as a leader in motorcycle braking components covering the gamut from pads to rotors to brake lines for street, off road, metric cruisers, and Harley-Davidson motorcycles.
One of Galfer's more popular offerings is its Oversized Brake Rotor Kit
Installing The Oversized Rotor Kit
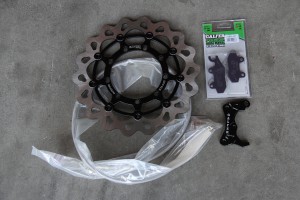
This guide will focus on the Oversized Rotor Kit for Kawasaki KLR650 models (MSRP $289.00), but the installation basics will be similar for other bikes as well.
The Oversize Wave rotor in this kit is laser cut from high carbon 420 stainless steel/8 composite and has been heat-treated to prevent warping. Between the material and the full floating wave design the rotor helps provide excellent braking characteristics through improved heat dissipation and allows for even and consistent pad contact. Included in the kit are semi-metal compound brake pads that are designed to deliver great performance in all conditions and offer excellent fade resistance. The steel-braided brake line provides improved protection and durability as compared to the the stock rubber line, while also improving overall brake feel and feedback-plus it just looks cooler than the standard black rubber line. Installation is a breeze and requires just basic hand tools.
Step 1 - Remove The Wheel
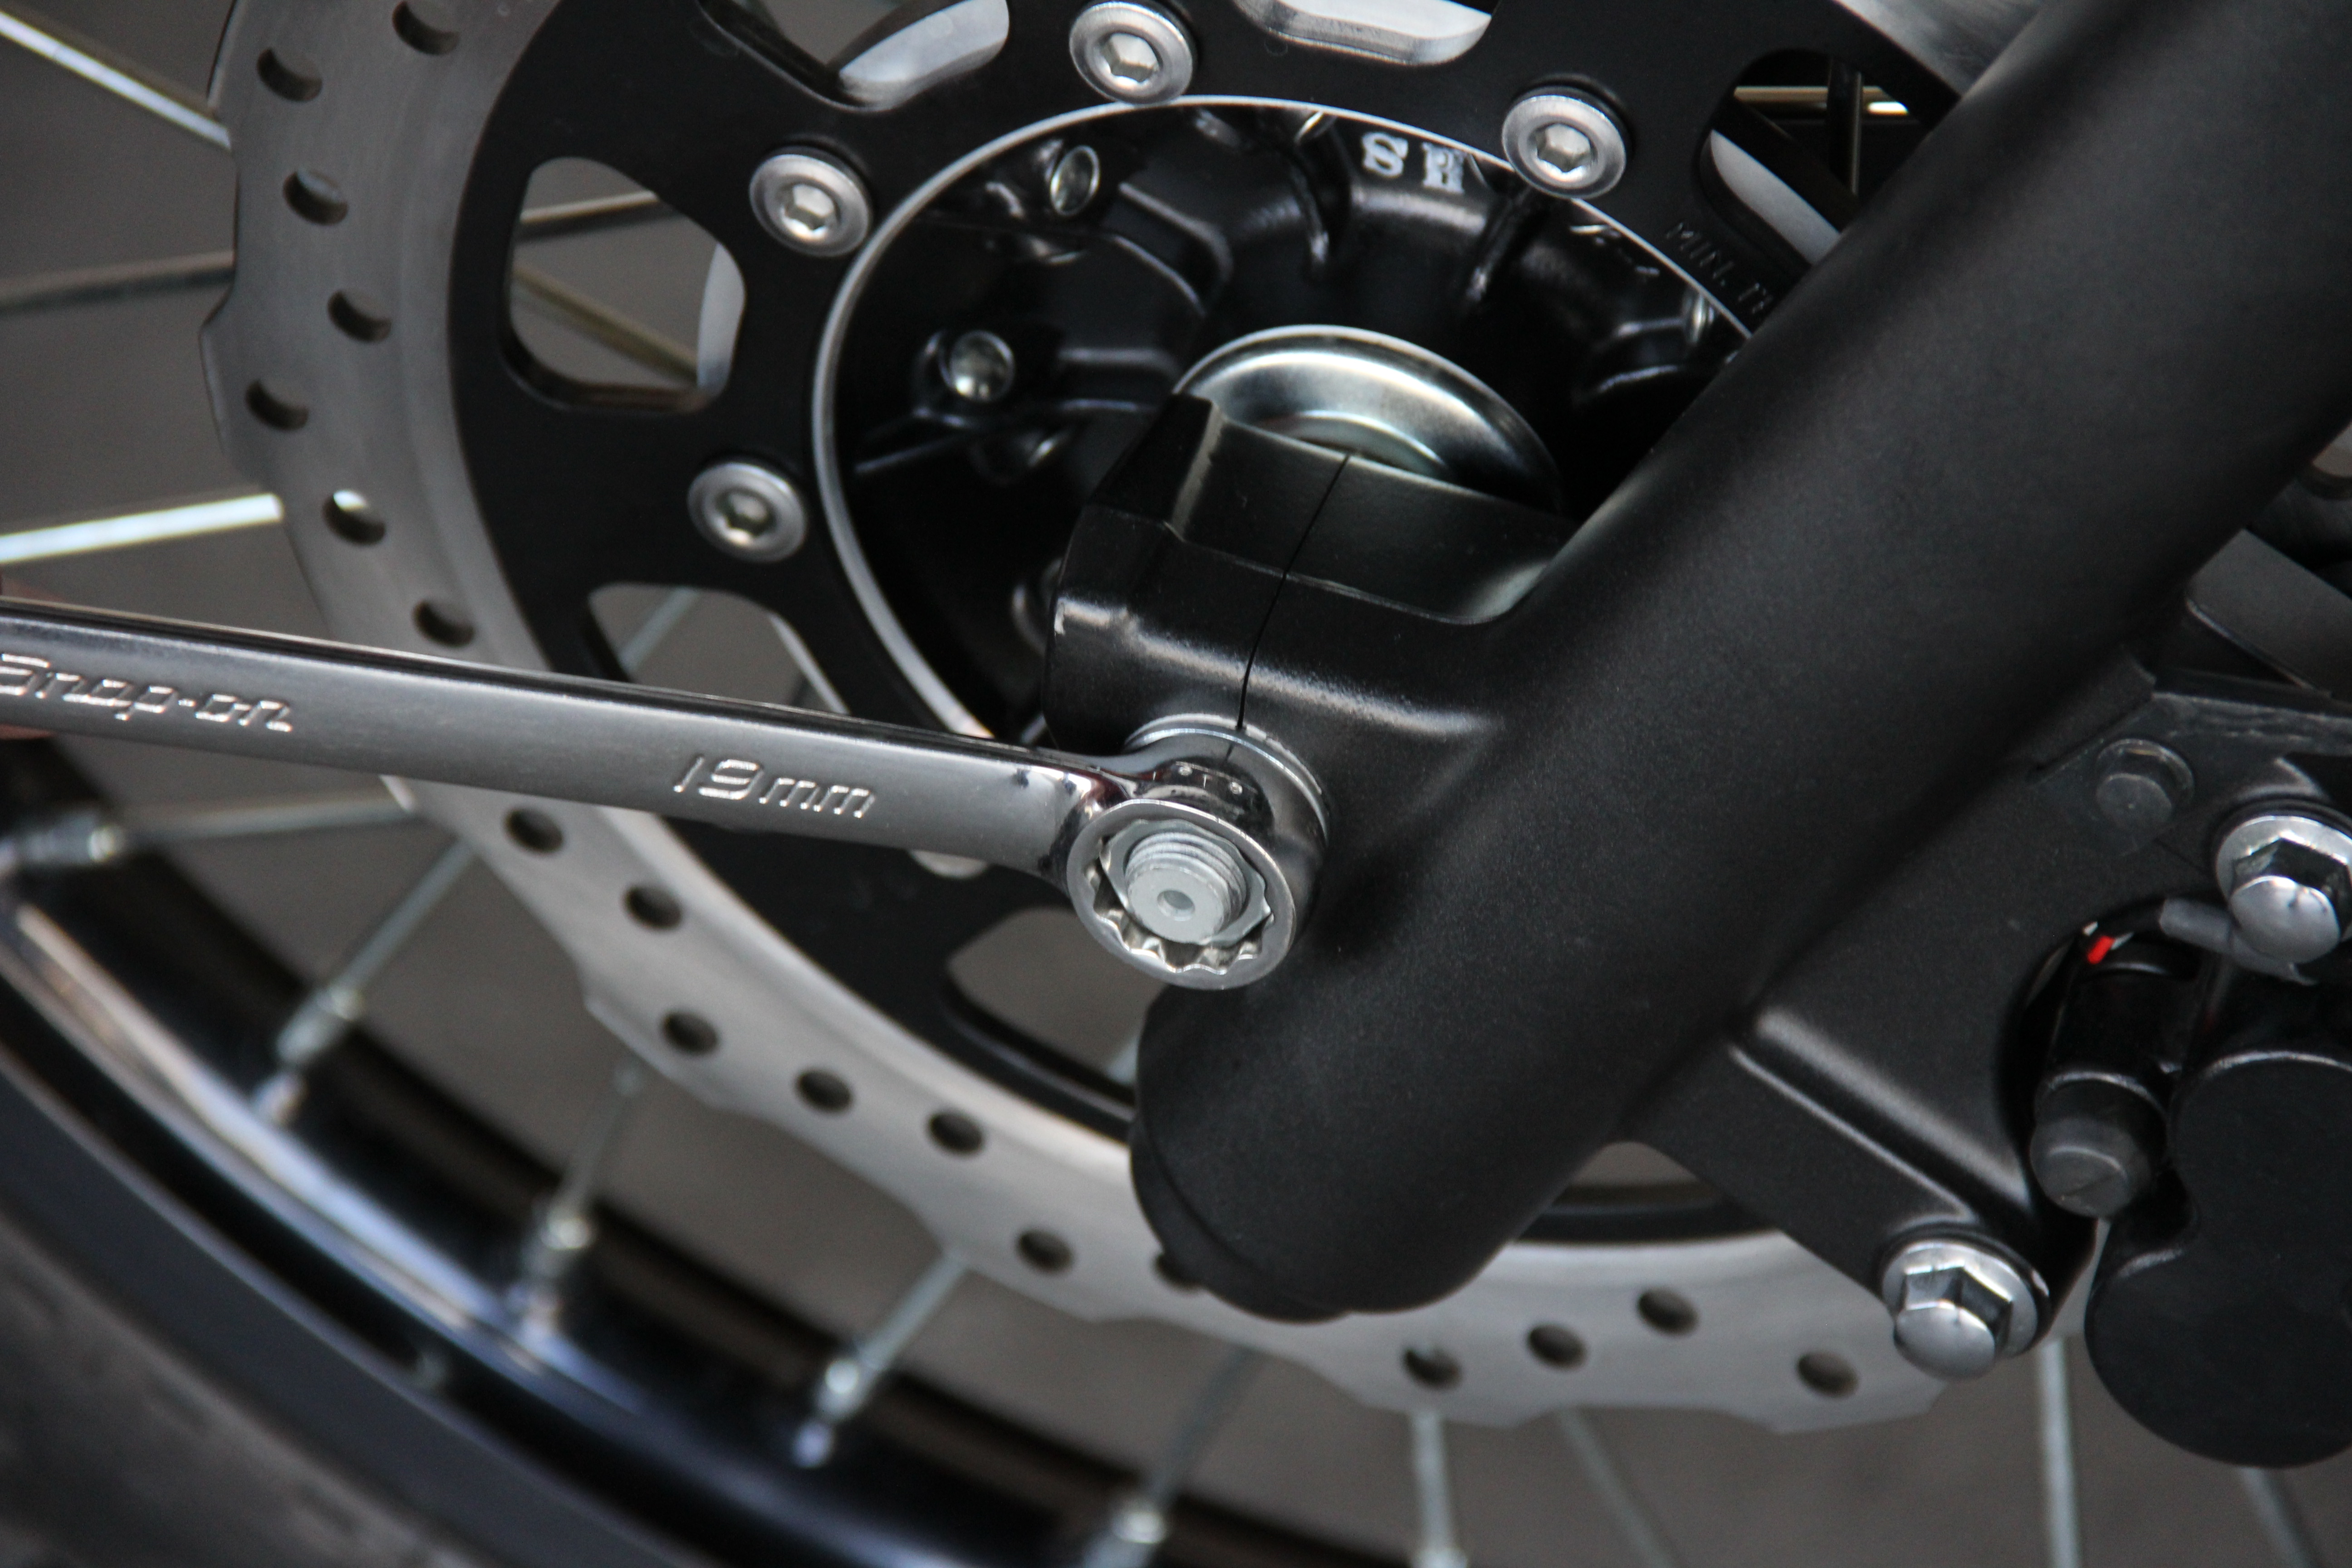
Installation begins by removing the front wheel. Loosen the axle/axle nut and followed by the axle pinch bolts on the front side of the fork legs. You can then remove the axle and pull the wheel from between the fork legs.
Step 2 - Remove The Old Rotor
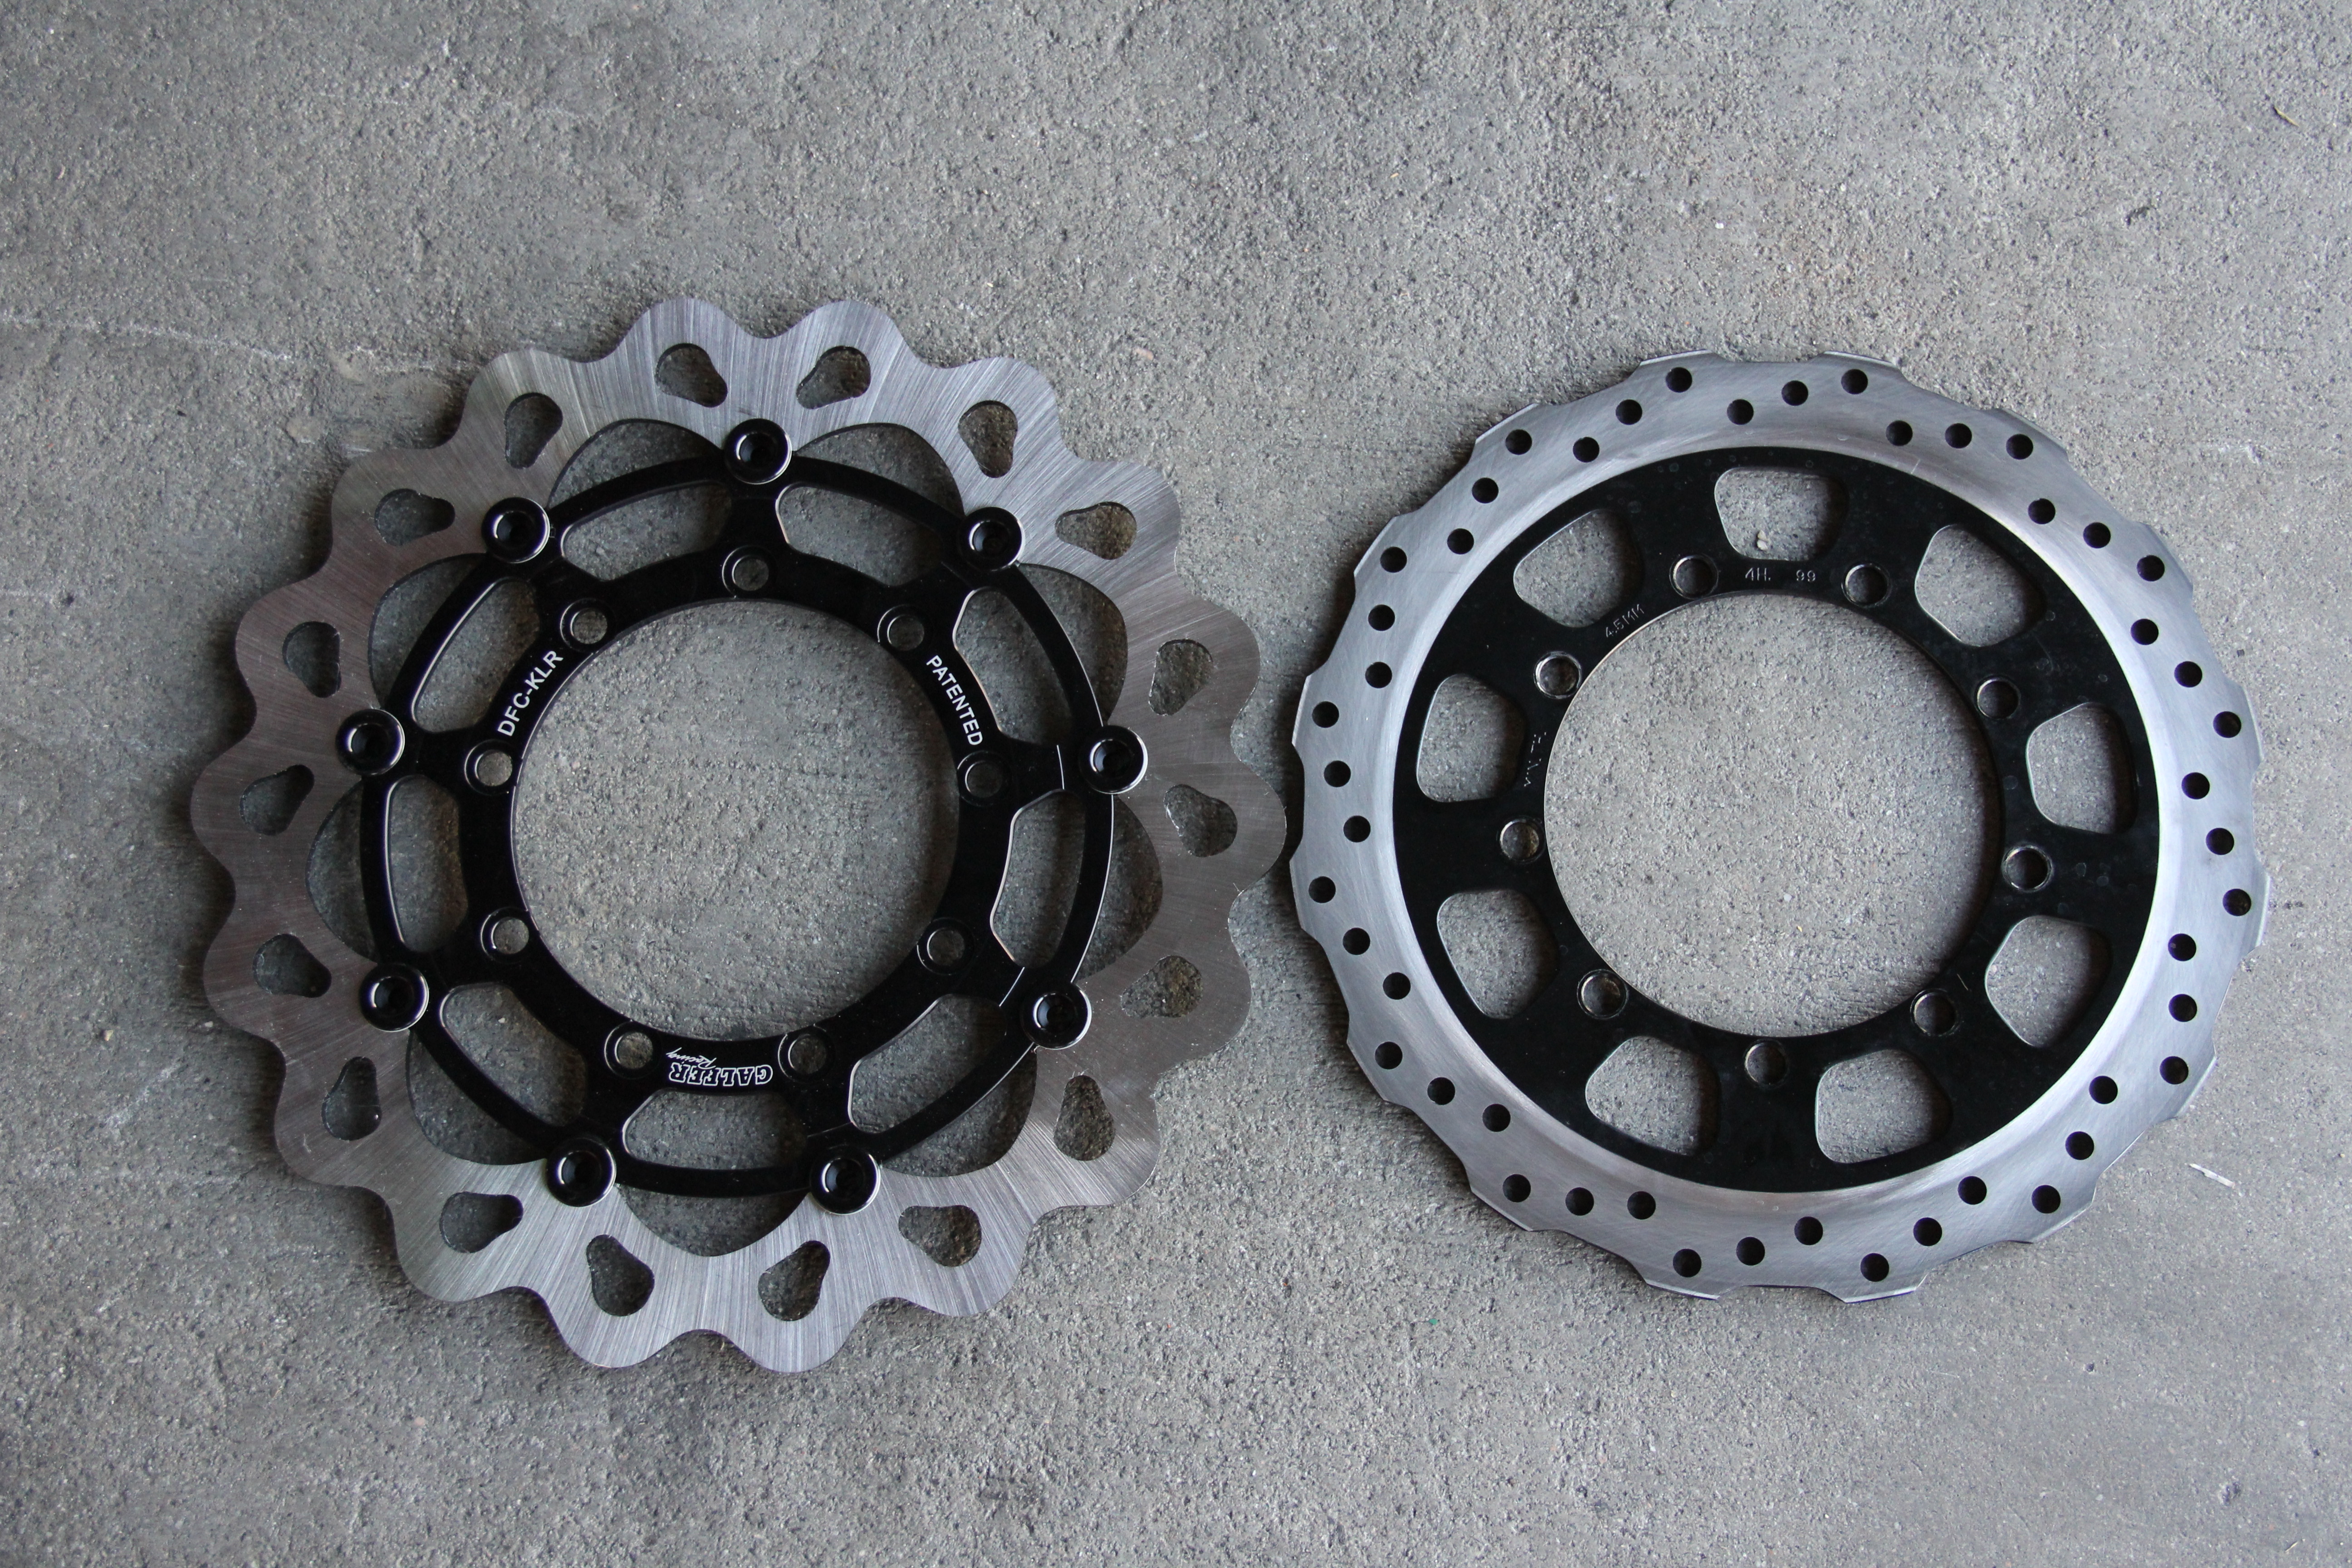
Next, remove the stock rotor. Side by side you can see the significant difference in size of the 320mm Galfer Wave Rotor and the 280mm stock rotor. Don't let the size fool you, even though it's 40mm larger, the Galfer rotor is significantly lighter, which in turn equates to less reciprocating mass and easier braking/handling.
Step 3 - Install The New Rotor
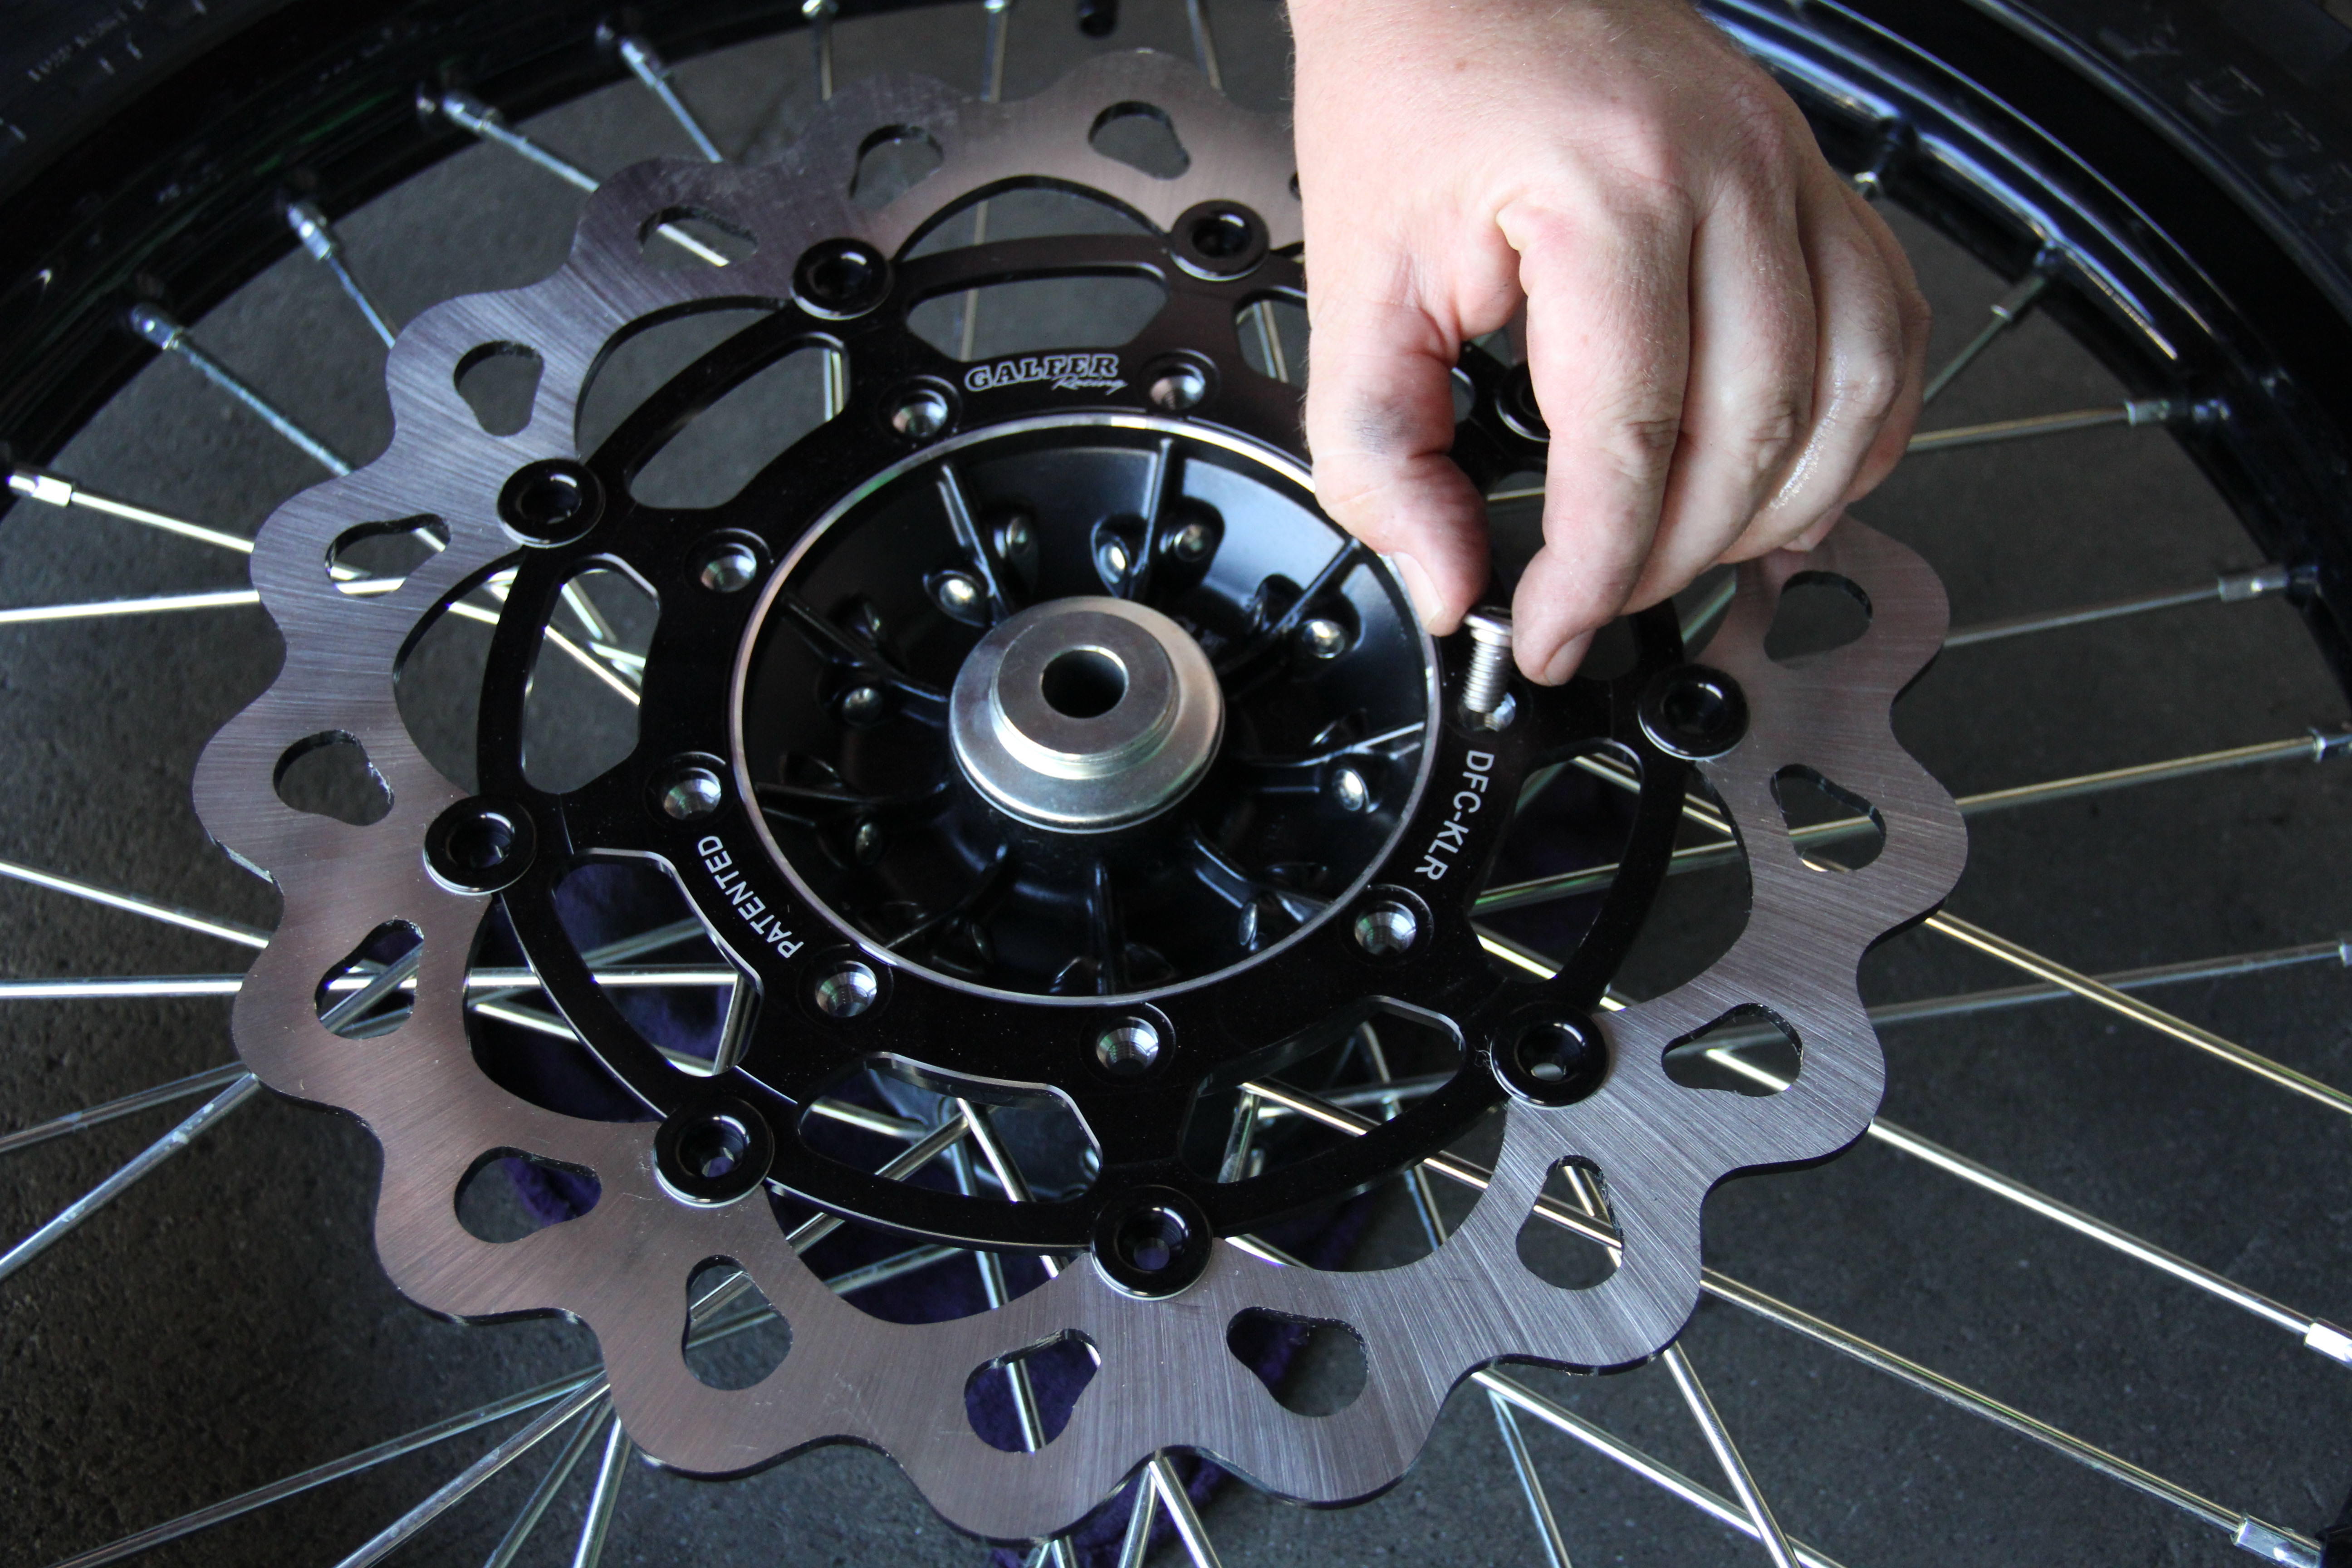
With the stock rotor out of the way you can now install the new rotor. Place the rotor over the center of the hub. Make sure the writing is facing outward. Use some medium strength thread locker and secure the rotor to the wheel using the stock bolts. Make sure to torque the rotor bolts to factory spec.
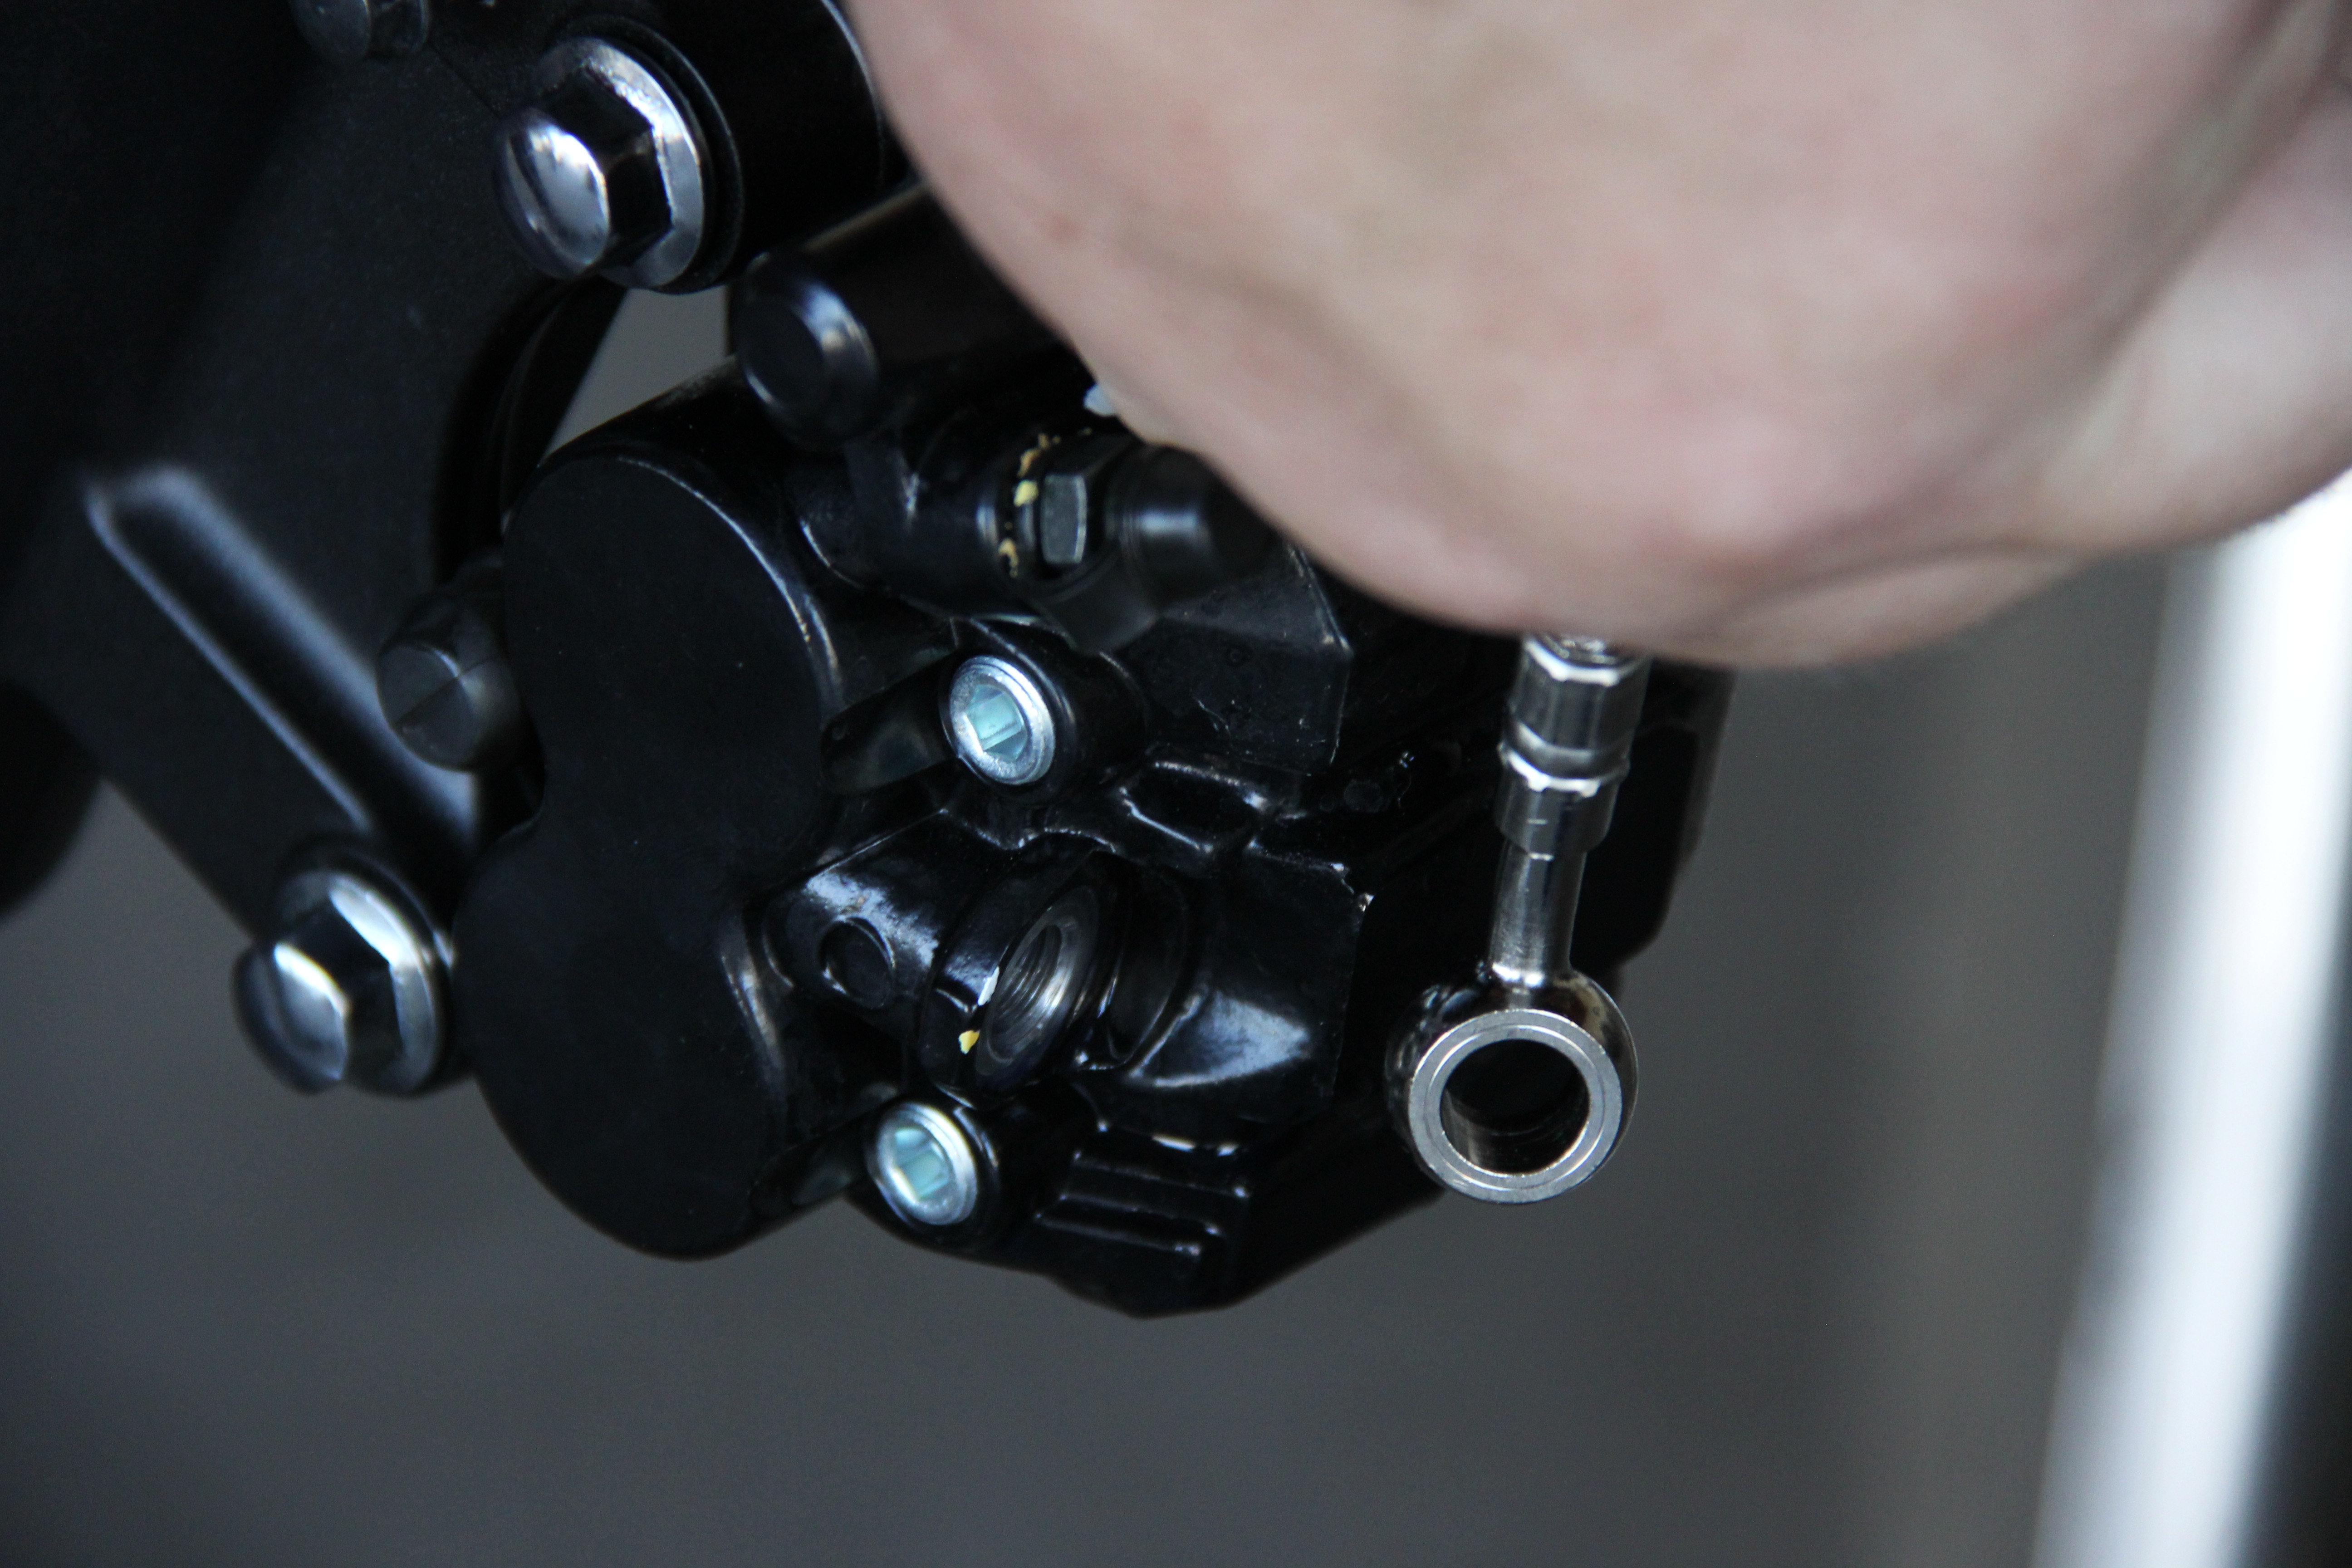
Step 4 - Drain The Brake Fluid

Next, grab a container to catch the brake fluid, then use a box end wrench to loosen and remove the lower banjo bolt from the caliper. Once the brake line is removed, place the end of the brake line in the catch container and then up at the brake lever remove the brake fluid reservoir cap and rubber boot to help the fluid flow out of the brake line.
Step 5 - Install The New Brake Line
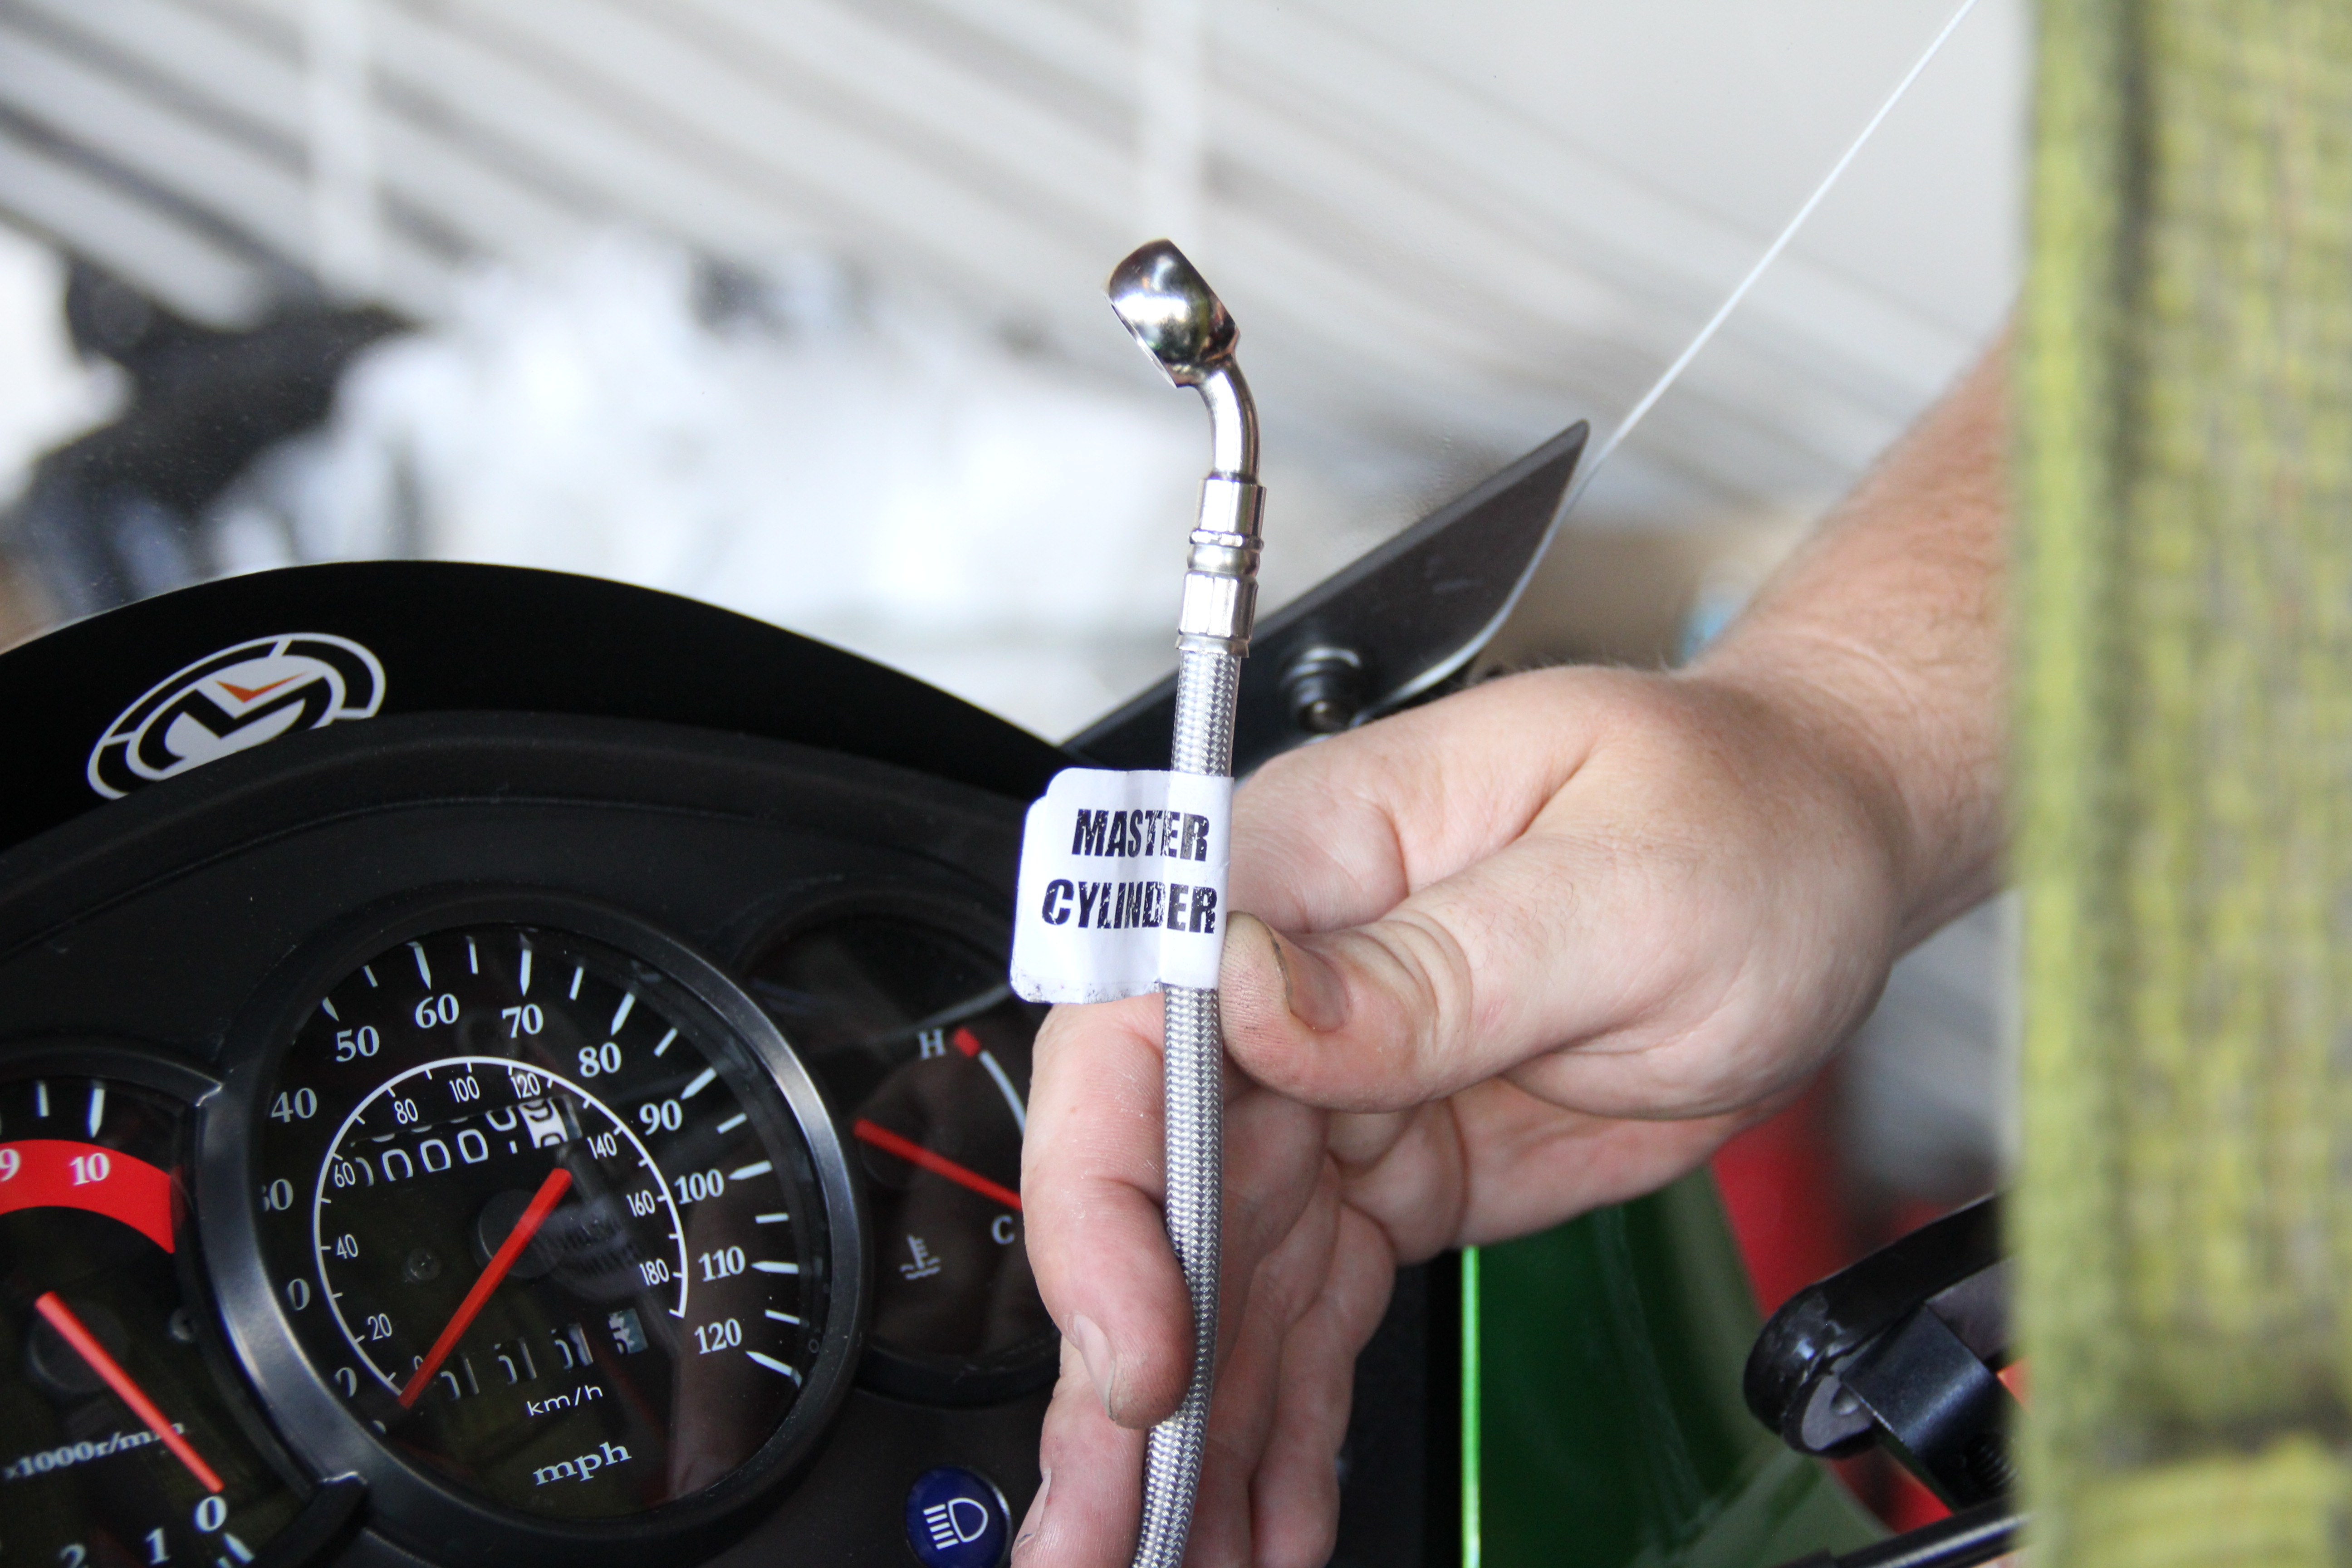
Take note of the brake line routing from top to bottom. After the majority of the fluid has drained out of the line and reservoir remove the bolt securing the top of the brake line to the reservoir (a rag will help catch and residual dripping out as you remove the bolt). Starting at the top, route the new brake line down along the front end, the same way the stock line was routed, and secure the top banjo fitting to the brake reservoir.
Step 6 - Remove The Caliper

Next, remove the caliper from the fork leg. To accommodate for the larger rotor, the kit comes with an extended caliper mount. This new mount replaces the stock unit and sets the caliper a tad bit further back for proper clearance.
Step 7 - Install The Caliper On Galfer's Bracket

Remove the caliper shafts from the stock mount and then install the shafts onto the Galfer bracket. Slide the caliper shafts/hanger assembly into the caliper, making sure the shafts don't pinch or misalign the caliper boots.
Step 8 - Install New Galfer Brake Pads
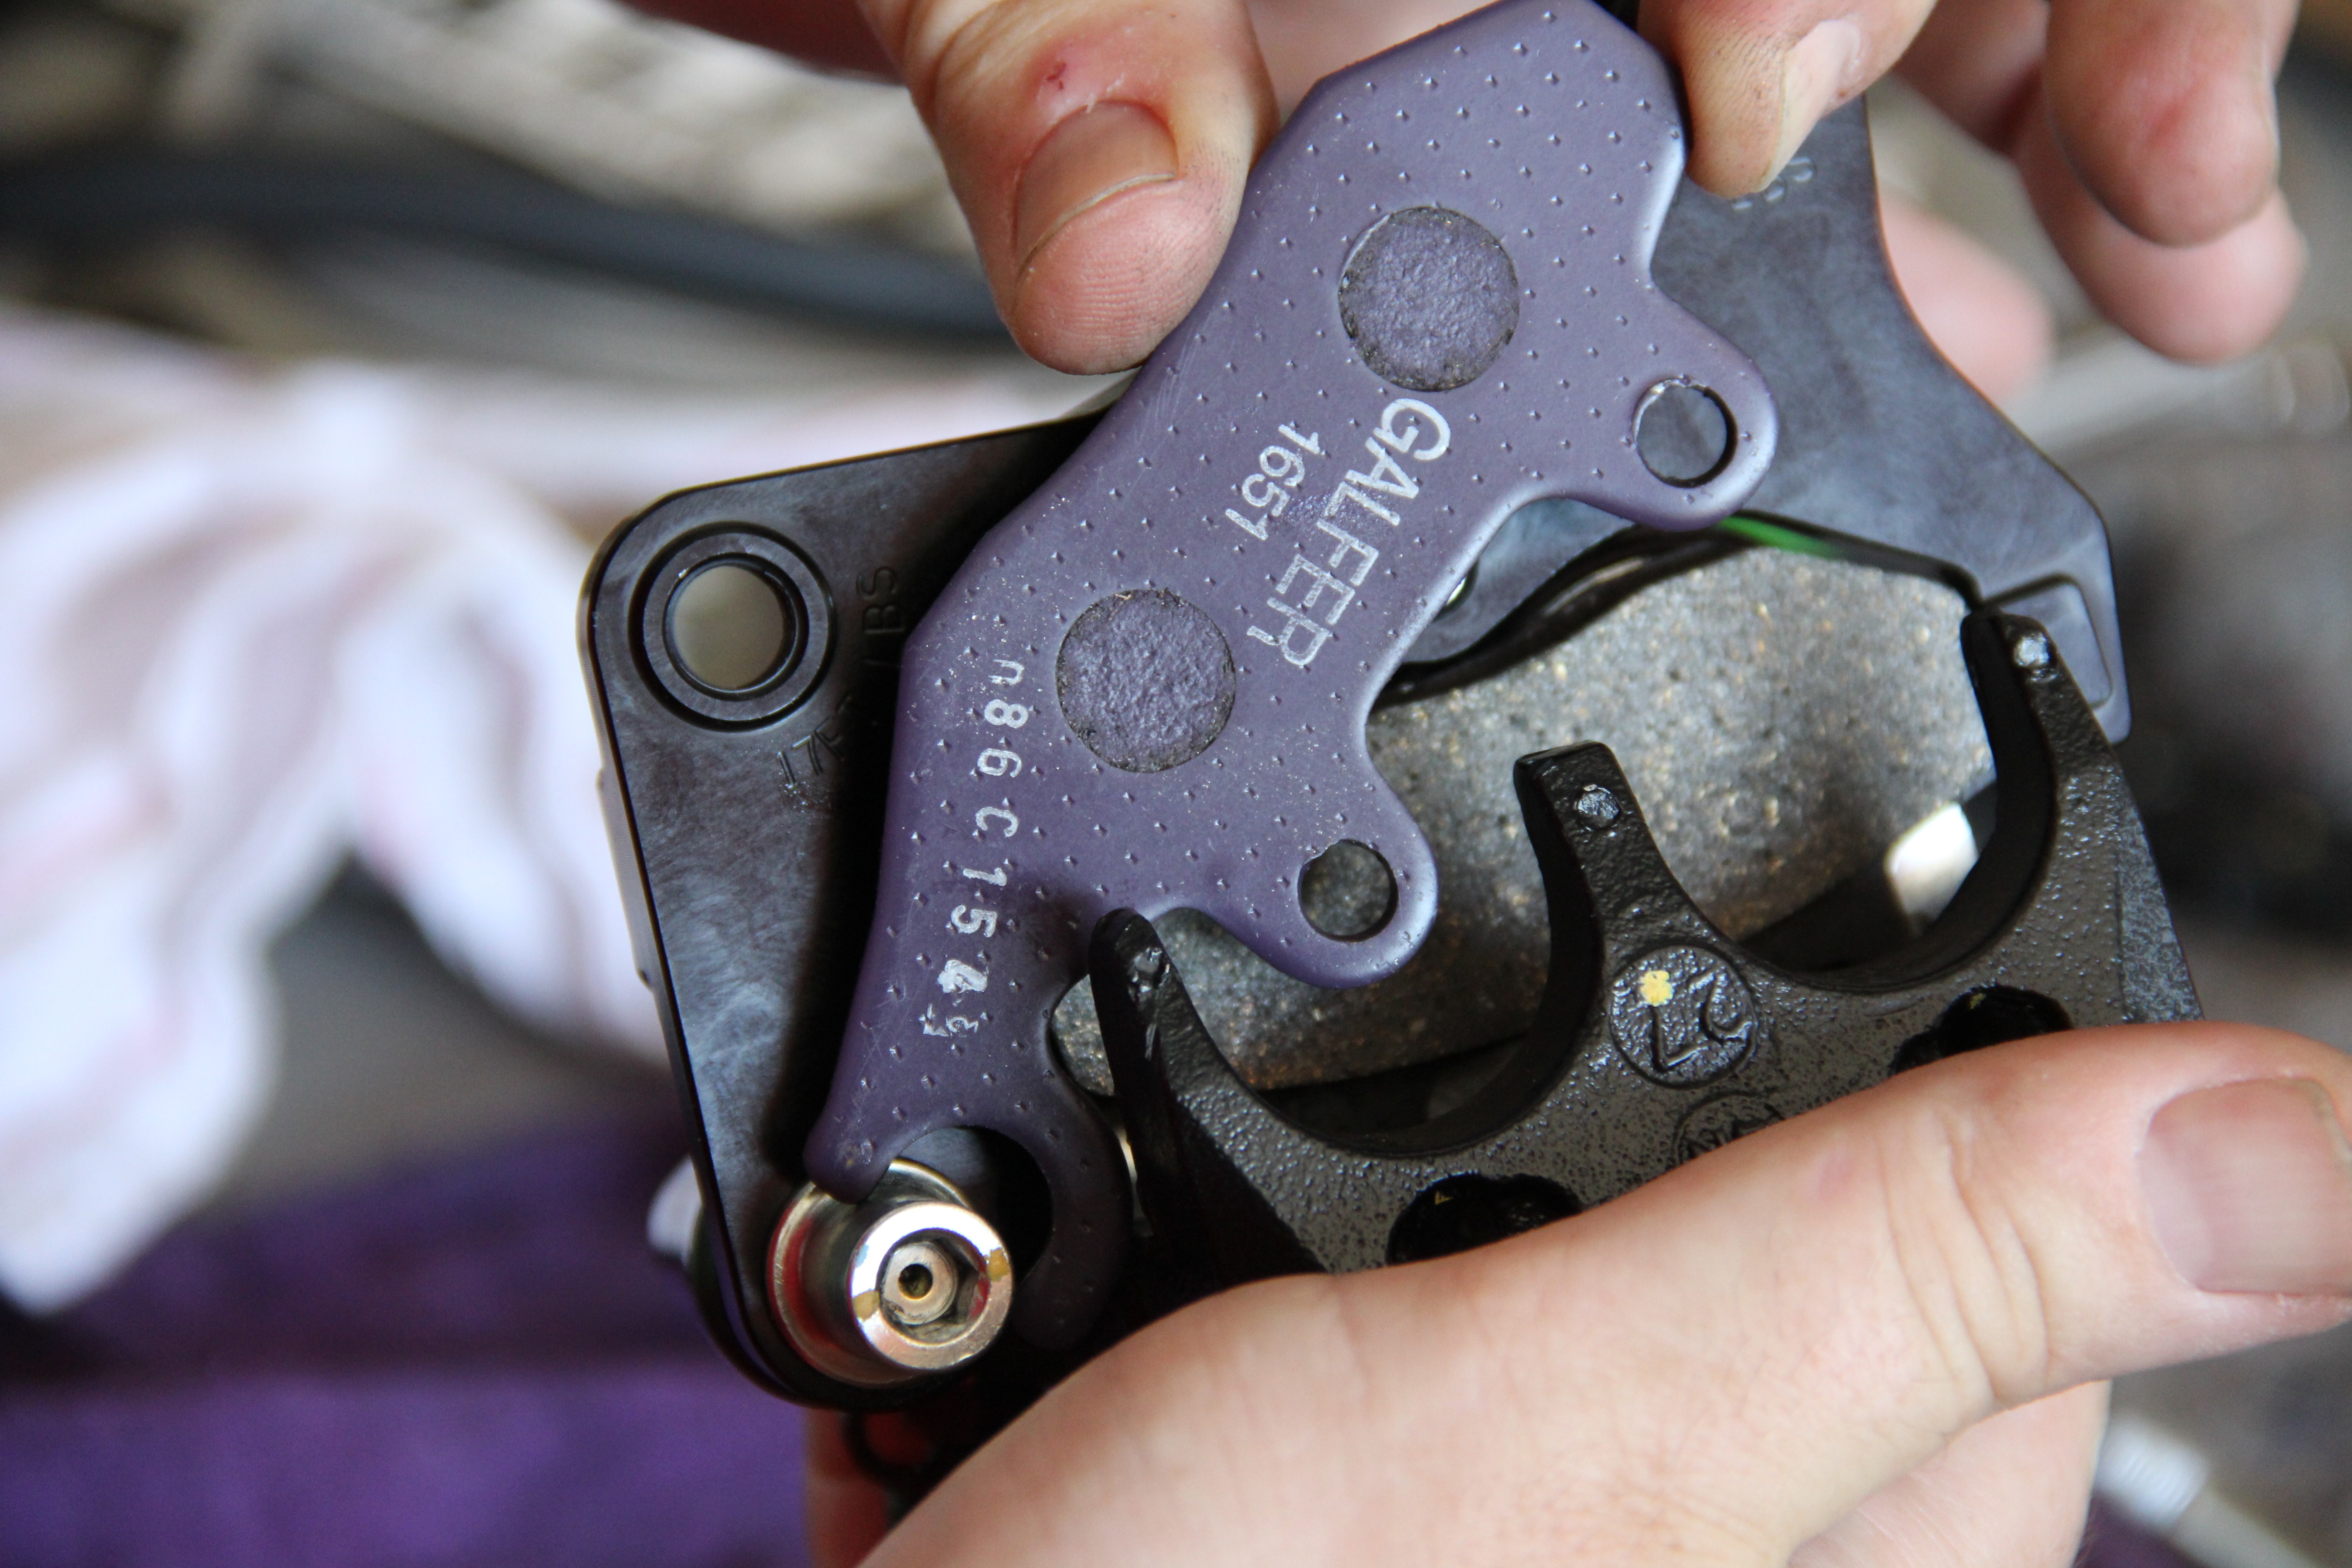
At this point you can now install the new brake pads into place in the caliper, ensure that curved cutout at the front of the pads mount bracket hooks into the front caliper shaft and then install the brake pad pins.
Step 9 - Re-Install Brake Caliper
Once the brake pads are in place you can secure the caliper to the fork leg. Torque the stock bolts to factory spec. Install the lower banjo bolt and secure the brake line to the caliper.
Step 10 - Re-Install The Wheel
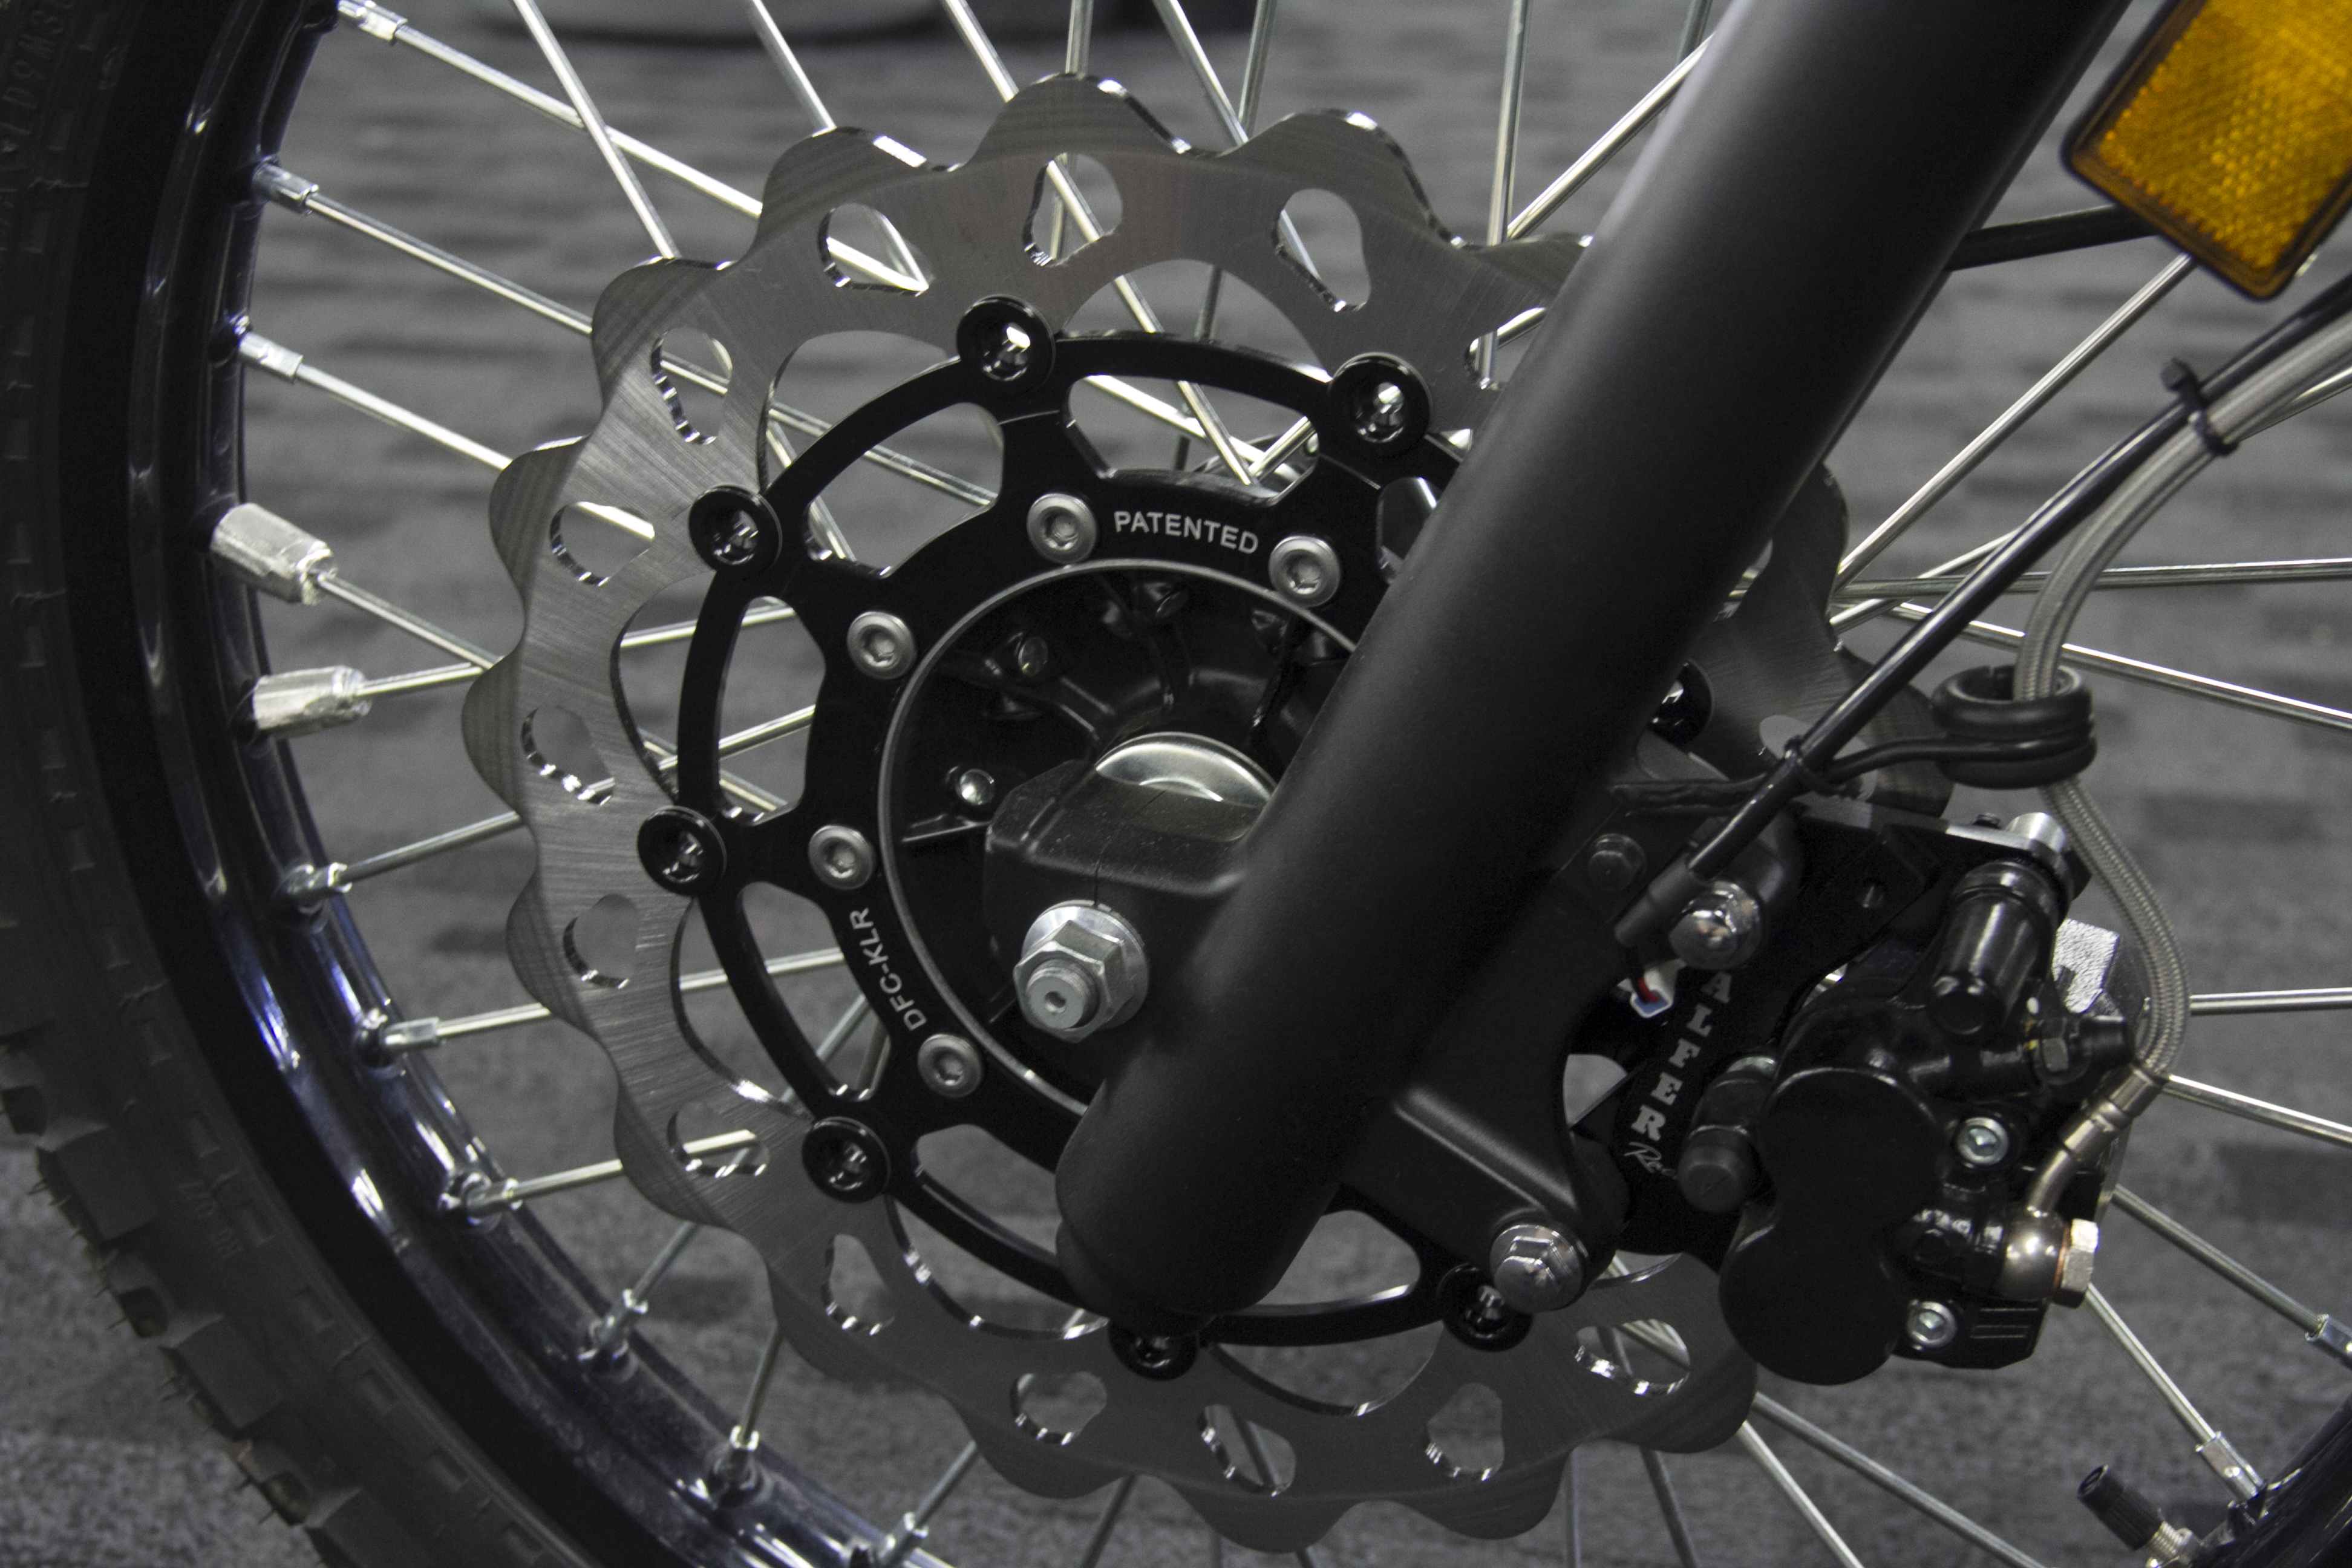
The wheel can now be installed, torque the axle nut and pinch bolts to factory spec. Then, using fresh brake fluid, follow the service manual procedures to properly bleed the brakes. Here is what the Galfer Oversize rotor kit look like installed. With this kit installed your bike will benefit from increased braking performance with less heat buildup, reduced brake fade, and a better feel at the brake lever.